

•
Discover the average outdoor misting system cost, key price factors, and ways to save. Get transparent, expert-backed estimates for your installation.
Go from irritation to irrigation


If one of your sprinkler heads or irrigation zones stays on or is stuck “on” even when you turn off the controller, you likely have debris inside the valve. Over time, debris and minerals from the water build up inside the valve and its parts. The blockage can impact the signal the valve receives from the controller. Learn how to clean a sprinkler valve and get your system back up and running.
You can clean your sprinkler valve of debris and mineral buildup with a few tools: a screwdriver, a soft-bristled brush, and a thin, flexible wire. You’ll also need a small bucket of clean water for rinsing the parts. Hiring a pro may be best if you feel uncomfortable taking apart your sprinkler valve system.
At the sprinkler system’s controller, turn off the system so it does not turn on while cleaning the valve.

Turn off the main water supply. If you open a valve under pressure, it can be dangerous and lead to injuries.
Open the valve box of your sprinkler system and take photos of how the pieces are put together. As you unscrew each part, take a photo of how the screws and pieces go together. You’ll need to know exactly what components go where when you reassemble your system later.
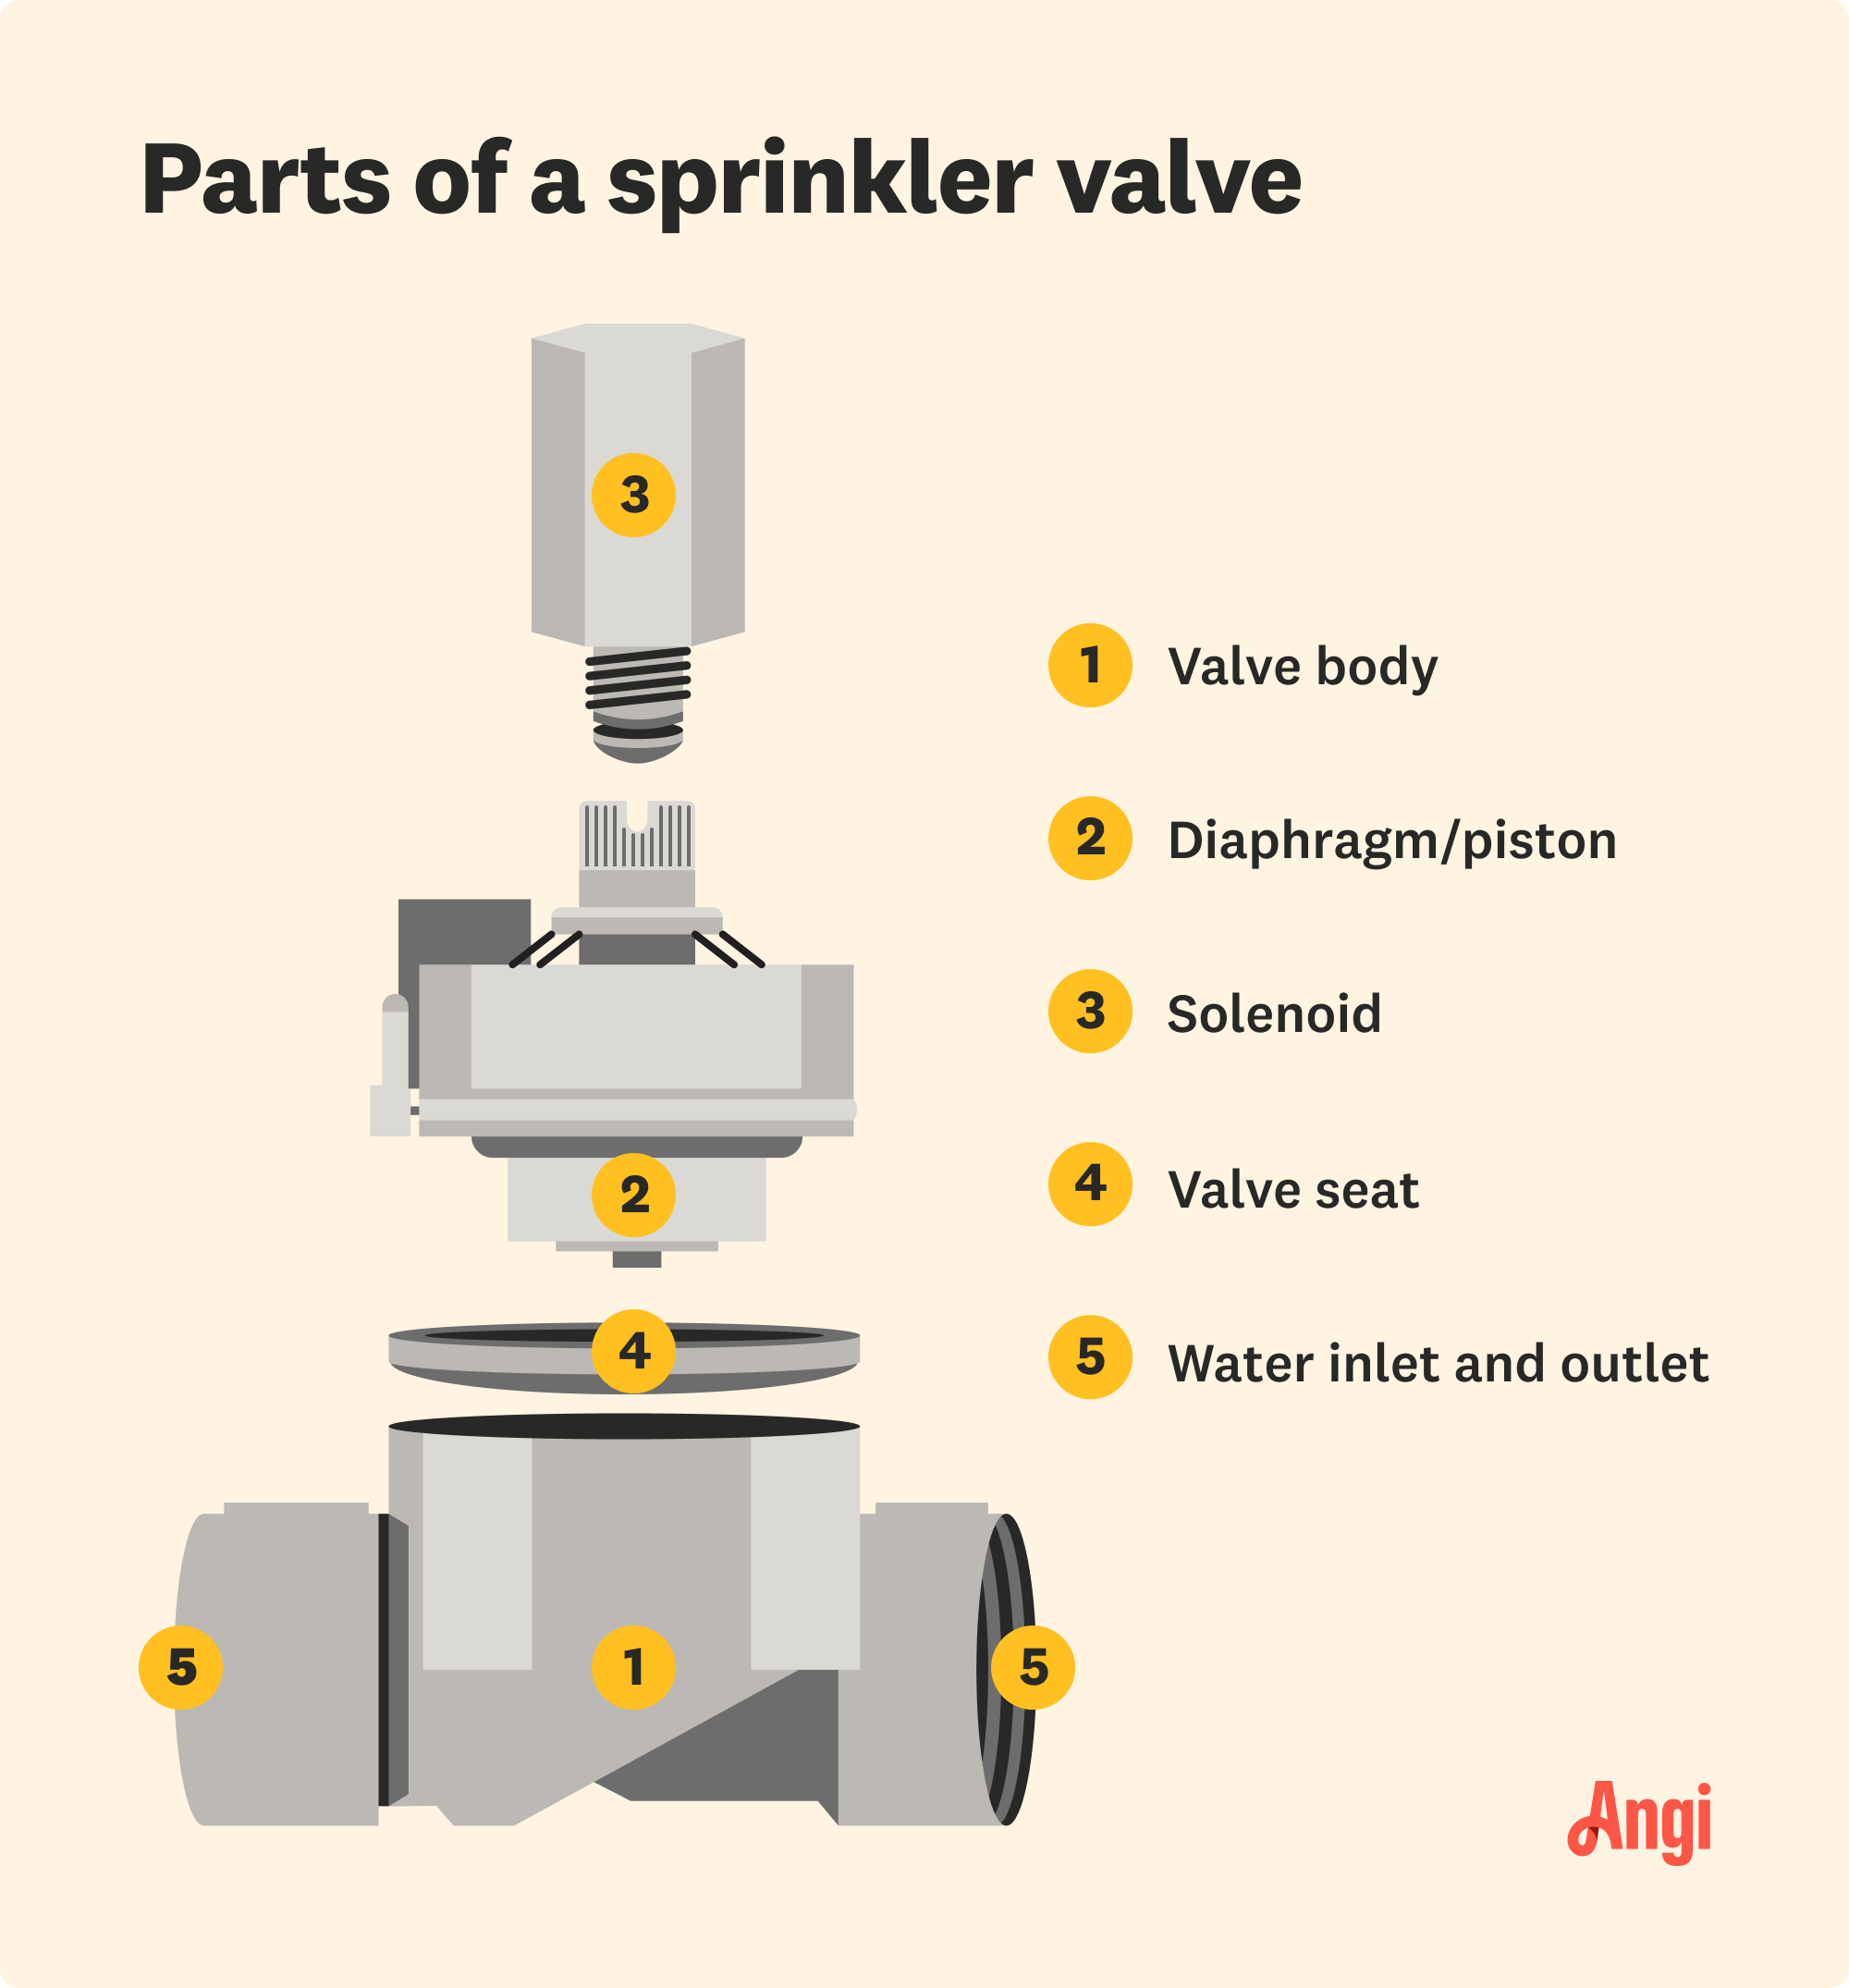
Look for the valve body or a cylinder with two wires. Depending on the brand and model, you may have a solenoid, electric, or automatic valve. Unscrew the screws to remove the lid.
Take off the valve piece by unscrewing the bonnet screws. Carefully pull the bonnet away from the valve body to avoid losing the spring or diaphragm in your muddy surroundings.
Check to see if the plunger is working. Push on the end of the spring-loaded plunger. It should bounce back when you release it. It should also slide in and out smoothly when pressed. If the plunger isn’t moving properly, you may need to replace the plunger or the entire valve.
Remove the diaphragm and spring and take a photo of where they are in the system so you know how to put everything back together later. Check if the diaphragm and seat are free of tears, holes, scratches, and wrinkles.
If any part is damaged, you’ll need to replace it. If the diaphragm is intact with no damage, gently clean it with water and a soft-bristled brush to remove debris.
Remove debris and mineral buildup from the valve body, including the gasket, seat, and other pieces. Be gentle to ensure you do not damage the system.
Inside the valve lid and on the valve body are small passages where the bottom of the lid attaches to the valve body. The location of the ports varies by brand and model. Some ports have a metal pin that runs through them. The pin is used to clean the passage and should slide freely in and out. Clean the passage with a small piece of flexible wire or a cleaning needle if it does not have a pin. Be gentle as you clean each port to ensure you do not scratch or enlarge the hole.

Place the parts of your valve back together, including your spring, gasket, and port. Consult your photos to ensure you reassemble the body properly. Secure the lid back on, screwing each screw partway, then going back to tighten them. Avoid overtightening the screws and warping the lid.
Turn on the controller and water supply to test the system to see if the sprinkler heads are working as they should. If not, consult the photos you took and make sure everything is in the right spot. Call in a pro if they still aren’t working.

To keep your irrigation system working smoothly, follow these tips for maintaining a home sprinkler system.
Install a filter upstream of your sprinkler valves to catch sand and dirt before they reach your valves.
Check your irrigation system once a month for clogged, leaking, and misdirected heads. Unclog sprinkler heads with a small piece of flexible wiring.
Repair or replace sprinkler parts when you notice leaks or other issues.
Watch for areas of your lawn that are overwatered or saturated.
Adjust sprinkler heads to ensure they distribute water evenly.
Install a rain sensor or smart technology to prevent overwatering.
Clean your sprinkler heads once per year.
Monitor the water pressure and use a water pressure regulator or booster pump to mitigate the issue.
Winterize your sprinkler system every fall if you live in a cold climate.
Don't neglect your sprinkler system maintenance, such as annual cleanings and inspections. These upkeep tasks can help prevent costly issues like clogged pumps and leaking pipes.

You can clean a sprinkler valve if you are a moderate DIYer and have a few tools. Take time to carefully disassemble and clean the components to avoid damaging your system. If you aren’t familiar with your sprinkler system’s valve box, you may want to hire a local sprinkler installer who can clean and inspect your system for damaged parts. In addition to any necessary replacement parts, expect to pay between $50 and $100 per hour for labor, depending on the issue's complexity.
From average costs to expert advice, get all the answers you need to get your job done.
Discover the average outdoor misting system cost, key price factors, and ways to save. Get transparent, expert-backed estimates for your installation.

Discover drip irrigation system cost estimates, key price factors, and ways to save. Get transparent pricing to plan your home irrigation project confidently.

If your sprinkler system isn’t working, it may be time for a new pump. Find out sprinkler pump replacement costs with this guide.

Do you truly know how long to run sprinklers in your yard? We explore the general guidelines of lawn watering and the factors that affect its frequency.

Learn how to replace sprinkler heads with this easy guide. Avoid common mistakes, choose the right head, and keep your lawn lush and green.

Sprinkler valves need to be wired to a control box to establish watering zones in your lawn. Learn how to wire sprinkler valves like a pro with this guide.