

Marble backsplashes are beautiful and costly additions to your kitchen. Our guide lays out marble options and the labor required to install it.
It’s time to change those dark, dated granite countertops


Granite countertops are durable, beautiful, and desirable—but that doesn’t mean you won’t get tired of them. If your granite counters are dark, too busy, or just don’t fit your design aesthetic, updating them without any demo required is possible. Here, we discuss seven ways to change the color of your granite countertops.
Complex, high-risk projects demand more than typical DIY projects. They require time, specialized tools, and trained expertise to make sure the job is done safely and correctly. We made it easy for you to find a local pro—with our skilled network, you'll get the job done without the stress of doing it yourself or significant safety risks.
No, and yes—the answer to whether you can change the color of granite countertops is nuanced. Granite is a natural stone, and it’s impossible to change the color of the stone itself. That said, there are several ways to change the appearance of your countertops without replacing them.
If you're looking for budget-friendly kitchen countertop ideas, you can consider painting them, applying tile or laminate over the top, refacing them with removable contact paper, and even honing the finish for a similar but different look. Each has pros and cons, and not every option will be a good choice for your kitchen and family, but exploring these ideas can give you hope that your dated kitchen can look fresh and exciting again without the cost of all-new counters.
Installing new countertops averages between $15 and $70 per square foot, with many options costing more. But that can be outside many budgets, especially if you don’t want to renovate your kitchen. Instead, changing the color of your existing countertops using paint, coverings, or other methods can cost as little as a few hundred dollars.
You can save even money by doing it yourself or hiring a contractor for only the steps you’re not comfortable doing. However, if you want to preserve the quality and value of the original granite, you’ll need to choose a reversible granite-safe method. Otherwise, you could find that your cheap kitchen counter renovation costs a lot more.
Sometimes, you’re just ready for a change; other times, styles change, and you want your home to look updated and fresh. In either case, new countertops can make a huge difference in how your kitchen looks—but new counters can be expensive, and that’s not always in the budget.
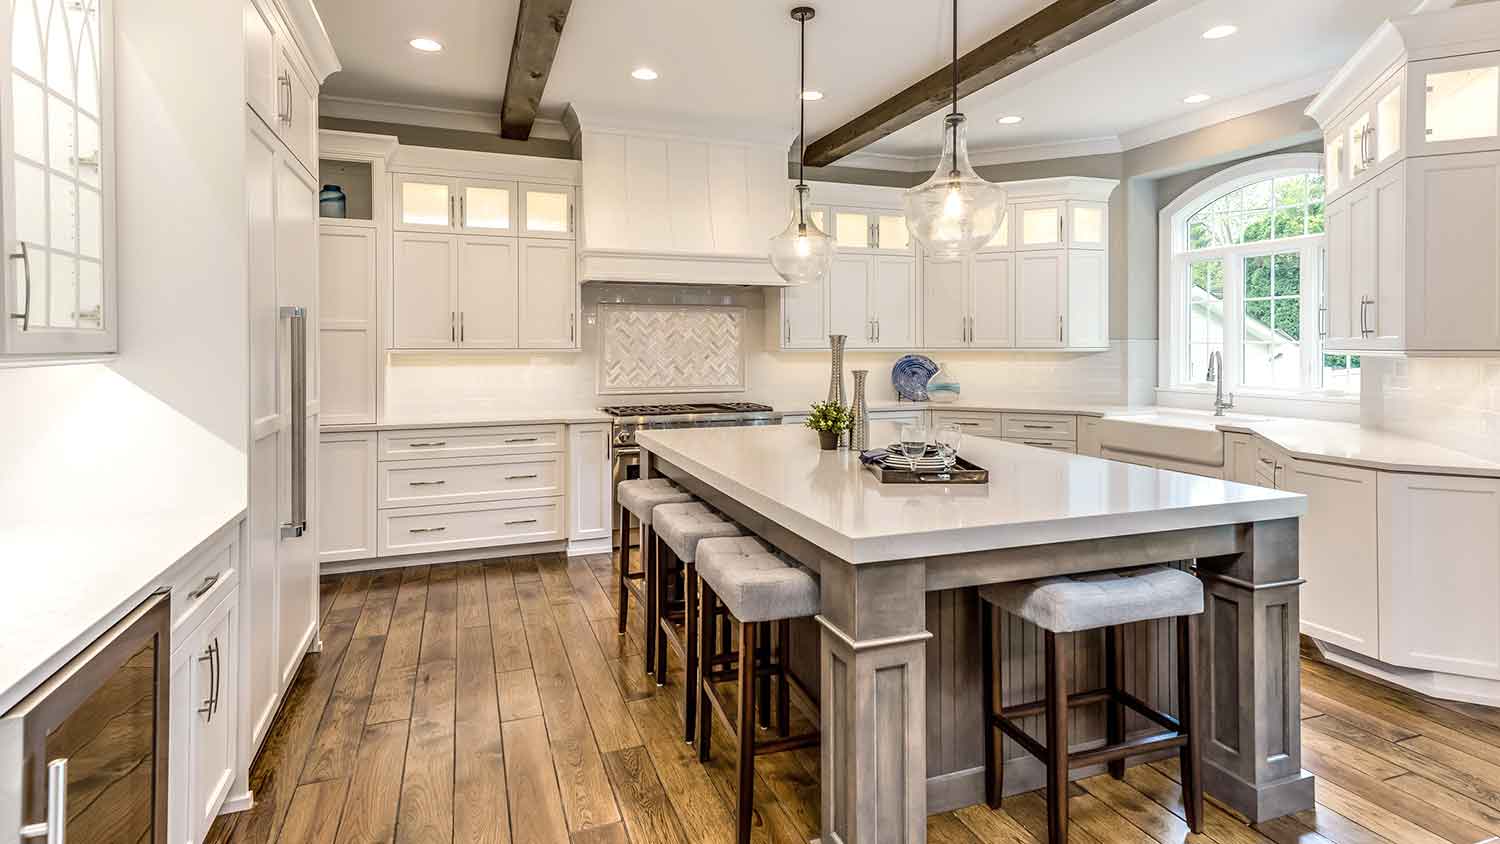
If your granite counters are structurally sound and in good physical condition, updating the look is a great option to save you money and still get you the fresh look you want. In fact, you can make those old granite countertops look like newer granite, marble, soapstone, slate, other popular types of stone countertops, or solid-surface countertops with paint or coverings—no demolition or installation required.
Along with saving money, reusing what you have can also lighten your ecological footprint by keeping old construction materials out of landfills and nixing the need for producing and shipping new materials.
It can also let your original counters offer lasting value while you get a temporary new look. Painting or applying a removable covering lets you revert your countertops to their original look, preserving the underlying value if you decide to sell your home; granite tends to hold its resale value even if you don’t currently love the color.
Always start by cleaning your counters as thoroughly as possible. If there are areas of overlapping caulking, grout, or similar materials, use a scraper or putty knife to remove them for the smoothest surface possible. Then, use a trisodium phosphate (TSP) cleanser and a soft scour pad to scrub every granite surface, rinse it off completely, and let the counters dry.
Next, tape off all edges of cabinets, backsplashes, appliances (or move them, if possible), sinks, and other items that touch the countertop, and use plastic or heavy-duty kraft paper to cover cabinets, flooring, and other items near the countertops to prevent spills or damage.
Finally, set out all of your materials in a location that’s out of the way but also convenient to the work area. You’ll want them handy but not underfoot or on the counters.
If you are happy with your current kitchen layout but want a different look without the added expense of, say, new Corian countertop costs, consider using a granite countertop paint kit, available online and from home improvement stores.
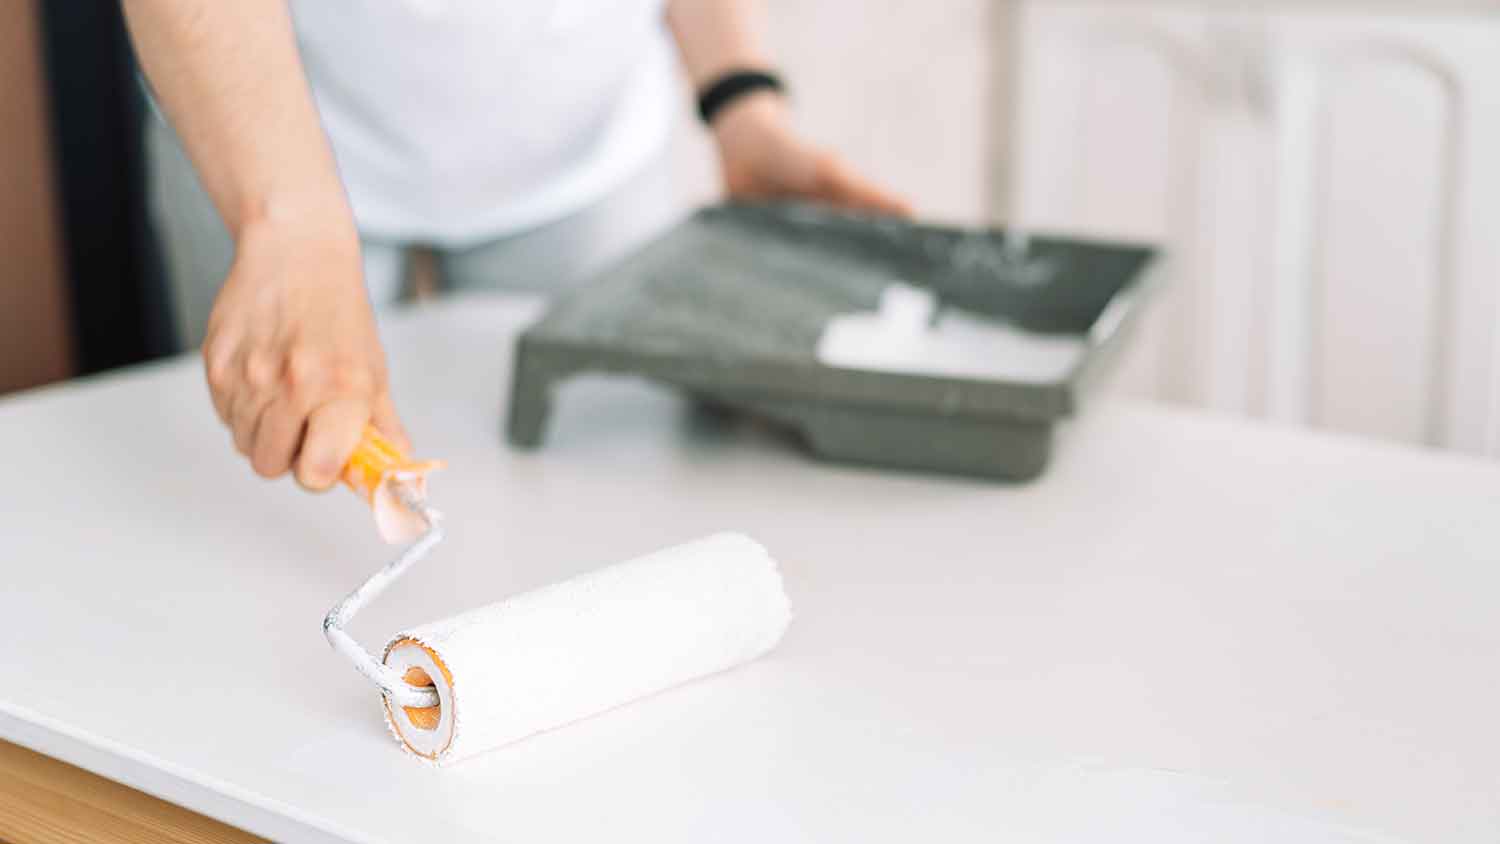
Countertop resurfacing kits usually include primer, paint, and epoxy, and some come with all of the sanders, rollers, brushes, and other tools you’ll need for the job. Be sure you follow the directions for your specific kit, but most kits recommend steps similar to the following:
Start by applying a coat of primer with a roller.
Let it dry, then apply a second coat of primer.
apply the stone coat using a new roller brush. You will likely need a smaller brush for hard-to-reach and detail areas, inducing around fixtures, sinks, and edges.
Once the stone coat is dry, sand it smooth with a rotary sander. It’s helpful to have a shop vacuum or filtration system to remove dust.
Dust or vacuum the surface until it’s completely free of dust and residue.
Apply a second layer of stone coat; let it dry, then sand again.
Apply the sealant coat as directed, and let dry. It’s important to allow this final coat to completely cure before touching or disturbing it, or you can end up with smudges and defects you can’t easily repair.
Remove the protective tape when the sealant coat is completely dry.
Caulk around all edges, sink and wall lines and other necessary areas to give the countertop a finished look.
While it can be easier to buy a complete, pre-assembled kit, you might prefer to create your own kit that exactly fits your aesthetic and desires.
For example, DIY marble countertops might be more expensive and more work than you’re willing to undertake, but did you know that you can paint your existing granite countertops to look like marble? Here’s how you can make it look like any stone or take on any other color you want:
Select the products and colors you need for the job. These can include tinted surface primer, chalk paint, metallic paints, feathers (to use like a brush to create the appearance of veining), sponges or other textural elements, brushes, rollers, and sealant.
Apply a layer of the primer and let it dry.
If you can still see the granite pattern underneath once the primer is dry, apply a second coat.
Apply a layer of the base paint color; let dry. (It will probably appear bumpy or blotchy.)
If you want a solid countertop color or solid base color, apply a second and third coat as necessary. For stone-like or textured finishes, use a brush, sponge, or patterned tool to layer on additional coats as necessary to get the look you want, allowing each layer to dry completely before adding another.
To add the appearance of veins, use a feather or small paintbrush and accent paint colors to create lines. This may require several rounds of additions and dry time to complete.
When you’re happy with the look of the counter, whether it’s a solid surface color or has a pattern, let it cure undisturbed for one or two full days.
For a shiny, glossy look, you can apply a layer of epoxy on top of the color, following the directions on the epoxy can.
When the paint or optional epoxy layer is fully dry, apply a coat of clear sealant on top, following the directions on the sealer.
Remove tape and protective paper or plastic once the sealant is dry to the touch.
Let the sealer dry for several days before using your countertops.
Apply caulk to the edges, sink gaps, wall lines, and other unfinished areas.
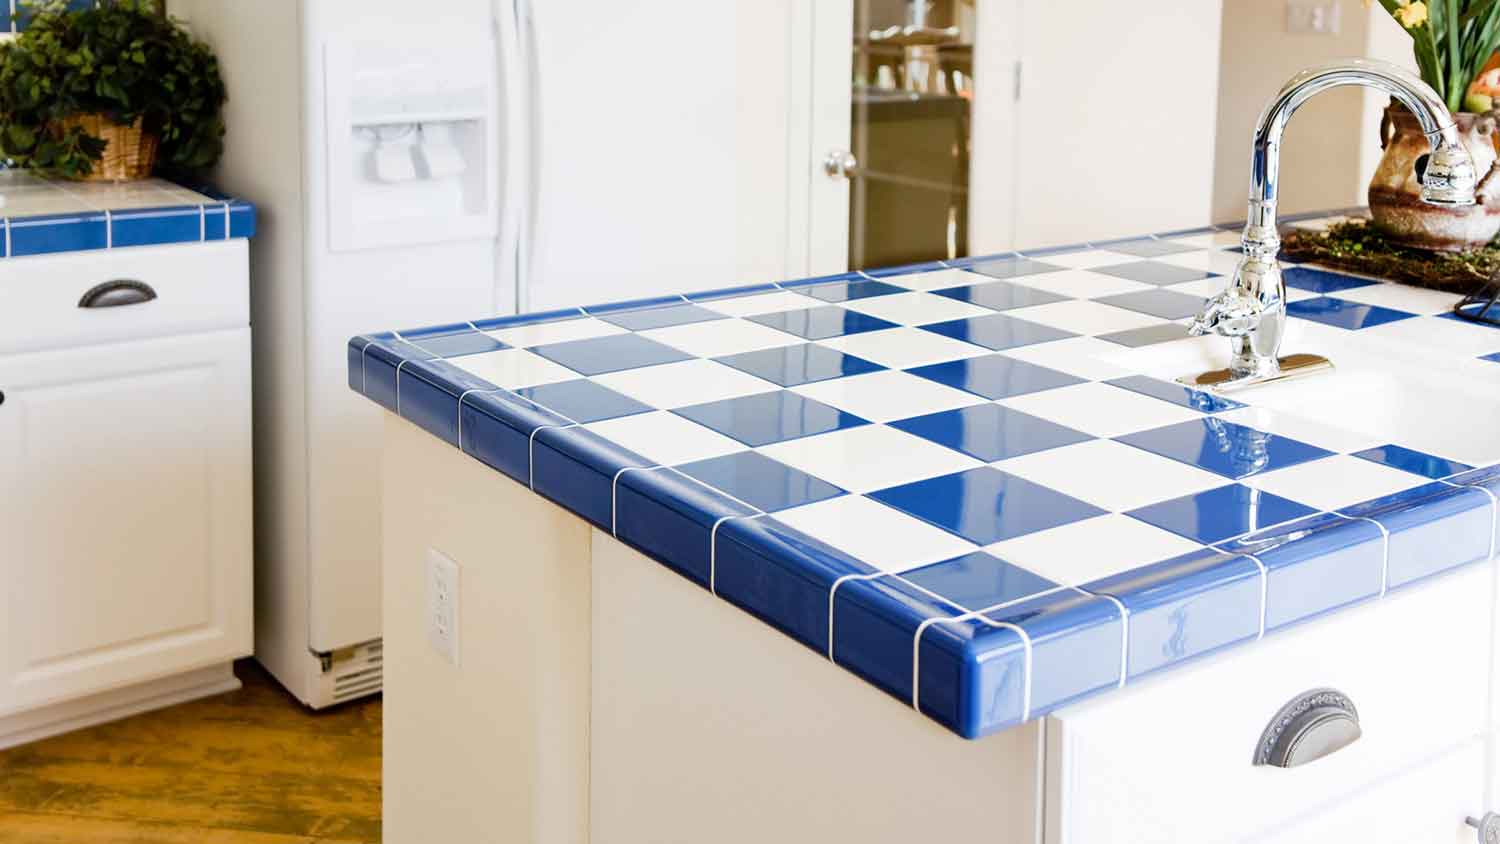
If your granite countertop is stable, absolutely flat, has square edges, and does not have curves, a waterfall edge, or other details, you can tile over it. It is absolutely critical that your countertops be solid and flat so that the tiles and grout don’t crack once you’ve installed them.
You’ll want to install porcelain, ceramic, or similar tiles that are water-resistant, durable, and food-safe. As for grout, look for one that is resin-based, stain-repellent, food-safe, and non-absorbent to prevent water, stains, and bacteria from taking up residence.
A word of warning: Tile is usually looked down upon as a cheaper, less desirable countertop material, so tiling over existing granite countertops can make your kitchen look less upscale unless you make smart tile, grout, and design choices. That said, it can make an old, dated countertop look new and help your kitchen better reflect your style. Proceed at your own risk.
Use a power sander and high-grit sandpaper to scratch and rough up the surface of your countertops. You need them to have a texture in order to hold the thinset mortar.
Or, if you don’t want to lay tile directly on your countertops, purchase and cut ¼-inch-thick cement backer board or tile backer board to fit exactly over your counters and glue it to the granite surface.
Lay out your tiles, starting at the center and working out, leaving room for grout lines between them. Use tile spacers if you have them. Then, use a wet saw to cut tiles as needed at the edges of the countertop, corners, sinks, and other areas.
Remove the tiles, but keep them laid out or stacked in the order you’ll use them.
Next, apply thinset mortar to a section of the countertops or backer board, working in a small area at a time so the thinset doesn’t dry out before you’ve set the tile.
Place tiles in the pattern you’ve chosen and rehearsed, moving deliberately and carefully and using tile spacers to maintain even grout lines.
Let the tile set overnight.
Using the directions specific to the grout you’ve chosen, apply grout to the grout lines and wipe the tiles clean.
Seal the grout with a waterproof, stain-resistant, food-safe sealant; you’ll want to reapply this at least once a year to help the grout stay clean and bright.
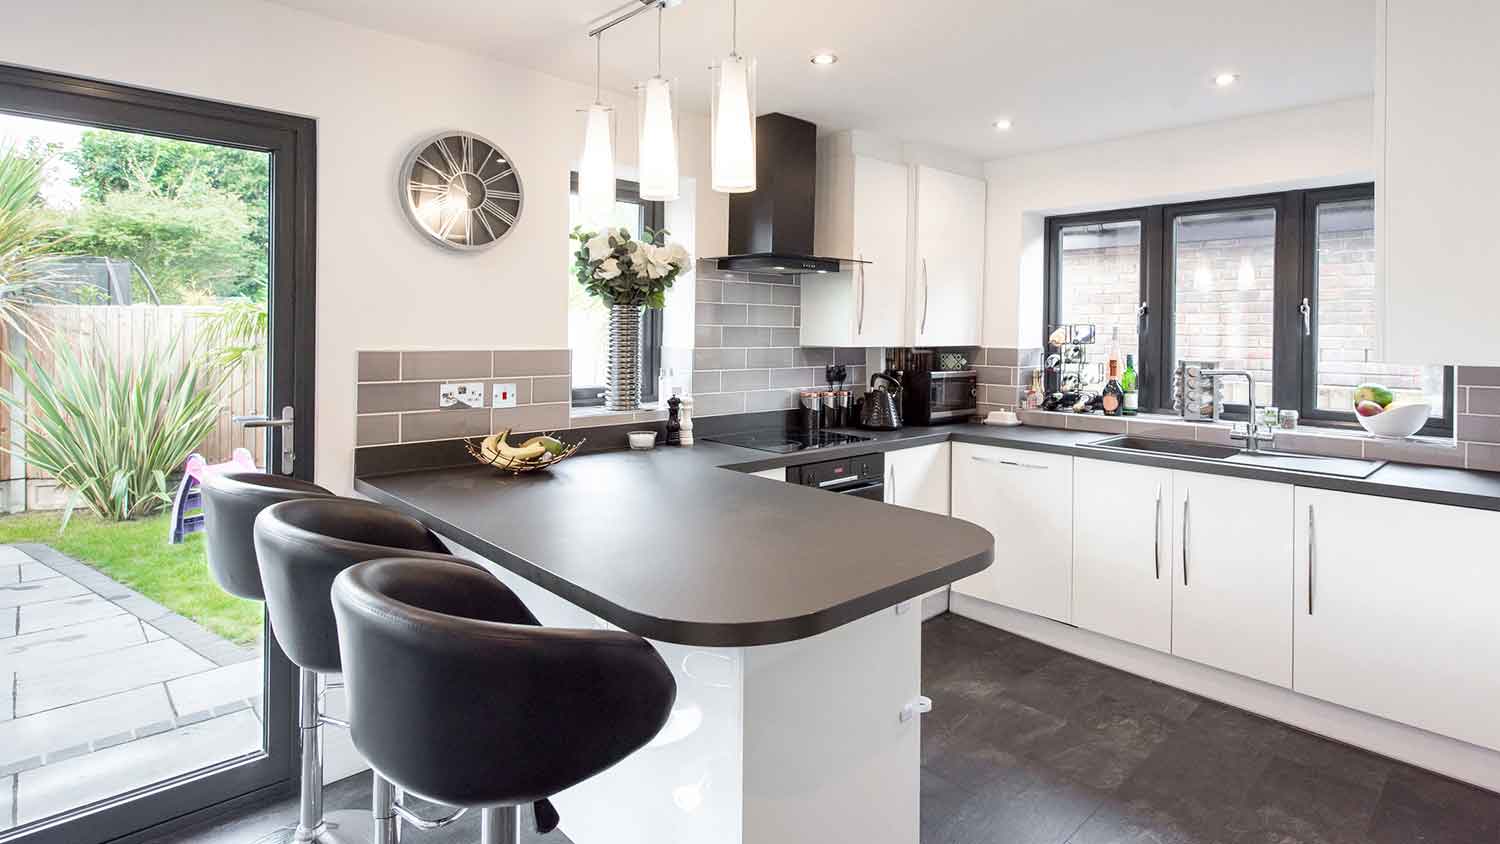
If you’re ready for a completely different look, you can consider affixing laminate sheets over your granite countertops. However, laminate is a much less durable material than granite, so you’ll need to treat your countertops more gently if you make the trade; and, while laminate comes in many solid and decorative patterns, it’s almost never as desirable as granite, so you’ll want to decide whether the switch is a positive one.
Use an orbital sander or belt sander to remove the top layer of your granite slabs; you want the stone to look dull.
Wipe them clean and vacuum up any remaining dust and debris.
Measure every surface of your countertops that you will cover—this includes the top, sides, edges, and backsplash (if applicable).
Choose the type and look of laminate that you want, including precut laminate strips for countertop edging.
Use a razor knife to cut the sheets slightly larger than your countertop surface area.
Use a paintbrush to coat the backs of the laminate sheets with contact cement.
Let the contact cement dry for 15 minutes or as directed on the packaging.
Hold up the first laminate piece at a 90-degree angle above the front vertical edge, and line it up exactly. Depending on the size of your countertops, you may need two people for this task.
Set the laminate down on the thin edge, then carefully lay it flat so that it perfectly aligns with the countertop.
Use a laminate roller to press it down and remove bubbles underneath.
Use a router saw to trim any overhang.
Apply factory precut laminate strips along all edges to give it a finished look.
Apply backsplash or caulking along the back seam to blend the laminate edge with the wall.
For a more temporary, low-commitment change that can still completely revamp your granite countertops, you can apply contact paper or countertop film over the granite surface. Contact paper, or peel-and-stick countertop material, is inexpensive and easy to cut—it’s also not as thick, tough, or resilient as countertop film, which is closer to vinyl flooring than traditional contact paper. Both come in a huge variety of colors and patterns, including photorealistic patterns like marble.
Remember, though, this is a short-term solution that will change the look for a while but will need to be cared for gently and replaced as it shows wear.
Choose and purchase the film, then lay it out over your countertops and let it flatten.
Using a straightedge and sharp scissors or rotary trimmer, cut it to size and align it with your countertops to check the fit.
Start by peeling one corner and edge, revealing the sticky side.
Adhere this side to your countertop gradually, starting with one edge and moving slowly and deliberately along the surface of the countertop.
You can use a squeegee or wide plastic putty knife to smooth the film as you go, removing bubbles and ensuring a tight fit.
It is possible to change the color of your granite and make it look like a solid concrete countertop by coating the surface with thin layers of cement. This will be more prone to stains, scratches, and impact damage than your original countertops, so use more caution and treat with more care.
Buff the granite surface with sandpaper using an orbital sander or sanding block with coarse sandpaper.
Mix the cement completely, thoroughly mixing it until there’s no powder left.
Using a trowel, apply a thin coat of cement.
Let it dry.
Apply a second coat, letting it dry.
Apply more coats as needed or desired, allowing each layer to dry before adding another.
When you’re happy with the thickness and texture, seal the entire surface with a food-grade sealant.
This method doesn’t exactly change the color. Still, it will make shiny granite counters matte and appear less boldly colored, as honed granite usually looks darker and less sparkly than glossy granite. If you’re looking for a slight change that maintains your countertops' integrity, value, and overall look while still giving them a cosmetic overhaul, honing might be the right way to go.
If DIYing isn’t suitable for you, you can hire a professional countertop refinishing contractor to hone your counters for about $50 per square foot. They’ll have all of the equipment, tools, skills, and cleanup duties, so hiring out this dusty job can be worth it.
Rent or buy an orbital sander. You’ll also need sandpaper of varying grits in 100-grit increments from 100-grit to 1,500-grit. You may not need all these grits, but having it on hand is wise.
Attach the 100-grit sandpaper to the sander, then sand the granite's surface and edges until it looks unpolished.
Vacuum dust and debris from the work area and the granite surface; use a soft cloth to wipe it clean.
Using the 200-grit sandpaper, go over the entire granite surface again. You’ll again want to attain a consistently unpolished look.
Again, vacuum dust and debris from the area and the granite surface, using a cloth to clean the surface.
Follow this pattern with the 300-grit, 400-grit, 500-grit sandpaper and onward until you’ve reached the honed look you want. Softer granite will hone faster, while dense granite may require 1,500-grit sandpaper to achieve your preferred look.
When you’re happy with the look, clean the granite with the vacuum and soft cloth, then use a damp cloth until no more dust remains. Let them dry completely.
Apply a matte, food-safe sealant to protect your newly honed counters from stains, spills, and damage. You’ll need to reseal them yearly or more for kitchens that get a lot of use.
The results can be astounding, but they won’t happen by chance. Here are the best tips for modifying your granite counters:
Research the method you’re considering and ensure the result will be one you like and can live with. Paint, epoxy, and coverings will all have downsides and will all change how you can use your countertops.
Gather your supplies and read through the directions before you begin.
Always follow all directions and best safety practices for your tools, equipment, and materials. This can include eye, ear, and hand protection.
Practice, if possible, on a smaller piece of granite to get a feel for the entire process and refine your skills.
If you don’t think you’re up to the task or it looks too complicated for your DIY skills, don’t even start. Just go ahead and call a pro. This will save you hassle, mess, and maybe even some money.
If you‘re painting, only use products meant for painting marble countertops and follow all directions so that you don’t damage the underlying stone and benefit from maximum adhesion and durability.
Mix all products completely and thoroughly.
Use extra primer coats under paints or contact paper if your granite is dark or has very dark spots.
Don’t skip the all-important preparation steps. Priming and preparation are the keys to getting the best outcome.
The way you finish matters, too—using a high-quality sealer will protect your hard work.
Use a filtration device or shop vacuum when sanding; this can keep down the dust and make the whole job cleaner, easier, and faster.
Take before and after photos to revel in your kitchen’s new look.
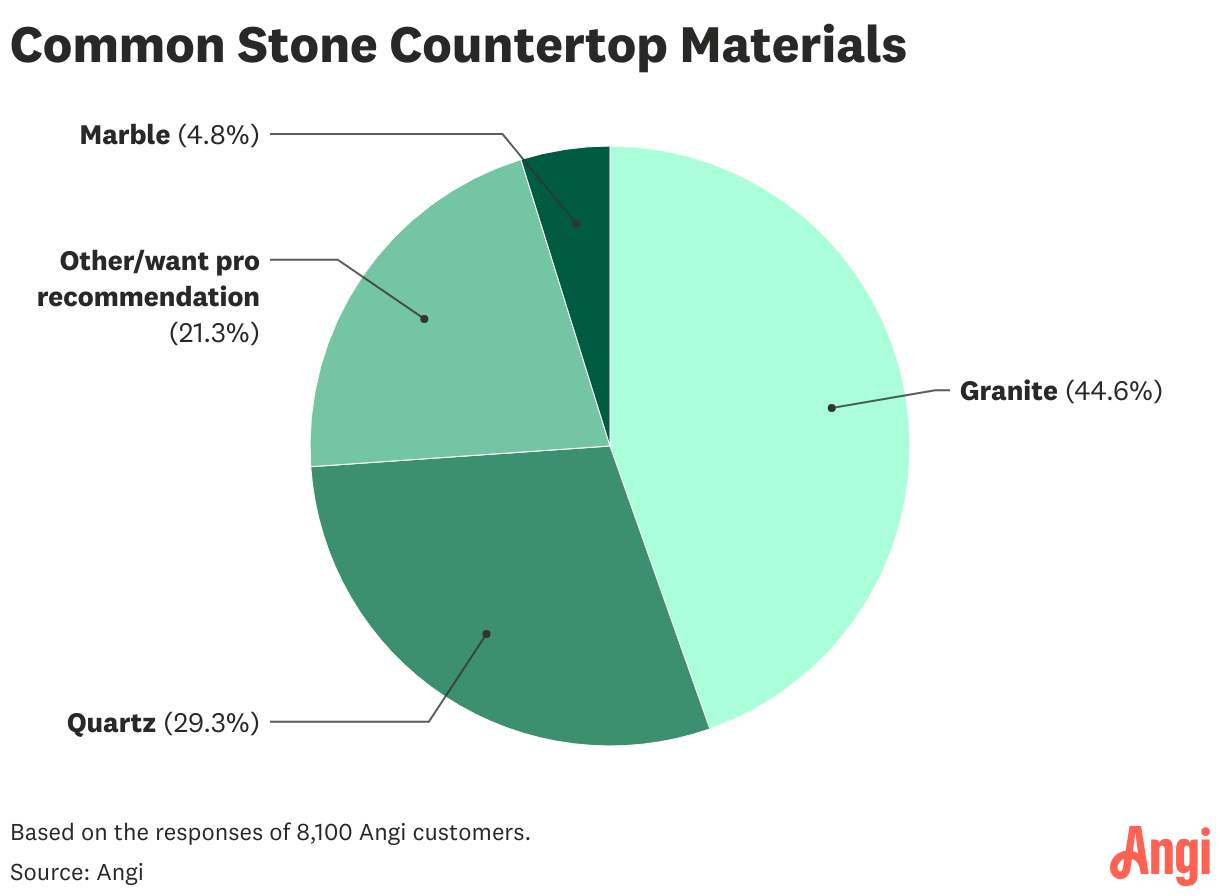
Granite and quartz are the most commonly requested stone countertop materials among homeowners. Responses from 8,100 Angi customers show that 44.6% requested granite, while 29.3% opted for quartz. Granite’s popularity is often enhanced by its wide range of colors and patterns, enabling homeowners to achieve a distinctive look that complements virtually any kitchen style.
For many DIY-inclined homeowners, tackling this project will bring a lot of satisfaction and can have a big payoff. But not everyone is up to the task, and it’s essential to be honest with yourself about your skills, ability to stick with the project, and tolerance for mess and unexpected results.
If you decide the job isn’t for you or want to hire someone with experience who already has the tools and skills, consider calling a painting contractor, countertop refinishing company, or local stone countertop company that provides the service you’re looking for.
The cost to hire a pro can be surprisingly affordable, especially if you don’t have to buy or rent equipment, dedicate hours to the job, and clean up afterward. The work may also come with a warranty, which can be a money saver if it doesn’t hold up as well as expected and has to be redone or repaired.
As we’ve seen, it is possible to paint, refinish, or modify your granite countertops to change the color or look. However, this isn’t without risks—and rewards. Here are the top pros and cons before starting a project yourself.
Pros:
You can choose the countertop color and pattern you want.
A good paint job can make granite look like marble or soapstone without the marble or soapstone countertops cost.
It can be temporary or removable if you change your mind—just be sure to seal the stone beforehand and use a stone-safe product.
You can do it yourself if you’re handy and patient.
Many contractors offer granite update services that are affordable and save you time.
Cons:
Painting granite countertops or applying a different material over the top will take away many of the benefits granite offers, including being heat resistant and stain resistant; you’ll need to use hot pads and clean up spills immediately.
Paint can be easily scratched and scuffed—you’ll have to be much more careful with knives, sharp items, dragging heavy items across your countertops, and other motions or tools that can scratch the paint.
You may hate the look; while it can be undone, that can be a lot of work just to get your old kitchen back.
From average costs to expert advice, get all the answers you need to get your job done.
Marble backsplashes are beautiful and costly additions to your kitchen. Our guide lays out marble options and the labor required to install it.
New quartz countertops can give any kitchen a facelift. Find out quartz countertop costs, including quartz slab prices and the cost of installation.

The cost of porcelain countertops is affected by many factors, primarily the material's type (tile or slab) and finish, as well as your counter’s size and shape.

If you are investing in new kitchen counters, you may wonder if quartz countertops are heat resistant. This guide explains how much heat quartz countertops can take and how to protect them.

Granite countertops are popular in kitchens because they’re attractive, durable, and long-lasting. Learn about the pros and cons of granite countertops here.

White quartz is durable, attractive, and low maintenance. Learn about the pros and cons of white quartz countertops to decide if they’ll work in your kitchen.