The cost to insulate a basement varies based on materials, size, and other factors, as well as how much of the work you wish to perform yourself.
A little math is all it takes to keep your home warm and cozy


R-value describes the thermal resistance of an insulation material.
To calculate R-value, divide the thickness of a material by its thermal conductivity.
Many common insulation materials will list the R-value on the packaging.
Understanding how to calculate R-value is essential, no matter what climate you live in. If you're building or remodeling your home or just trying to determine its energy efficiency, knowing what R-value you need and how to achieve it will save money and effort. Here's what you need to know about R-value and how to calculate it.
The cost of insulation ranges widely between $0.40 and $6.75 per square foot. Determining the ideal amount of R-value your home or project needs can help keep you from spending more than necessary or installing too little.
Additionally, understanding R-value calculations can also help you determine if your home has poor insulation and how you can fix it.
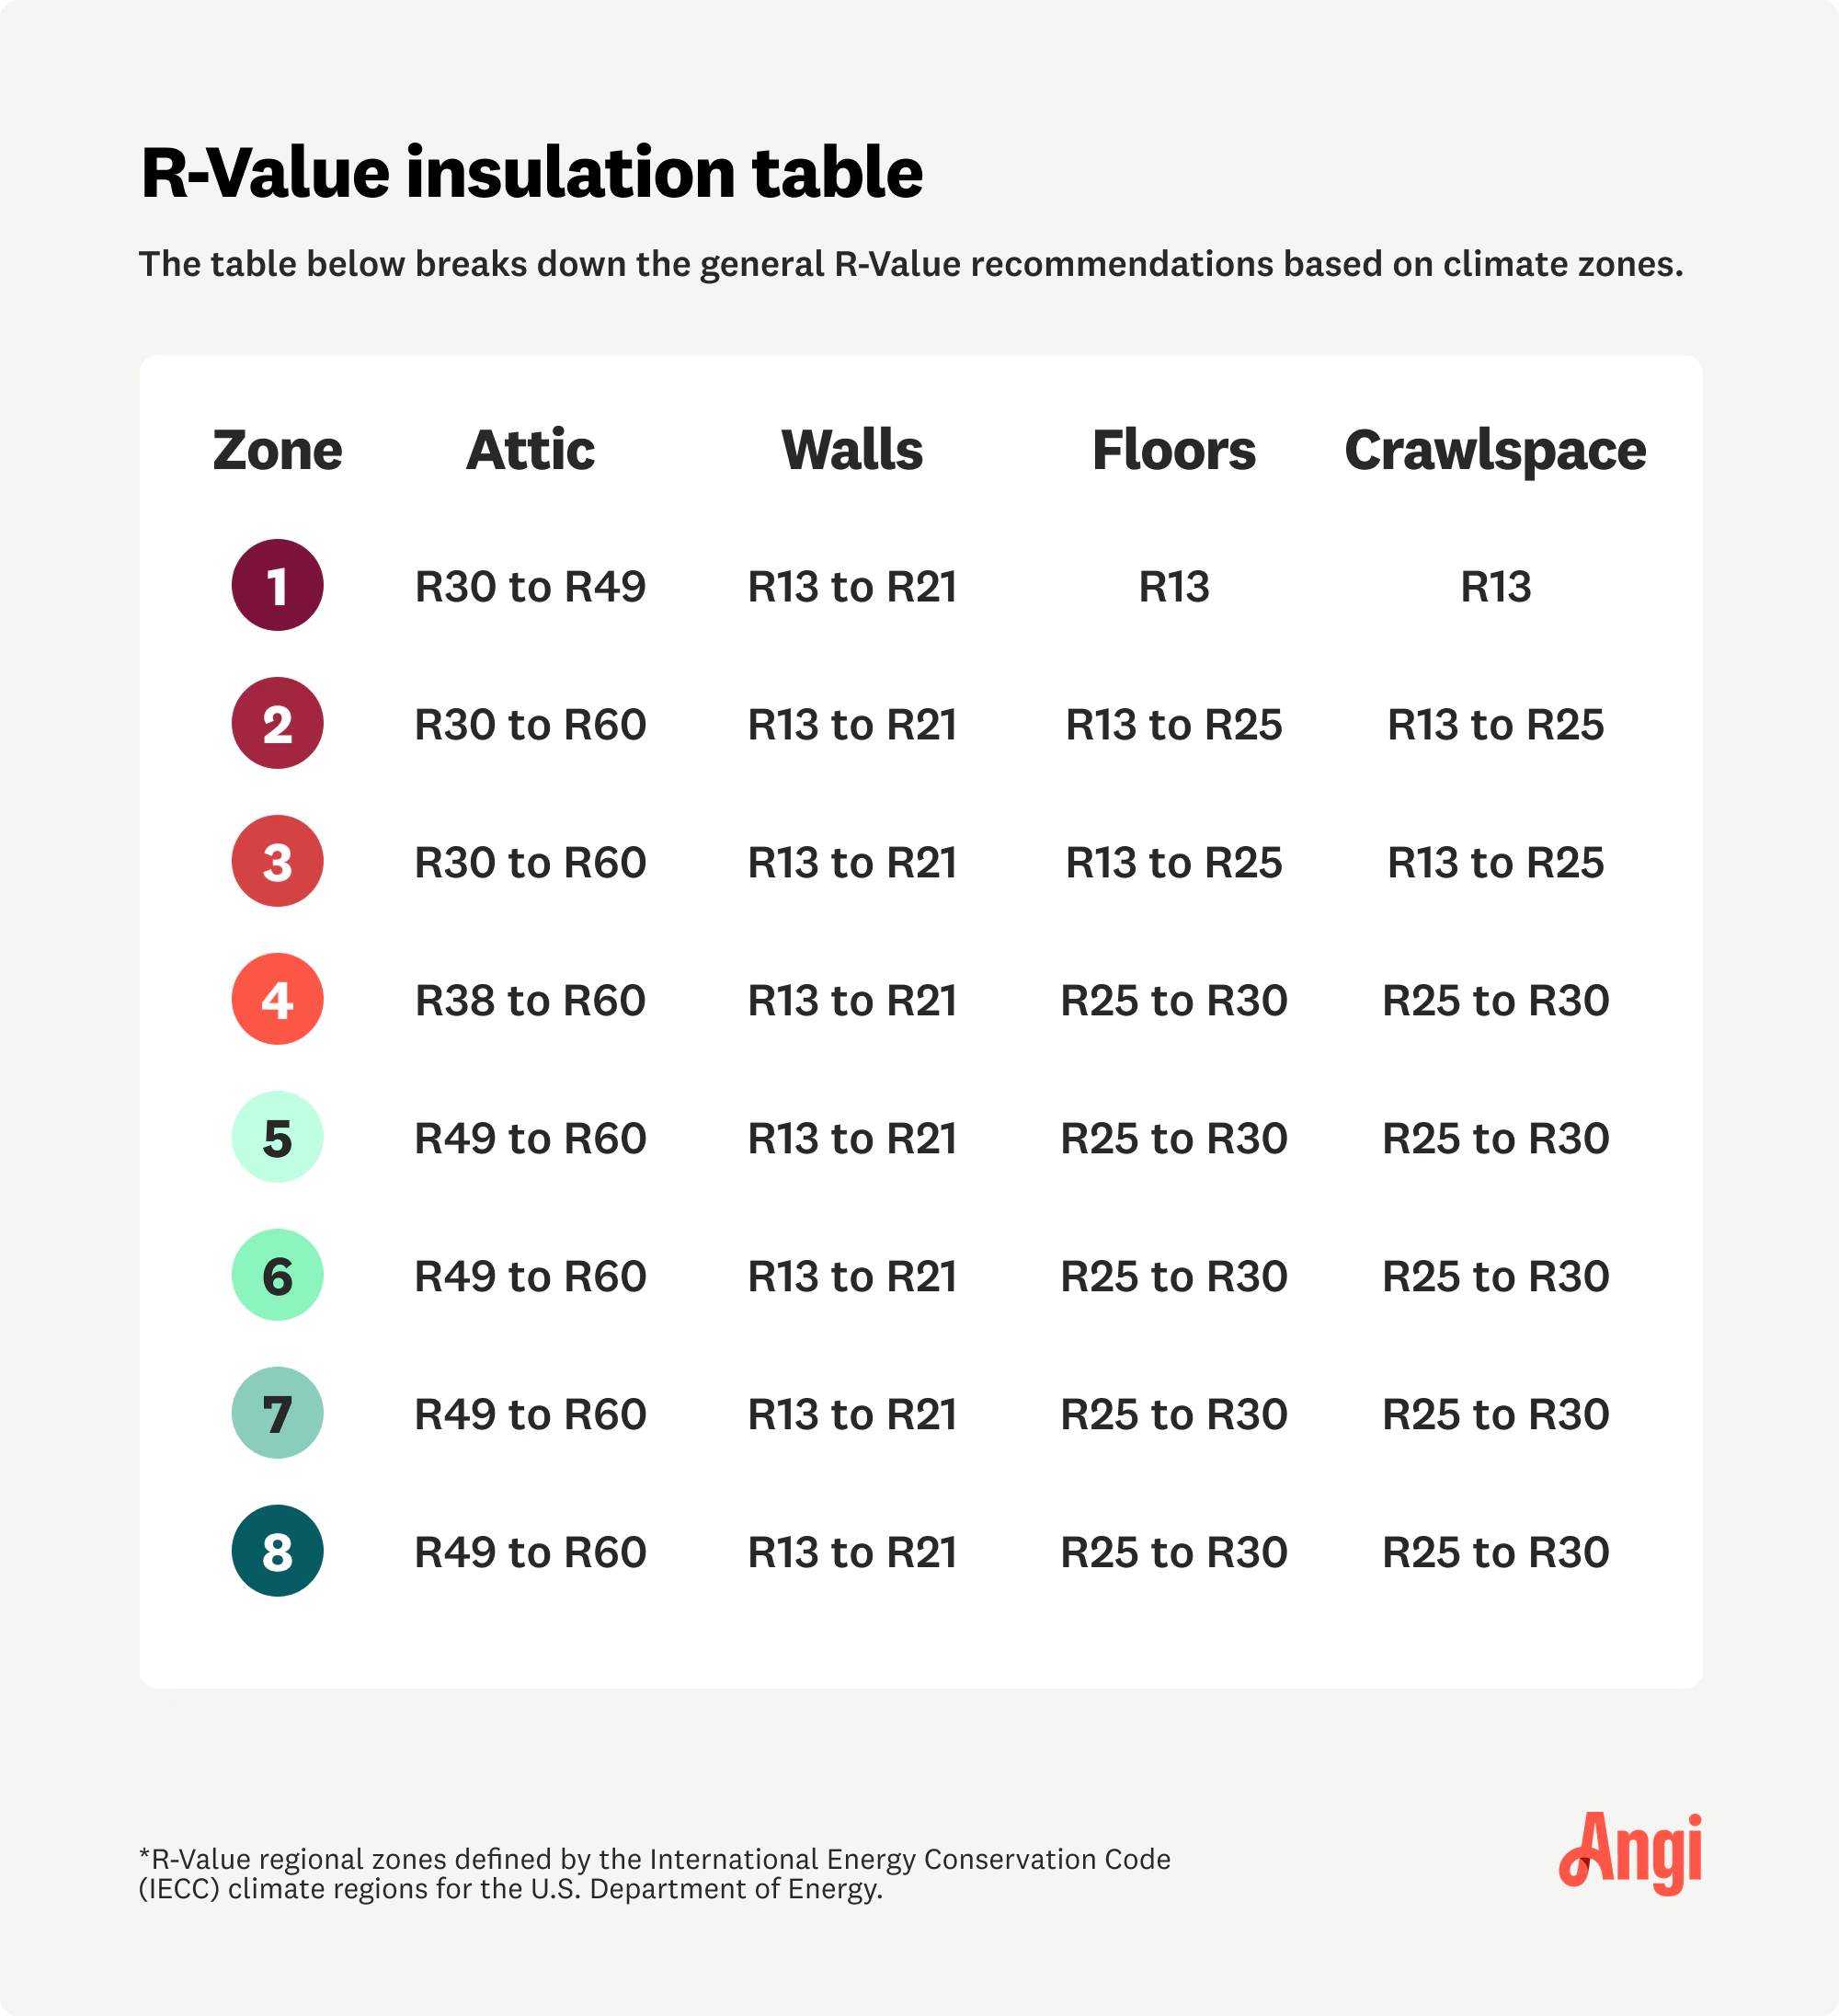
The R-value your home needs varies based on your climate and the area you’re insulating. Your municipality governs the building codes that require you to install at least the minimum amount necessary when altering your house or replacing insulation.
Warmer locations require less R-value, while colder ones require more. However, all climate areas require between R30 and R60 in attics and between R13 and R21 in exterior walls.

In technical terms, R-value is the measurement of thermal resistance of any building material you'll find in your home. In practical terms, R-value can simply mean how well it insulates. A higher R-value reflects a more robust insulating ability than a lower R-value.
Calculating the R-value of any material, including insulation, involves dividing its thickness by its thermal conductivity.
R-value = ∆T x Area x Time / Heat Loss
Here’s a look at the average thermal conductivity for some common building materials:
| Building Material | Thermal Conductivity (average) |
|---|---|
| Plywood | 0.14 |
| Chipboard | 0.15 |
| Concrete | 1.40 |
| Exposed brick | 0.84 |
| Glass | 1.05 |
| Plaster | 0.46 |
| Drywall | 0.20 |
Fortunately, most insulation products make things easy for you and will list the R-value on the packaging. Here are the R-values for the most common insulation materials.
| Material | R-Value |
|---|---|
| Cellulose | 2.4–2.8 |
| Fiberglass | 3.0–4.0 |
| Mineral wool | 2.5–3.3 |
| Polystyrene | 2.6–3.6 |
| Spray foam | 3.5–7.0 |
If you need to determine the R-value of the existing insulation in your home, you can estimate it by multiplying the thickness of the material in inches by the R-value per inch for the material.
If you're looking to determine the total R-value of a wall or similar structure, you'll need to account for all the materials in that structure. For example, the total R-value of an exterior wall includes the cumulative R-value of the drywall, vapor barrier, insulation, sheathing, and the exterior siding.
To get your measurement, calculate the R-value of each material and add them together.
Batt and roll insulation is an affordable type of insulation, making it a fairly common choice for many homeowners. According to Angi data, nearly 44% of homeowners report installing batt and roll insulation in their attics. Other common insulation locations include inside walls and ceilings. Check out the most common places to install batt and roll insulation:
Determining the precise amount of R-value in your home can get complex, but pros who install insulation have the tools and experience to pull it off. And a local insulation company will have intimate knowledge of the building code requirements for insulation in your location.
From average costs to expert advice, get all the answers you need to get your job done.

The cost to insulate a basement varies based on materials, size, and other factors, as well as how much of the work you wish to perform yourself.

Find out the average pipe insulation cost, including material and labor prices, plus tips to save money on your project.

Wool insulation offers a higher R-value than fiberglass but is more expensive. Use this guide to estimate wool insulation costs for your home.

It’s important to know when to use R13 versus R15 insulation to maximize temperature control and energy savings. Learn more about each of these popular insulation options.

Is a radiant barrier worth it for your home? It depends on the climate where you live, installation factors, and the cost of keeping your home cool.

Learning how to insulate plaster walls can help improve your home's energy efficiency. However, there are crucial cautions to consider before attempting.