Sometimes, all your home needs is a new wall to make a room or provide an updated function to an existing space. Learn how much it costs to install a new wall.
Infuse style and privacy into your home with this weekend DIY

Your room divider wall needs secure attachment points at three locations: a wall stud, ceiling joist, and floor substrate to prevent stability issues.
The cost to build it runs $150 to $500 for materials including wood studs, glue, nails, screws, and your choice of stain or paint.
You'll want to measure twice before cutting, then sand and finish all wood pieces before assembling your frame to ensure a professional look.
Hiring a local carpentry professional takes the guesswork out of locating structural support and securing your divider wall safely to existing framing.
Perhaps your open concept floor plan is a bit too open or you are in the midst of reconfiguring your entryway as part of a remodel. Whatever the design need, creating a room divider wall can enhance the use of your space and add in thoughtful interior design elements. A partition wall can also help create a more dedicated entryway if your front door opens into the living room.
With a few tools and a couple of days, you can transform your space by building a partition wall. You can build room divider walls out of many materials, including repurposed doors and modular panels. Our guide shows you how to construct a wall out of wood studs that you can paint, stain, or keep natural.
Map out your space to determine how wide, deep, and high you'd like your wall. Depending on your space, you might want it to stretch across a quarter or half of the room's width. You also might prefer a half-wall room divider or extending it to the ceiling.
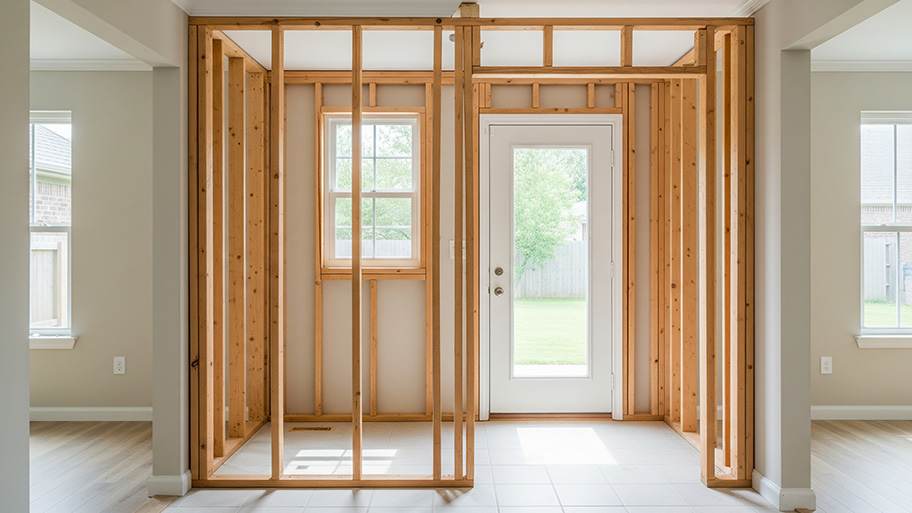
Next, determine where you'll secure your wall. You should attach it to three solid framing members: a wall stud, ceiling joist, and floor substrate. Use a stud finder or other method to locate these structural components and pinpoint the best spot to install your wall.
If you don't find a location with three secure points, you may need to add extra framing before attaching the new wall—adding a partition wall without the proper structural support may result in stability issues.
Once you know the size and location of your wall, create a detailed plan on a piece of paper or an app to serve as your project blueprint. Draw out how you'd like your wall to look, including the spacing of your wood slats and if you'd like an alcove. Write out exact measurements to make the rest of the project easier.

Following your detailed blueprint, measure and cut:
Top and bottom plates
Side pieces
Inside planks
Design features, such as alcove pieces
Measure your pieces twice before cutting them to limit mistakes and material waste. Having all your pieces cut allows you to easily assemble your wall and keep your project sailing along smoothly at each step.
With an orbital sander, smooth your wood pieces with 100-grit sandpaper, removing any rough edges and bumpy spots. Then stain or paint your pieces, depending on the style you like. You’ll likely need to apply two coats—be sure to wait the recommended time between coats.
Painting or staining your wood before assembling the wall is easier than doing it later and provides a better final look. For the best finish, sand between coats with 180-grit sandpaper.
Create your outside border, or the wall’s frame, on the floor. Use a carpenter square to ensure the pieces are joined at a 90-degree angle. Apply a line of wood glue along the edges before nailing the boards in place.
Next, assemble the interior wood planks with equal spacing between each panel, such as one or two inches apart. For ease and consistency, create two spacers in your desired width by cutting out small pieces of wood. Use them as guides at the top and bottom as you secure each panel.
Glue each piece in place—you’ll want to pre-drill your holes to prevent wood-splitting—
then screw each panel into your frame.
While you can build a room divider by yourself, you may want to enlist a helper or two to assist you in lifting and positioning the divider, depending on its size and weight.
If you have crown molding or a baseboard and shoe molding, you may need to cut out a piece of the molding equal to the depth of your divider wall. That way, your divider wall rests flush against the perpendicular wall.
Mark the line where your new wall will adhere to the existing wall, and add construction glue in a line from ceiling to floor. Then screw the divider into the wall stud, ceiling joist, and floor substrate.
To finish the look, sand the edges of any visible nail or screw holes. Fill in the holes with wood filler and sand again. Finally, touch up with paint or stain so the holes blend with the rest of your wall.
If you have a free weekend and want to tackle a moderate DIY project, building a partition wall can be a winner. Careful planning and execution ensure that your home's partition wall is sturdy, beautiful, and properly secured. Hiring a pro can also be a good option, depending on the type of wall you need and your DIY skills.
A local carpenter or general contractor can handle building and installing a partition wall for you. Get quotes from at least three pros to compare prices and find a great contractor.
Jason has helped me with multiple household projects, with the most recent being new door installation. He has always showed up on time and organized and has done an incredible job! Jason is very professional and he's now my go-to for anything around my house that needs to be fixed or...
Cole has been handling plumbing and general contracting for our four properties over the past three years, and he’s always done a great job. Most recently, he installed a sink and countertop in our retail store where none existed before, and it turned out exactly how we needed. He’s...
 ANB Renovations LLC
1st Choice Renew is simply the best! We hired them for a complete home renovation, and they transformed our space into something truly amazing. The team attention to detail and commitment to quality were evident throughout the project. They were easy to work with, very responsive, and always...
This company went above and beyond with their work, chimney sweeps are usually pretty messy, but the clean up was spot on.!! Josh explained every thing that he was doing, and the things that he was checking to make sure the chimney was safe for me and my family. He was very professional,...
 Supreme brick & chimney
Custom Paint Jobs LLC transformed our outdated kitchen into a modern masterpiece.
Excellent customer service and knowledge. I was recommend to him from my neighbour. My front door and window came in great and were installed beautifully perfectly, I m very satisfied with their excellent work, so decided to order one more big bow window for my living room. I cant wait for...
If I could give 10 stars for Kitchen Tune Up, I would. I cannot say enough good things about my experience with Kitchen Tune Up and the entire team involved in the process of my kitchen project. They went above and beyond as far as service and quality with my cabinets, paint, countertops, and...
It was wonderful working with Yordy and his team. They were very professional and are experts in what they do. They have completed the work on time, with better quality and with in fairly reasonable price. We just started with backsplash work , but liking his work, we went on to provide...
We were having 2”x 2” tile installed . There was a small installation error and the new additional replacement tile was from a different lot and the colors didn’t match. Joe assured us that he would rectify everything , which he did without hesitation. We decided to go with the 18” x 36” tile...
 CarifaTile
They work that 360 did on my kitchen cabinets is nothing short of amazing. I still cannot believe the difference from before and after. Jon and Jeff were both so incredibly professional throughout the whole process and their communications with me were constant and consistent. These guys...
 360 Painting Columbus
From average costs to expert advice, get all the answers you need to get your job done.
Sometimes, all your home needs is a new wall to make a room or provide an updated function to an existing space. Learn how much it costs to install a new wall.
Discover how much concrete walls cost based on factors like their size, material, location, design, and local labor rates.
Before you build that sturdy wall, you should know about cinder block prices. Learn about different cinder block wall cost factors in this handy guide.
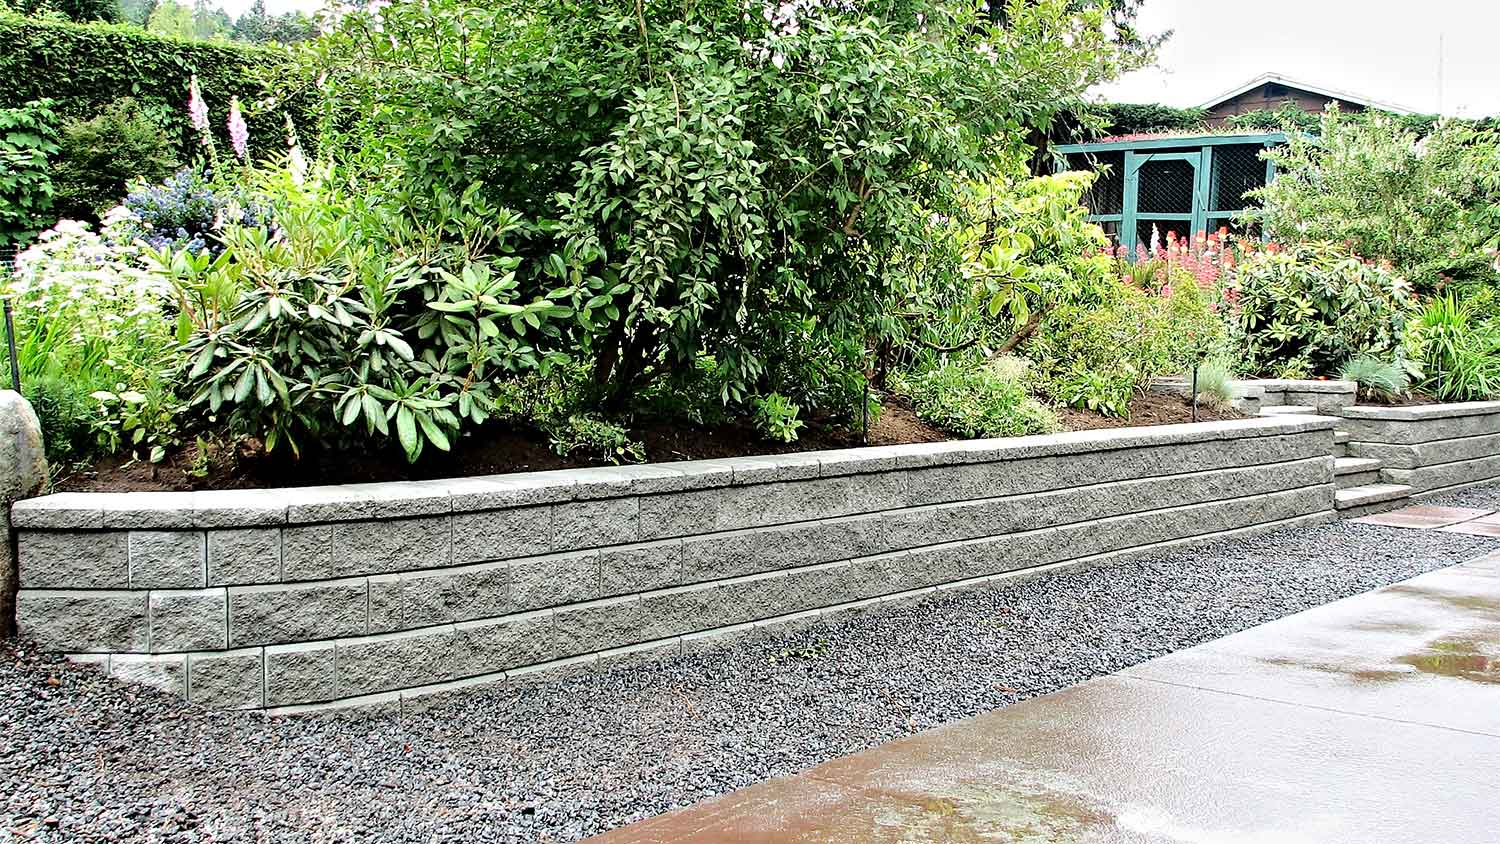
Retaining walls increase your yard space and your curb appeal. Use this step-by-step guide on how to build a retaining wall to put in your yard.

House your best hardcovers on a DIY bookshelf made by hand. Here are seven ways to do it and all the tips you need to make it strong and sturdy.
While it’s possible to DIY build a retaining wall, several pros have advanced knowledge of hardscaping and building. Learn who to hire to build a retaining wall.