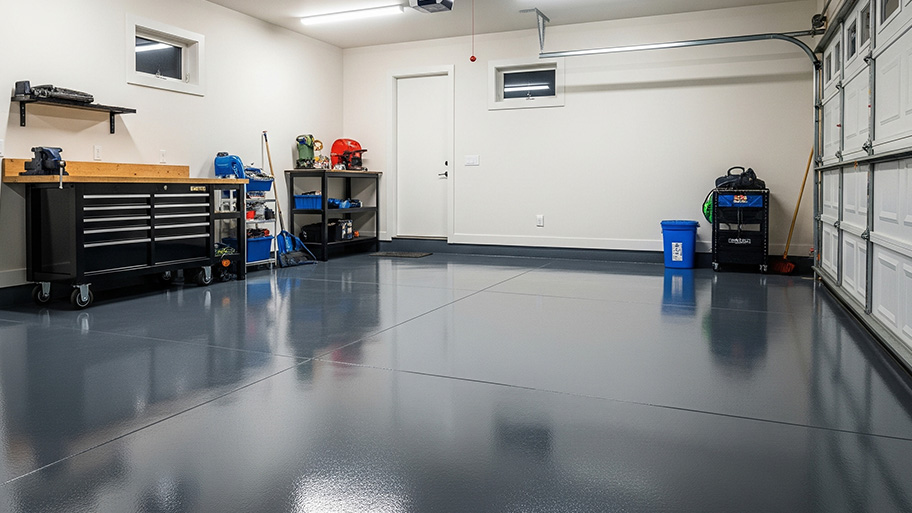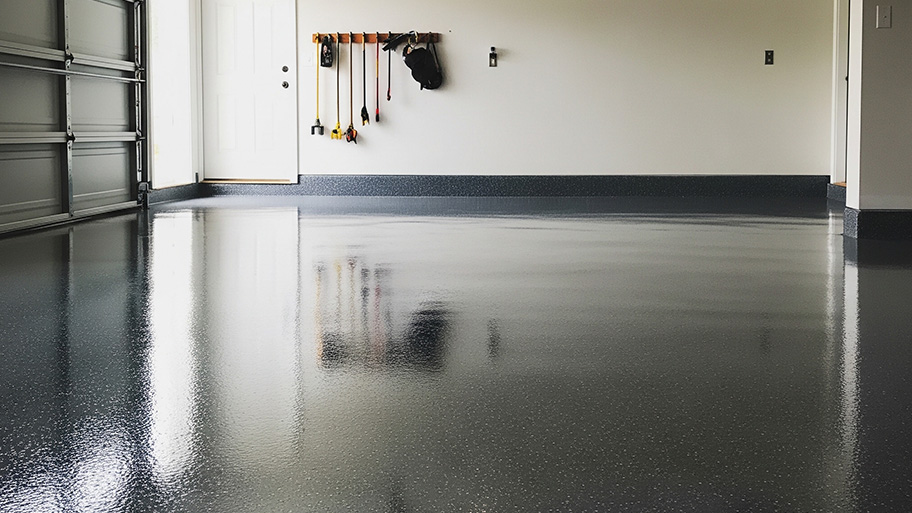
Garage floor replacement costs $2,200 on average but can vary depending on several factors. Review our guide for a more accurate estimate.
Protect your garage floor for years to come with just a few hours worth of work


Your garage can do far more than simply store your cars. Transform it into a woodshop, an auto repair center, a home to store your tools, or even as a workshop for your next hobby. As a result, you should maintain this versatile space by sealing your concrete floor—just one of the many concrete floor finishes ideal for garages. If sealing a garage floor seems daunting, this guide will simplify the process.
There are several types of concrete sealers to choose from that affect the final look and level of protection for your floors. The cost of a concrete sealer may vary greatly depending on which you choose.
For example, an acrylic sealer may cost just $0.15 to $0.20 per square foot, but you may pay up to $2 or more per square foot for higher-end epoxies. You can find a complete guide to concrete sealer types at the end of this article for reference.
Depending on the sealer you choose, you may only be able to apply it in certain temperatures (anything below 50 degrees is usually too cold). If you don’t have a heated and insulated garage, you’ll have to wait until the temperature warms up.
You will also have to leave things out of your garage for an entire weekend or longer while the sealant cures. Read the manufacturer's instructions carefully before getting started to ensure you’re working in the right conditions.
Put on your protective gear before starting. Always wear protective gloves, goggles, a respirator face mask, work clothing, and thick boots. Open all doors and windows and place work fans to encourage airflow—you're dealing with chemicals, so ventilation is important.
Clear the garage floor of any bikes, boxes of holiday decorations, cars, and anything else you may store in there. If you’ve recently poured the concrete, wait until the concrete has cured and any stains have dried completely before attempting to seal it.
It's important to then review how to clean concrete floors. Sweep your floor and spray it down with a hose or, ideally, a pressure washer. Focus on removing grease stains by focusing on these areas with a concrete cleaner if they do not come up with the hose. You’ll want to make sure your floor is free of any debris, so be thorough with this step. Cover your baseboards with painter’s tape to avoid getting sealer on them, too.
Depending on the type of coating you're applying and the type of coating present on the floor already, you may need to apply an etchant or a chemical stripper to remove old concrete sealers. When poured, the etchant will start bubbling, and you will need a stiff brush to scrub the floor.
With most sealers, you’ll need to wait for the floor to dry, ideally for 24 hours, before getting started.
Scan the floor for concrete damage before applying the sealant. It is important to repair concrete cracks under 1/8 inch wide with a concrete filler. Allow the filler to fully cure before applying the sealant. If you have any wider cracks or cracks that are uneven from side to side, call in a foundation specialist to make sure you don’t have foundation damage that needs repair.
You might also want to take this time to sort out any other issues with your garage, like a garage door that won’t close or a malfunctioning garage door opener. That way, your new space will be all ready to go once the sealer cures.
Apply a thin coat of the sealer with your paint roller or sprayer, moving in even, slow motions. You can use the hand brush to get into any smaller areas as well. Be sure to have a game plan for your application process, as you won’t want to step on any spaces where you’ve recently applied sealer.
Application tactics and drying time will vary depending on the type you choose. Although it may feel dry sooner, wait at least the amount of time the manufacturer recommends before continuing.
Following the manufacturer's instructions, wait the recommended amount of time and then apply another thin coat and allow it to dry. After your final coat, plan to keep everything out of your garage for as long as the instructions recommend.
From here, you can wax your floor if you want to or finally pull your car back into its rightful place once the sealant has fully cured.
Different sealers have varying uses and applications. Some provide a layer of protection on top of the floor, while others penetrate into the floor to reduce the porousness of the concrete. You'll have four types of floor sealers to choose from: acrylic, silane/siloxane, polyurethane, and epoxy. Which one you choose depends on what you're going for in terms of attributes and aesthetics.
Acrylic sealers are good at repelling moisture, oil, and other buildup that can threaten the look and integrity of your garage floor. These sealers are ideal for homeowners concerned about chemical damage and stains to their garage floors, so they might be ideal if you do automotive work in your garage space. However, you'll need to reapply acrylic sealers once every three years, as they wear down more quickly than others.
Cost range: $0.55 to $0.70 per square foot
Silane works by making concrete less porous. Sometimes, homeowners use it in conjunction with acrylic sealers. It can cut down on cracking and spalling, as well as freeze and salt damage.
These sealers are great for homeowners in cold climates because they can protect against freeze-thaw damage and salt exposure. This family of penetrating sealants lasts between five and 10 years on average, though this will depend on the level of wear and exposure to the outside elements.
Cost range: $0.15 to $0.25 per square foot
Polyurethane sealers don't require as much maintenance compared to acrylic sealers and are tougher. They’re a great option for preventing color fading as well. You can also try this kind if you're worried about improving the overall durability of your garage floor and just want a simple, straightforward option. Sealants in the urethane group of sealants also last between five and 10 years, but again, their longevity depends on foot traffic and exposure to car tires and other equipment.
Cost range: $0.20 to $0.25 per square foot
Epoxy sealers are the thickest and thus provide the toughest protection against scratching and cracking. You may need to use it in combination with polyurethane to prevent fading and concrete floor discoloration.
Epoxy can be expensive, but you get a lot of value for your money. It's highly resistant to damage and a lot more attractive than other sealers. This one is a good option if you want solid results and don't mind the price or its long curing time (up to 72 hours). And once more, epoxy sealers last between five and 10 years and are tough against wear and tear, even in garages and driveways, where traffic is heavy.
Cost range: $0.55 to $0.85 per square foot
Unlike asphalt, you are not actually required to seal concrete. Sealing your garage floor, however, will protect it from grease stains, spilled chemicals, and all the muck that rolls in on your tires. But is the process really worth it? You should consider the pros and cons to understand before you decide.
After spending so much on the cost of the concrete slab, why not add some extra protection? The pros of sealing a garage floor include:
Make your garage less porous to stains and damage.
Fix hairline cracks and protect against future crumbling.
Deepen the color or protect stains against UV rays.
Discourage mildew and moisture damage.
Complete the process over a weekend.
All this being said, sealing a garage floor does call for a lot of elbow grease and preparation. Here are the downsides to concrete sealing:
It can be expensive, especially if you opt for a highly protective seal.
The high levels of volatile organic compound (VOC) fumes can be difficult to manage in indoor spaces.
Preparing the room and floors is a lengthy process.
If the concrete slab is newly poured, you must wait several weeks to apply the seal.
The floor may become slippery after sealing.
Note: VOCs can be dangerous as they are highly flammable and can lead to short- and long-term adverse health effects, according to the U.S. Environmental Protection Agency. It’s important to wear a respirator approved for working with sealers containing high levels of VOCs. Apply these sealers in a well-ventilated area and away from heat sources and open flames.
If you don't have experience sealing floors, it might be wise to hire a pro. You'll pay an average of around $750 to have a professional seal your concrete garage floor. The cost can range from around $300 up to over $1,100, largely depending on the size of your garage and the type of sealant you choose. This is pretty affordable, but it’s much higher than the $100 you might spend doing the work yourself.
Still, a pro has the necessary gear, knows how to do the job properly, and is less likely to cause damage you'll need to fix later. Plus, they can often address other concrete issues in the process, like cracking and spalling for an all-in-one repair and seal. Not to mention, sealing your concrete is a lot of work.
Contact a concrete and garage floor coating contractor near you to set up a consultation if you think you’d rather save some time and effort. They can take a look at your garage, make some recommendations on which sealer to use, and provide you with a quote so you can fit it into your budget. They might also be able to install a new garage door and carry out other projects you might want to bring your garage ideas to life.
From average costs to expert advice, get all the answers you need to get your job done.

Garage floor replacement costs $2,200 on average but can vary depending on several factors. Review our guide for a more accurate estimate.

Sealing concrete floors, patios, walkways, and driveways can keep them looking fresh for far longer. Let's break down the cost to seal concrete with a pro or on your own.

This guide breaks down the cost of installing epoxy flooring in your garage, basement, or other space. Costs depend on resin type, floor size, and more.

Looking for a way to update your concrete garage floor on a budget? From epoxy paint coatings to rubber and carpet tiles, explore the pros and cons of the top affordable garage flooring ideas, and compare prices using our helpful guide.

Will your space thrive with epoxy floors? Make sure the room's purpose and your budget align with the pros and cons of epoxy flooring.

Sealing your concrete helps it last longer—and look better. Learn how to seal concrete yourself to save money and keep it looking and performing like new.