The cost to install porcelain tile depends on materials, size, and whether you DIY or hire a pro. This guide will help you choose the perfect porcelain tile for your home and budget.
Give your bathroom a whole new look with fresh tiles


Your bathroom is your sanctuary, from your morning skincare ritual to your evening bath. But these moments that are meant to be soothing can be disrupted when all you can focus on is the dated or cracked tiles on the walls, floors, or shower. Whether your bathroom tile is worn out or just not your style anymore, there is a solution: retiling. With a little DIY experience under your belt and the cost of new tiles, you can learn how to retile a bathroom.
Bathroom tiles cost $0.50 to $15 per square foot, but you also need to budget for 10% to 20% more tile than you measured for in case you make an accidental wrong cut or damage tiles in the process.
You don’t want to drop a heavy tile on the tub and have to replace that, too, so make sure to cover the bathtub, toilet, and other plumbing fixtures, as well as cabinets and additional appliances in the bathroom before you start removing old tiles.
You can cover the tub with a sheet of plywood for best protection, and use tape and plastic sheets to cover cabinets and other fixtures. If you are retiling the shower walls, make sure to shut the water off and remove the showerhead and fixtures before starting.
In addition to protecting your home, you’ll want to protect yourself from any flying tile pieces. Be sure to sport goggles and wear gloves when removing and applying tiles.
Removing old bathroom tiles takes time and patience, but it will save you from doing more work in the long run. By gently prying up the older tiles, you’ll have fewer drywall or subfloor repairs.
Use a utility knife to score the grout in the corners where tiles meet. With a prying tool, such as a putty knife or chisel, gently push along the edge of each tile, prying tiles off of the wall. Continue with each tile until you remove all the old tiles.
For the tiles to align seamlessly, they’ll need a flat, smooth surface to adhere to. Use a trowel or utility knife to scrape away the old mortar and grout. Scrape gently to minimize damage to the drywall or subfloor, but continue working until every bit of mortar and grout is gone. Otherwise, your new tiles won’t lay properly.

You may have some damage to the drywall or subfloor after removing all the old tile and mortar, or these materials could be worn if you haven’t replaced them in several years. Make sure to take the steps to repair your drywall or subfloor now to give your tile a longer lifespan and more durability.
You’ll need to make certain repairs based on your specific damage, but common fixes include using drywall compound to fill in holes or using small pieces of plywood to repair subflooring.
All those steamy showers and long baths can make for a humid environment, and that’s why bathrooms need backer boards under tiles to help them better withstand moisture.
Cut sheets of cement board or backer board with a circular saw to fit shower walls and bathroom floors. Then, use the circular saw to cut away holes for tub faucets, showerheads, toilets, and other fixtures.
Install the backer board with a drill and screws. For showers, space screws 8 to 12 inches apart. For floors, install the backer board underlayment with screws spaced 6 inches apart.

You wouldn’t want to start installing the new tile only to find the pieces don’t fit together the way you thought they would, or the pattern doesn’t look quite right with the cabinetry. Minimize any potential design regrets early on by laying out the tiles without mortar to get a better feel for the tile in the space. You can arrange and cut tiles as needed to achieve your desired look.
Once you arrange the tiles in a way that works for the bathroom, use a chalk line tool to mark guidelines that will make laying the tile quicker and easier. Mark tricky spots, like corners of a room, and measure out and mark the center of the wall, shower wall, and/or floor. Use a straightedge to ensure the lines are as straight and even as possible.

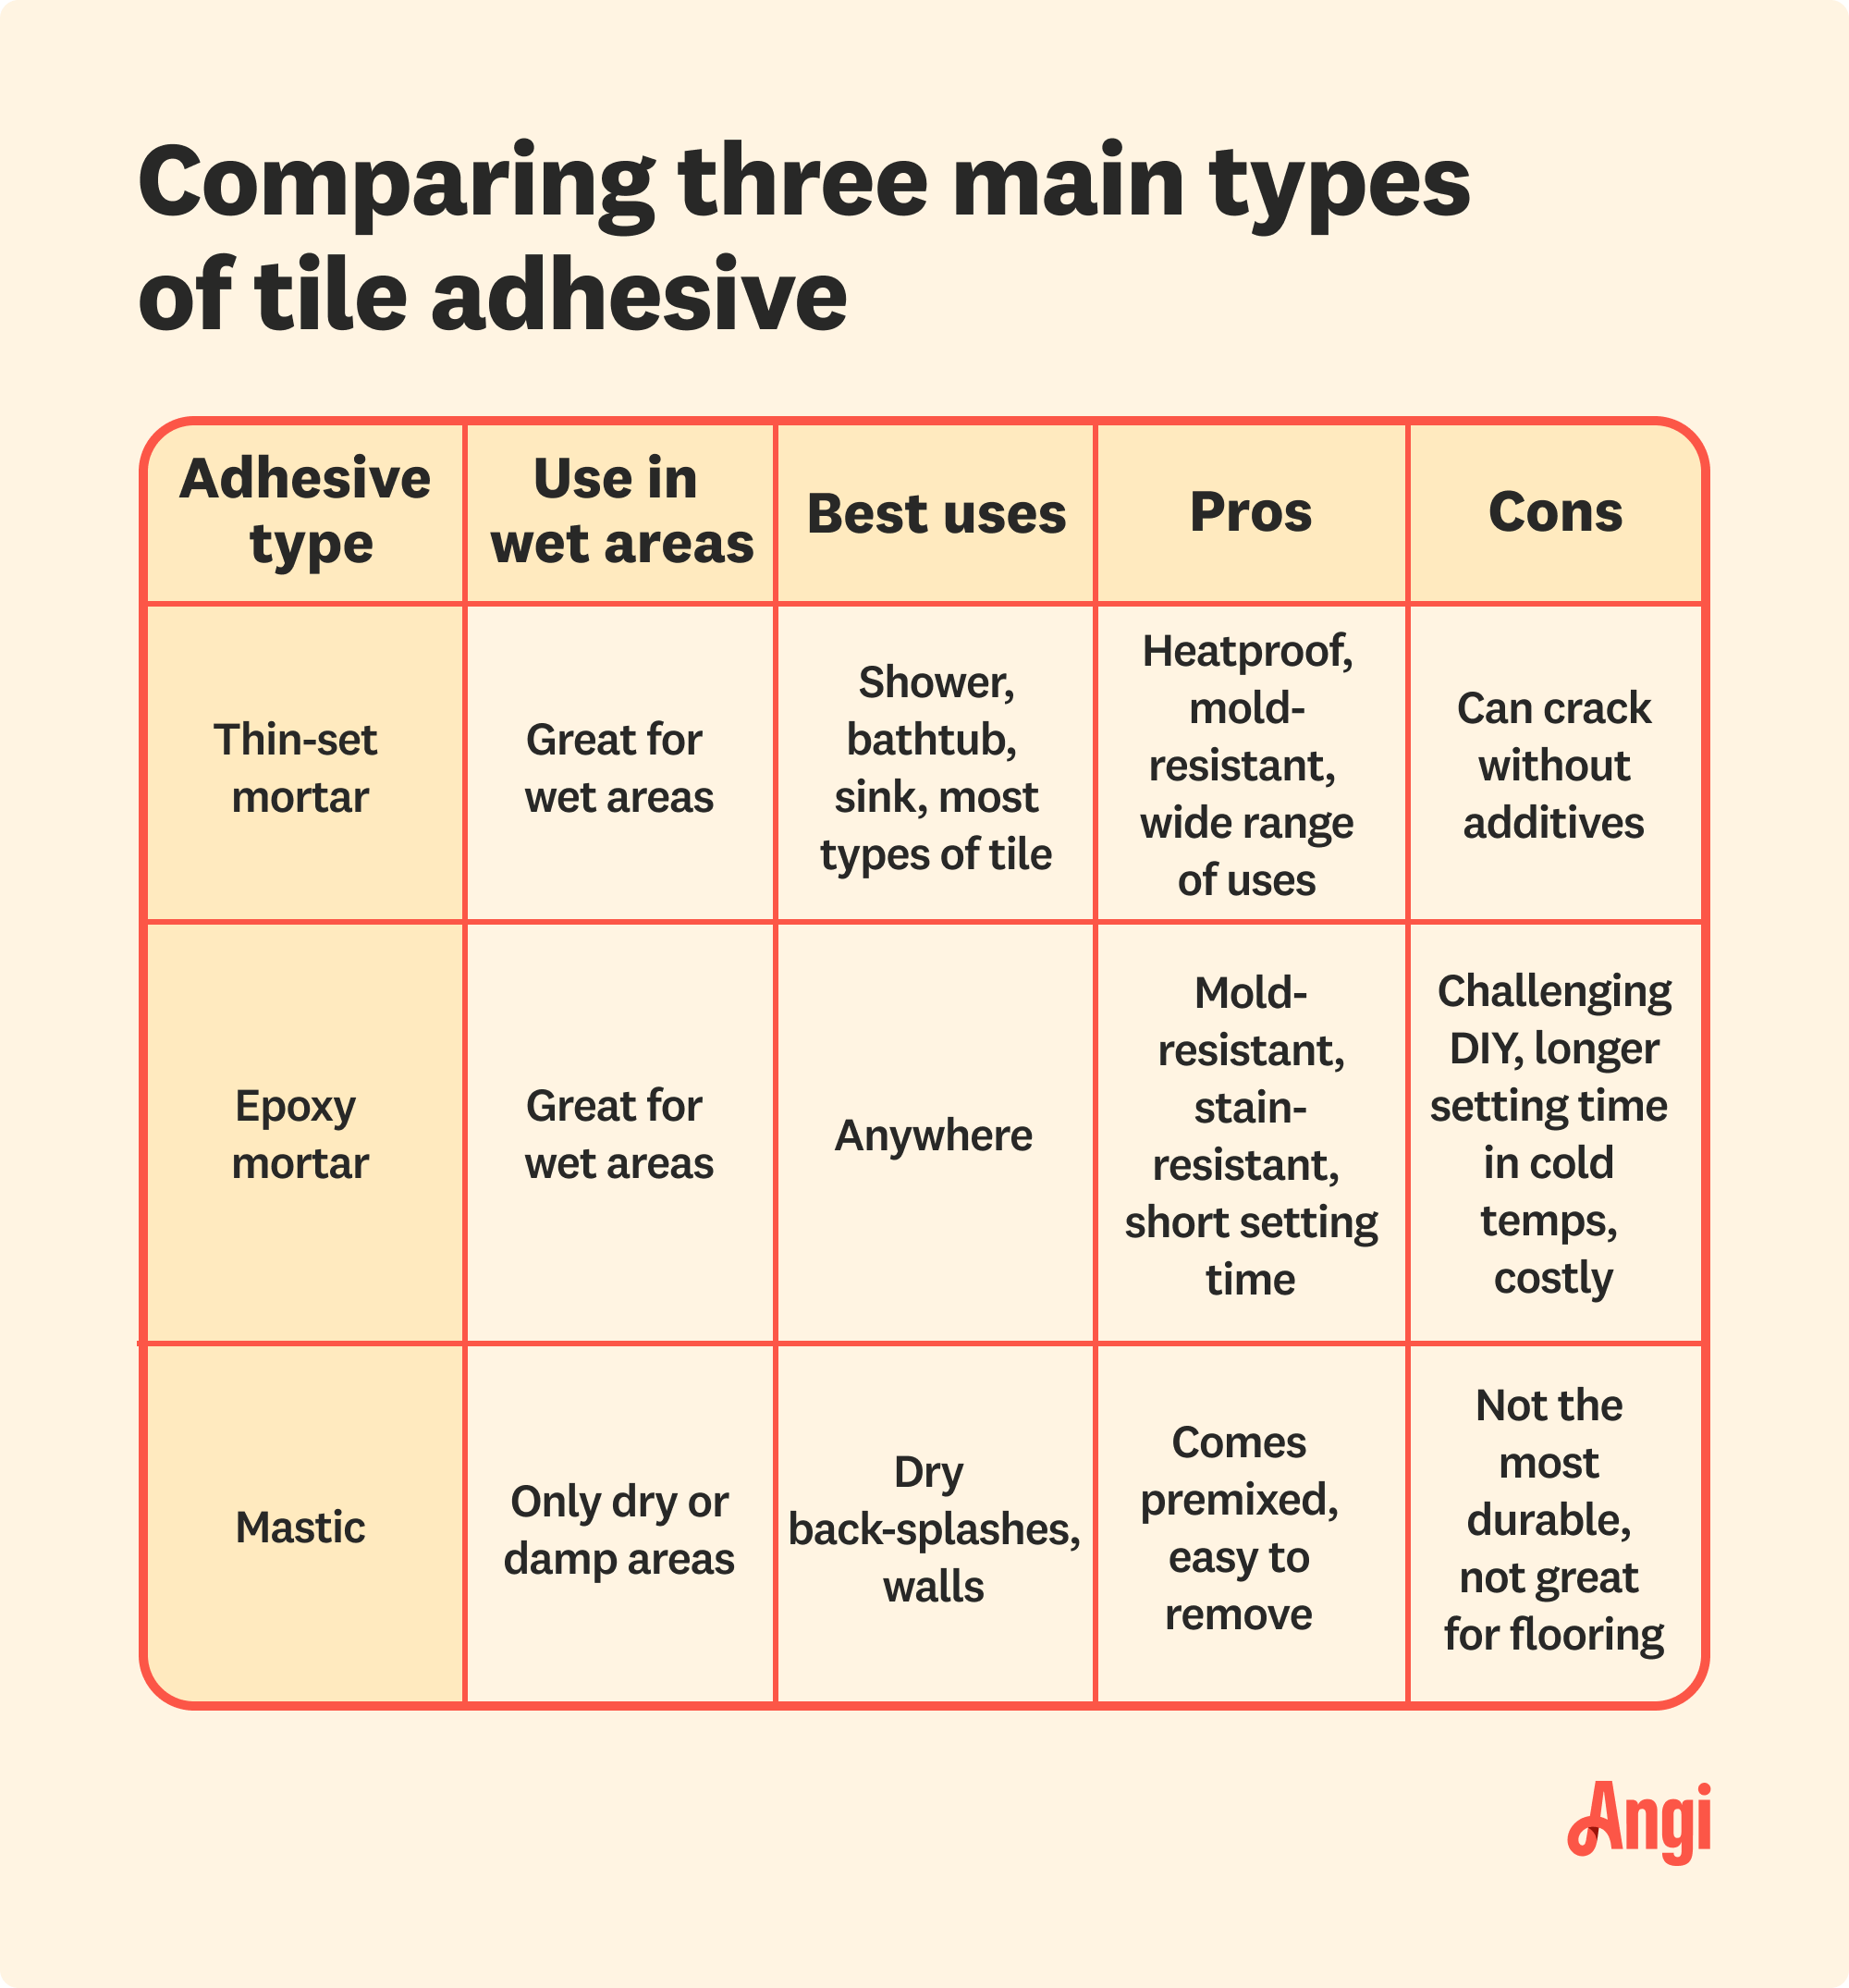
You’ll need mortar or thin-set, a type of mortar or tile adhesive, to attach the tiles to the backer board. Following the manufacturer’s instructions, mix only an amount of mortar you can use up within about 30 minutes. Otherwise, it will begin drying too quickly, and you’ll be left with wasted materials.
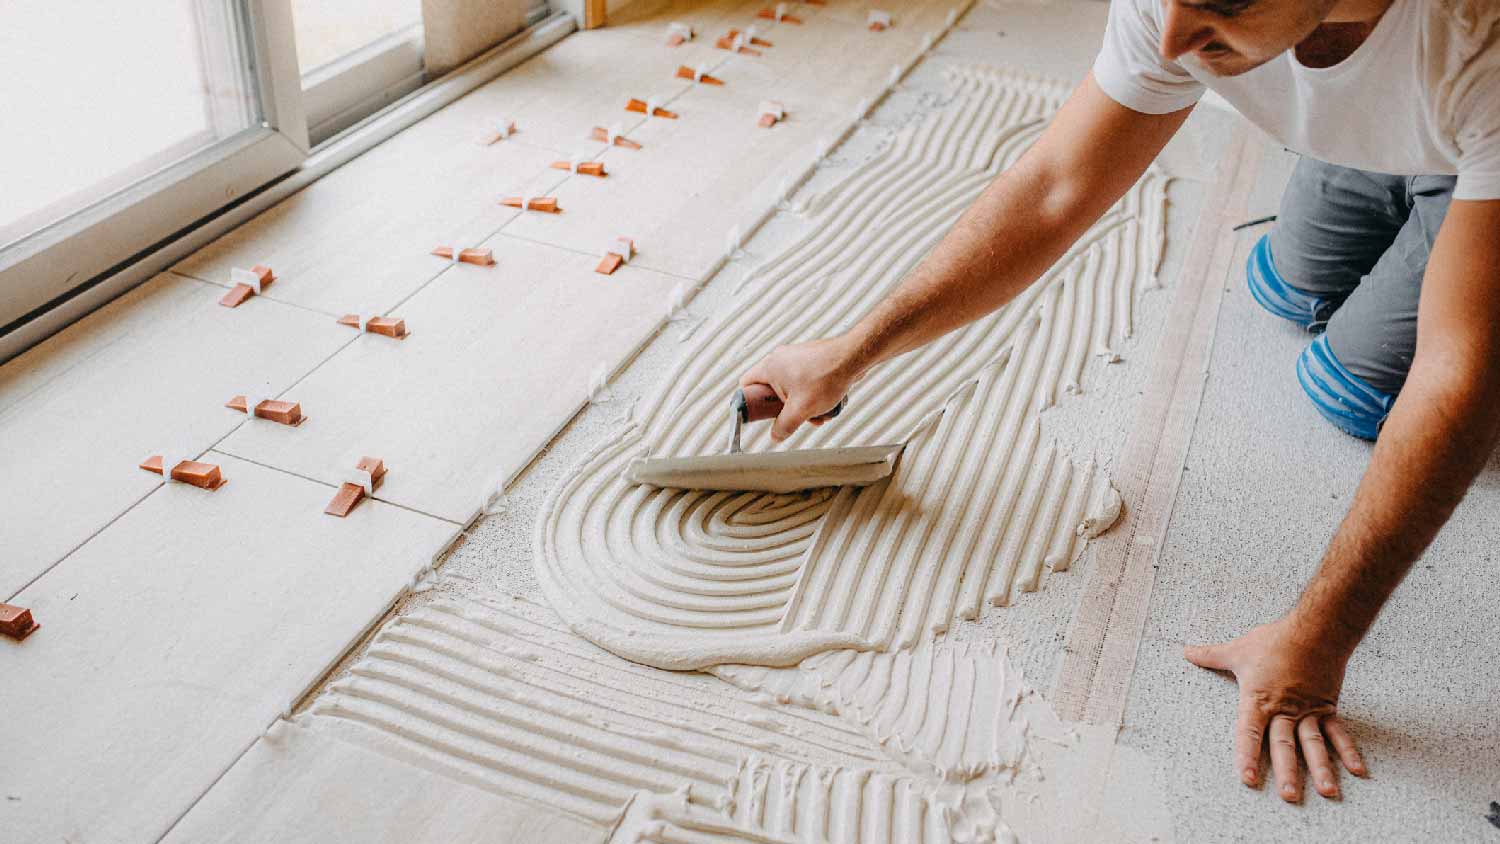
Follow the marked guidelines on the wall or floor, starting along the center lines. Apply mortar or thin-set over the backer board with a notched trowel, spreading it evenly. You’ll want to work in areas of about 3 square feet.

Now it’s time to watch your design come to life by installing the new bathroom tiles.
Apply mortar or thin-set to the back of the tile in a thin layer. Spread it with the trowel, then use the notched edge to create a textured surface. Place the tile on the backer board according to the guidelines. Position tile spacers between tiles to make room for the grout.
If you didn’t already cut tiles when arranging them in step five, use a wet saw and tile nippers to cut tiles to fit in tight spaces, like around cabinets or in corners. Leave the tile and mortar to set for at least 24 hours.
The hardest part of the job is done, and it’s time to add the finishing touches. Before you apply the grout, make sure to remove the tile spacers.
First, mix grout by following the manufacturer’s instructions. Use a trowel to spread grout evenly over the tiles, filling the spaces between the tiles. Work in small sections.
With a damp sponge, and a bucket of water nearby to rinse out the sponge, wipe away excess grout every three to four minutes to keep it from drying on the tiles. Refresh the water frequently. Let the grout set for 24 hours or up to 72 hours for floors.

Now that the grout is dry, you can clean the tiled areas and apply caulk around the bathtub, other plumbing fixtures, and in the corners of the room. Remove plastic sheets and tape and protective plywood boards. Once the caulk has dried—the time will depend on the manufacturer’s instructions—you’re ready to soak in the tub and admire your handiwork.
Retiling a bathroom yourself costs about $1,200 to $1,400 on average. Most of the cost is for supplies, like tile, mortar, and grout. The cost will be much higher if you don’t already have a well-stocked tool shed with circular saws, trowels, and utility knives. This factor is the benefit of hiring a professional tile installer near you, which adds about $600 to $800 to the cost but saves you in buying or renting tools you don’t already have.
Tile installation can also be difficult, especially when it comes to cutting tiles to fit into tight spaces. Hiring a pro to retile the bathroom ensures that the tiles are even and as durable to heavy traffic and moisture as possible. They can also do the job much more quickly than your typical homeowner.
From average costs to expert advice, get all the answers you need to get your job done.

The cost to install porcelain tile depends on materials, size, and whether you DIY or hire a pro. This guide will help you choose the perfect porcelain tile for your home and budget.
.jpg?impolicy=leadImage)
Sealing your grout goes a long way toward extending its life span. This guide breaks down the cost factors for sealing grout, including size, materials, and labor.

You're planning a bathroom remodel, but how much will it cost to retile your bathroom? Read this guide to find out.

Goodbye dingy grout, hello pristine tiles! Learn how to keep white grout clean like a pro with seven grime-busting tips.

Choosing between different types of tile adhesive is an important part of any tile job. Here’s how to pick the best tile glue for your project.

Calculating how much thinset you need involves multiple steps. Use this guide to determine exactly how much of the bonding material you’ll need.