
We’ll cover the cost of replacing a shower or bathtub drain, whether you can tackle this repair yourself, and what other projects to consider along the way.
Replace a shower valve and get it back in working order with these steps


Maybe your showerhead has sprung a leak, making your shower time not nearly as satisfying—no one likes losing precious water. Perhaps you noticed the shower is whistling, or you can’t get a comfortable water temperature—it’s always too hot or too cold. A faulty or worn-out shower valve might be the culprit.
Follow these steps to learn how to replace a shower valve and get your shower working like new again. Keep in mind, this is an advanced-level DIY that involves plumbing, so don’t hesitate to call a pro for help. Incorrectly changing the shower valve can lead to costly repairs down the road.
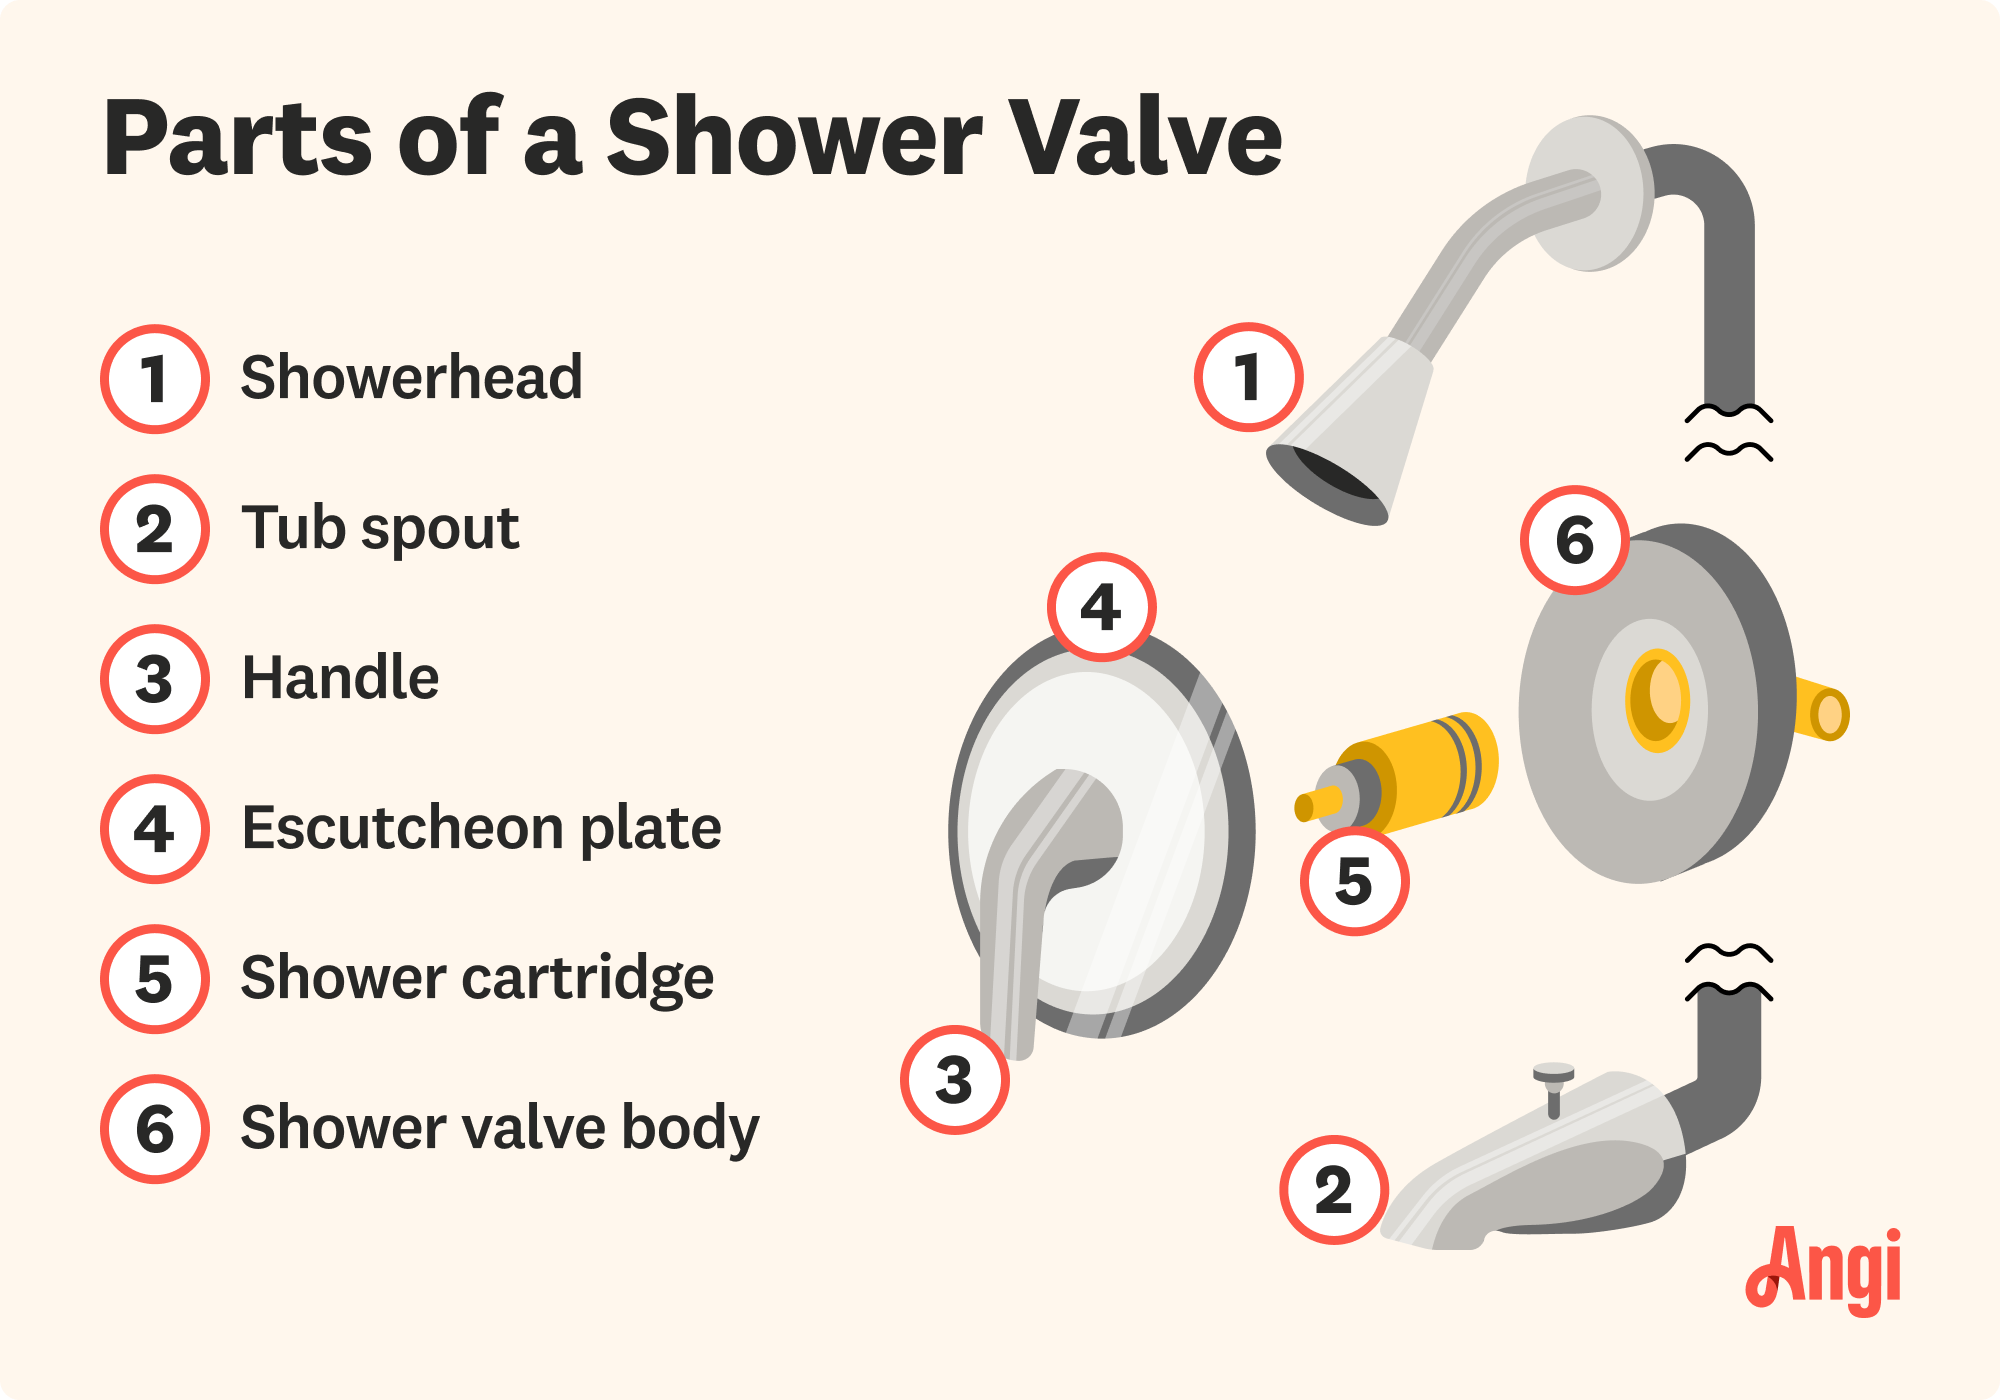
To find the right replacement valve, you’ll need to know the brand and type of faucet and familiarize yourself with the parts of a shower valve. If you can’t find any markings, you’ll need to take apart your faucet and take measurements or bring it into your local supply store and ask for help. Additionally, be sure to purchase the same brand and the correct fittings or adaptors, depending on the type of piping in your bathroom.
“You’re going to do way better at the local supply house, not the hardware store,” says Joseph Wood, Expert Review Board member, Master Plumber, and Founder of Boston Standard Company. “And you should go to one that sells the same brand of fixture you're trying to get.”
Changing the shower valve cartridge (the internal mechanism) will solve the problem most of the time, but you might need to change the entire shower valve assembly. Call a plumber near you to take on the job if you’re upgrading to a different system.
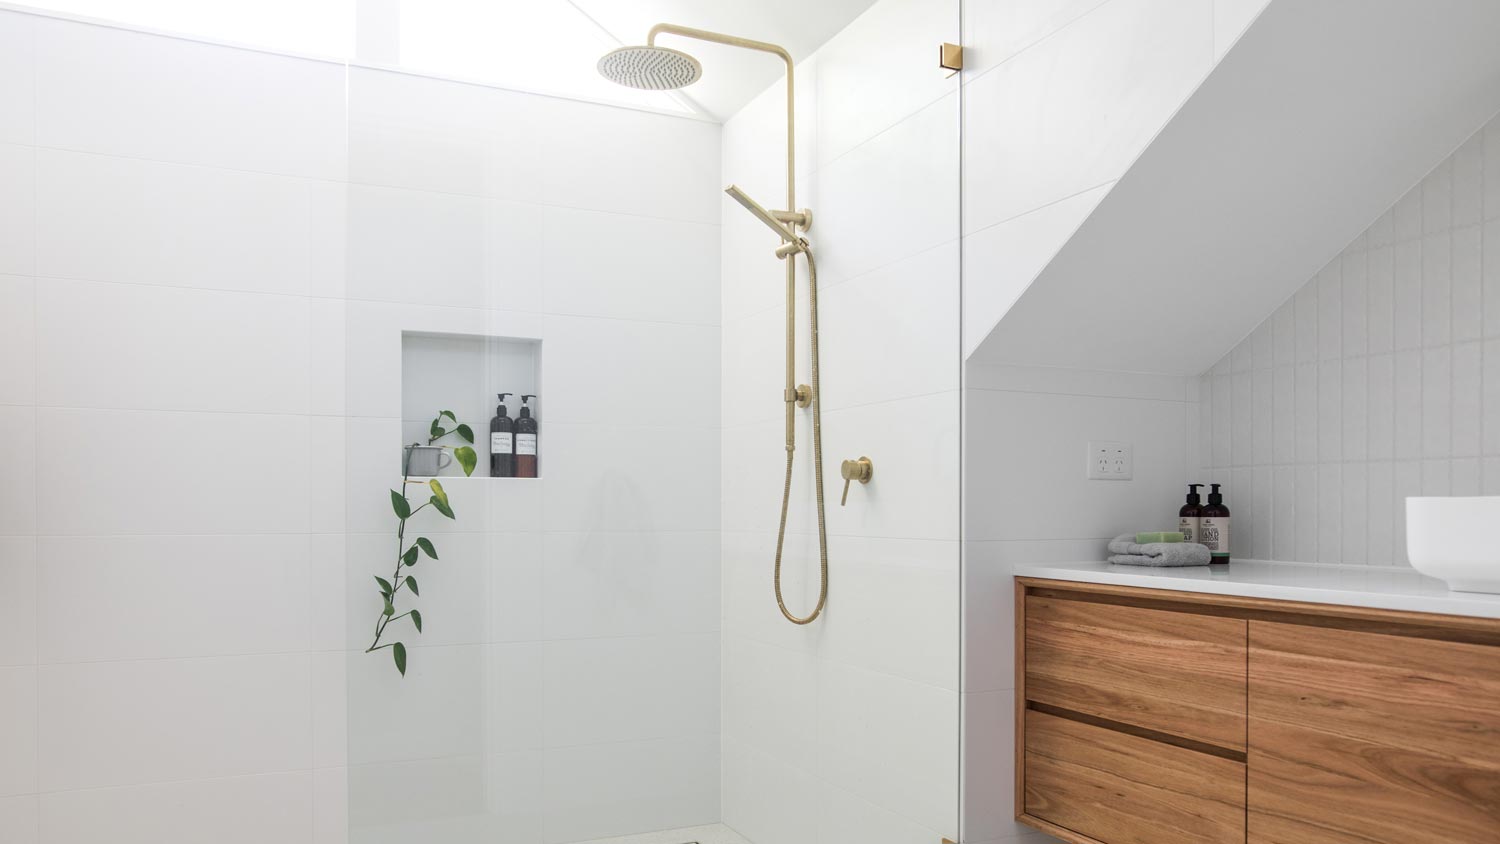
Cover the shower or bathtub drain with a cloth or a drain stopper. You don’t want to lose any important screws or parts down there, not to mention risk clogging your drain.

Use the screwdriver (or the Allen wrench, depending on the screw on your shower valve) to unscrew the shower handle. Sometimes the screw is underneath the decorative shower handle cap. Keep your handle, screws, and any caps to the handle together so you can easily find them when it’s time to put the shower back together.
Take off the trim plate covering the hole in your shower wall (the shower-side wall, to be exact). If there’s caulking between the plate and the shower wall, cut through it with the utility knife. Now you should be able to see your valve.
Here’s your chance to give the shower handle and trim plate a good cleaning. Soak them in vinegar until it’s time to put them back on.
Shut off the water to your shower. There should be a shut-off for the hot and cold water on each side of the valve. If you can’t locate them, go ahead and shut off the main water valve in your home until you’ve finished this project. If you use a well, turn off the well pump circuit breaker.
If the existing hole behind your trim plate is smaller than 12-by-12 inches, you may need to cut a larger hole with the hacksaw to access the valve. First, measure your trim plate using the tape measure. Make sure the new hole you create isn’t bigger than the trim plate. Otherwise, it won’t cover the hole when you put it back together.
If your existing shower valve has a cap, remove it by taking out the screws on either side. If there’s a valve clip at the top of the valve, remove it using the needle-nose pliers and set it aside. Check to see if your existing valve also has a retaining nut that holds the valve in place; if it does, hold the valve while you unscrew the nut with the wrench and keep it with your valve clip.
If changing the shower valve cartridge alone isn’t going to cut it, you have to replace the entire shower valve assembly. You’ll have to access the valve from the other side of the shower wall. Using the drywall saw, cut out a section of drywall (about one foot by one foot). The valve will be attached to a stringer (a supporting board between the studs) that you’ll have to cut loose with a reciprocating saw.
Disconnect the shower valve from the pipes running to the shower and the hot and cold lines. If you have copper pipes, cut the pipes with a tubing cutter.
Connect the piping to the new shower valve using the correct fittings, connectors, or adaptors. You may have to cut new piping to attach to the valve. Follow the instructions that came with your replacement shower valve for guidance.
If you have PEX piping, wrap the male threads with plumber’s tape before attaching them to the female fittings. Next, attach couplings and pipe-crimp fittings. If you have copper pipes, you can solder the piping or use compression fittings.
The instructions will also specify where to position the valve so it’s the correct distance from the shower wall and the drywall. Depending on the shower valve you purchased, you may have to install the shower valve cartridge as well.
If you replaced the entire valve assembly, reattach the stringer between the studs in the wall to provide support.

Replace the cap, valve clip, and retaining nut as needed to secure the valve back into position.
Turn the water back on at the hot and cold shut-off on each side of the valve or at the main water valve for the home. Check all connections for possible leaks before turning the water back off.
If you replaced the entire valve assembly, you’ll need to repair the drywall covering the assembly and the stringer.
Create a patch with a piece of drywall the size of the hole. Attach furring strips with screws, and screw the patch into the strips. Apply joint tape around the edges of the patch and cover the entire patch with joint compound. Once it dries, sand and paint the area.
Replace the trim plate and the shower handle. If necessary, apply more caulking around the trim plate to make it watertight and look good as new.
Turn the water back on and enjoy your functional shower.
There’s a learning curve when replacing a shower valve. This job requires a deep understanding of your shower’s plumbing. It’s a good idea to hire a licensed plumber, but if you do plan to replace your valve DIY, keep an eye out for these common mistakes:
Choosing the wrong type of valve: There are different types of shower valves, including mixing valves (which control the flow and temperature of water) and diverter valves (which direct water in a tub-shower combo). Make sure you purchase the same type of valve you’re replacing.
Choosing an incompatible valve: Even if you choose the right type of valve, you’ll need to choose one that’s compatible with your shower controls. For example, pressure balancing valves (the most common) work with a single-handle control, while thermostatic valves use a dual-handle design. Check your existing valve and try to get an exact match.
Incorrect valve placement: The shower valve height may vary from shower to shower. If you already have the rest of the hardware installed, you’ll need to match the exact height and depth of the old shower valve. Otherwise, it will not line up correctly with your piping and the trim won’t sit flush against the wall.
Improper sealing: Shower valve trim comes with a gasket to keep it watertight, but you’ll still need to seal the trim (escutcheon) plate with caulk. If this is done incorrectly, water can leak behind your trim, foster mold growth, and damage your wall and piping.
Unless you have the required plumbing experience, you should always hire a local shower installer or a plumber to replace your shower valve. This job requires precise measurements and knowledge of different shower valves and parts. It’s not easy for a DIYer, and a mistake can cause serious water damage that will cost more to repair than hiring a pro in the first place.
If you hire a pro, the cost of replacing a shower valve is $150 to $550. You’ll save $100 to $300 by doing this job on your own, but only if you do it correctly.
Jason has helped me with multiple household projects, with the most recent being new door installation. He has always showed up on time and organized and has done an incredible job! Jason is very professional and he's now my go-to for anything around my house that needs to be fixed or...
Cole has been handling plumbing and general contracting for our four properties over the past three years, and he’s always done a great job. Most recently, he installed a sink and countertop in our retail store where none existed before, and it turned out exactly how we needed. He’s...
 ANB Renovations LLC
1st Choice Renew is simply the best! We hired them for a complete home renovation, and they transformed our space into something truly amazing. The team attention to detail and commitment to quality were evident throughout the project. They were easy to work with, very responsive, and always...
This company went above and beyond with their work, chimney sweeps are usually pretty messy, but the clean up was spot on.!! Josh explained every thing that he was doing, and the things that he was checking to make sure the chimney was safe for me and my family. He was very professional,...
 Supreme brick & chimney
Custom Paint Jobs LLC turned our outdated bathroom into a modern masterpiece.
Excellent customer service and knowledge. I was recommend to him from my neighbour. My front door and window came in great and were installed beautifully perfectly, I m very satisfied with their excellent work, so decided to order one more big bow window for my living room. I cant wait for...
If I could give 10 stars for Kitchen Tune Up, I would. I cannot say enough good things about my experience with Kitchen Tune Up and the entire team involved in the process of my kitchen project. They went above and beyond as far as service and quality with my cabinets, paint, countertops, and...
It was wonderful working with Yordy and his team. They were very professional and are experts in what they do. They have completed the work on time, with better quality and with in fairly reasonable price. We just started with backsplash work , but liking his work, we went on to provide...
We were having 2”x 2” tile installed . There was a small installation error and the new additional replacement tile was from a different lot and the colors didn’t match. Joe assured us that he would rectify everything , which he did without hesitation. We decided to go with the 18” x 36” tile...
 CarifaTile
They work that 360 did on my kitchen cabinets is nothing short of amazing. I still cannot believe the difference from before and after. Jon and Jeff were both so incredibly professional throughout the whole process and their communications with me were constant and consistent. These guys...
 360 Painting Columbus
From average costs to expert advice, get all the answers you need to get your job done.
We’ll cover the cost of replacing a shower or bathtub drain, whether you can tackle this repair yourself, and what other projects to consider along the way.
Got temperature issues in your shower? You may need a new shower cartridge. This guide will help you understand shower cartridge replacement costs.

A main water shut-off valve controls water flow for your entire home. Here we break down the cost to replace a main water shut-off valve.
What is a shower valve? Discover how shower valves work, the different types, and learn how to choose the best one for your bathroom.
Is the water pressure in your shower lacking? Here are common solutions to increase it so you can enjoy your showers again.
Constant dripping and a stiff shower handle can be the first (but not last) signs of a bad shower cartridge. Learn other signs and how to fix the issue.