

•
Discover the average stone restoration cost, including price ranges and key factors, to help you plan your next home project with confidence.
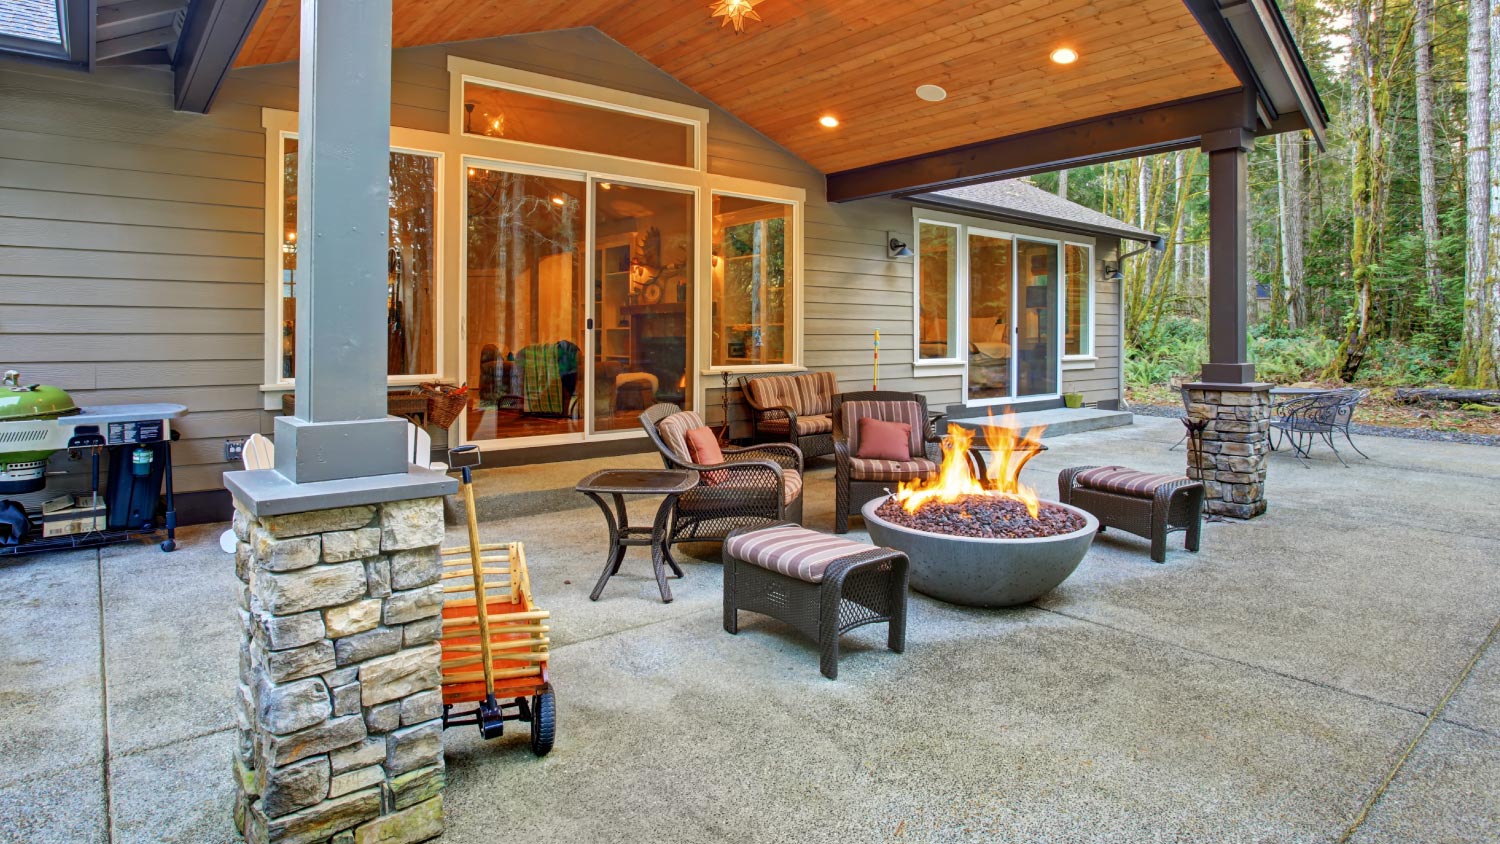
Gather ‘round and learn how to build your own outdoor fireplace


This project requires a lot of experience, so we don’t recommend DIYing it. Hire a pro with the special skills and tools necessary to complete the job safely.
A backyard fireplace is the perfect warm and toasty gathering spot, a means for roasting marshmallows, and a way to get more use from your outdoor space when the nights get nippy. If the cost of a pro installing your outdoor fireplace or a premade kit burns you up, you can save big by going the DIY route.
But know this: You should have some masonry knowledge if you want to tackle this project, as the planning and execution can be challenging without it.
Ready to learn how to build an outdoor fireplace? We get into s’more detail below.
Before you begin the build, check in with your local permit office to see if there are any codes or restrictions to abide by. Certain municipalities also require building permits for outdoor fireplaces. Either way, you don’t want to find out you needed this important documentation after you’ve already completed the project.
Prior to hitting the bricks, you’ll need a solid plan to help you figure out what materials you’ll need (and how many). Measure out the area you’d like to fill and create a rough sketch with the dimensions.
If you don’t already have a concrete slab to build on, prepare one by digging a ditch, roughly 6 inches to a foot deep. You can check with local building codes if you’re not sure. You need to dig it deep enough to set the foundation below the frost line.
Once you’ve dug the trench, tamp the soil down so that it’s compact and level. Then, add a layer of gravel or crushed aggregate between 4 and 6 inches deep. Install temporary batter boards to ensure your foundation is level; the top of the batter boards should be the elevation of the top of the concrete base you intend to pour.
When you’re ready, mix and pour the concrete, and allow it to cure for 24 hours.
Note: If you’re installing on an existing concrete foundation, you can skip this step.
Referring to your drawing and dimensions, begin laying the cinder blocks that shape the wood box of your fireplace. Use your masonry trowel to spread the mortar on the foundation before carefully laying the blocks.
Keep the center hollow for the fire box and create a “U” shape. Mortar the first layer of blocks to the concrete, then stack and mortar more blocks until you reach your desired height.
A lintel acts as a support beam that runs the length of your fireplace. Cut your steel angle to the right size (or purchase the exact length if it’s available).
Lay the lintel across the front of the wood box for support. It should extend at least 4 inches over each side for proper support. If it’s not level, you can add coins as shims or sand under one side so it sits flush.
Using mortar, lay your chosen hearthstone in the firebox and out from the lip of the fireplace opening. It should extend 16 or more inches from the front and at least 8 inches to the sides. The stone should be fire-rated and at least 4 inches thick.
Use a rubber mallet to ensure the hearthstone is level before the mortar dries.
Stack fire bricks on top of the hearth blocks, adhering to the interior walls of the fire box using refractory mortar, which is designed to withstand extreme heat. You may need to cut some of the fire bricks to fit the corners and edges.
Allow the refractory mortar 24 hours to cure.
Cut the second steel angle so it runs the length of your fire box. Place this across the front of your fire box for added support. Again, there should be a 4-inch overhang on each side, and make sure it is level.
Once your fire box is complete and the mortar has set (at least 24 hours), you can construct the smoke chamber. The smoke chamber funnels smoke from the wide fire box through a chimney flue above.
To construct it, stack rows of blocks on top of the U-shaped fire box. For each new row, inset the blocks 2 inches in on the left and right and 4 inches inward at the front, building on the lintel (the back row should stay plumb).
Continue building until you’ve reached the size of your chimney flue.
To build the flue, add more layers of block. Ensure each layer is square and level all the way up.
The chimney flue should be at least 2 to 3 feet higher than the fireplace opening, but you also want it to be several feet above any nearby structures or seating areas to avoid issues with smoke draft.
Then add the chimney cap to the top of the fireplace.
Cut your cement board to fit around the exterior of your fireplace. Securely mortar down each piece of cement board.
After you’ve laid down and mortared your cement board, nail it into place with masonry nails and a masonry hammer.
Your last step is laying down your veneers of choice. Add a layer of mortar to the cement board and set your veneers firmly in place.
Manufactured stone veneer is super heat resistant, so it’s a great choice for this purpose.
Before you set your fireplace on its maiden voyage, allow all your materials to dry fully. Then, examine the fire box and seal any cracks if needed.
If reading through those steps left you feeling overwhelmed, you’re not alone. This project is best suited for those with prior masonry knowledge. From the design to building the actual structure, it’s not something the average DIY-er can typically pull off.
You could also go another route; a firepit costs less than an outdoor fireplace, plus it is much more DIY-friendly (and will toast marshmallows all the same). These can be gas or wood, though gas varieties require the knowledge of a professional. Either way, there are tons of unique fire pit ideas, so you can still create a gorgeous design that will light up your outdoor space.
Professionally installing an outdoor fireplace costs quite a bit more than the DIY, but it’s worth the investment if you’re dead-set on an outdoor fireplace. This is a build you shouldn’t attempt unless you’re totally confident that you can safely accomplish it. When in doubt, reach out to a local mason.
Building an outdoor fireplace costs between $1,500 and $8,000, and labor makes up roughly 80% of that project cost. That means you could save between $1,200 and $6,400 by constructing it yourself—but it’s back-breaking, time-consuming work, and easy mistakes could cause structural issues and major safety hazards.
From average costs to expert advice, get all the answers you need to get your job done.
Discover the average stone restoration cost, including price ranges and key factors, to help you plan your next home project with confidence.

Door or window lintel replacement costs $400 on average, but there are ways you can save. On the other hand, complicated work will increase costs considerably.

The cost to replace brick front steps depends on the type of brick, square footage, pattern, and more. Learn how much you may spend on this project.
Learn about the five common causes behind black stains on your brick and how to remove them effectively, either by yourself or by hiring a pro.

Discover the average stone fireplace cost for your home. Learn about installation prices, cost factors, and ways to save before starting your stone fireplace project.
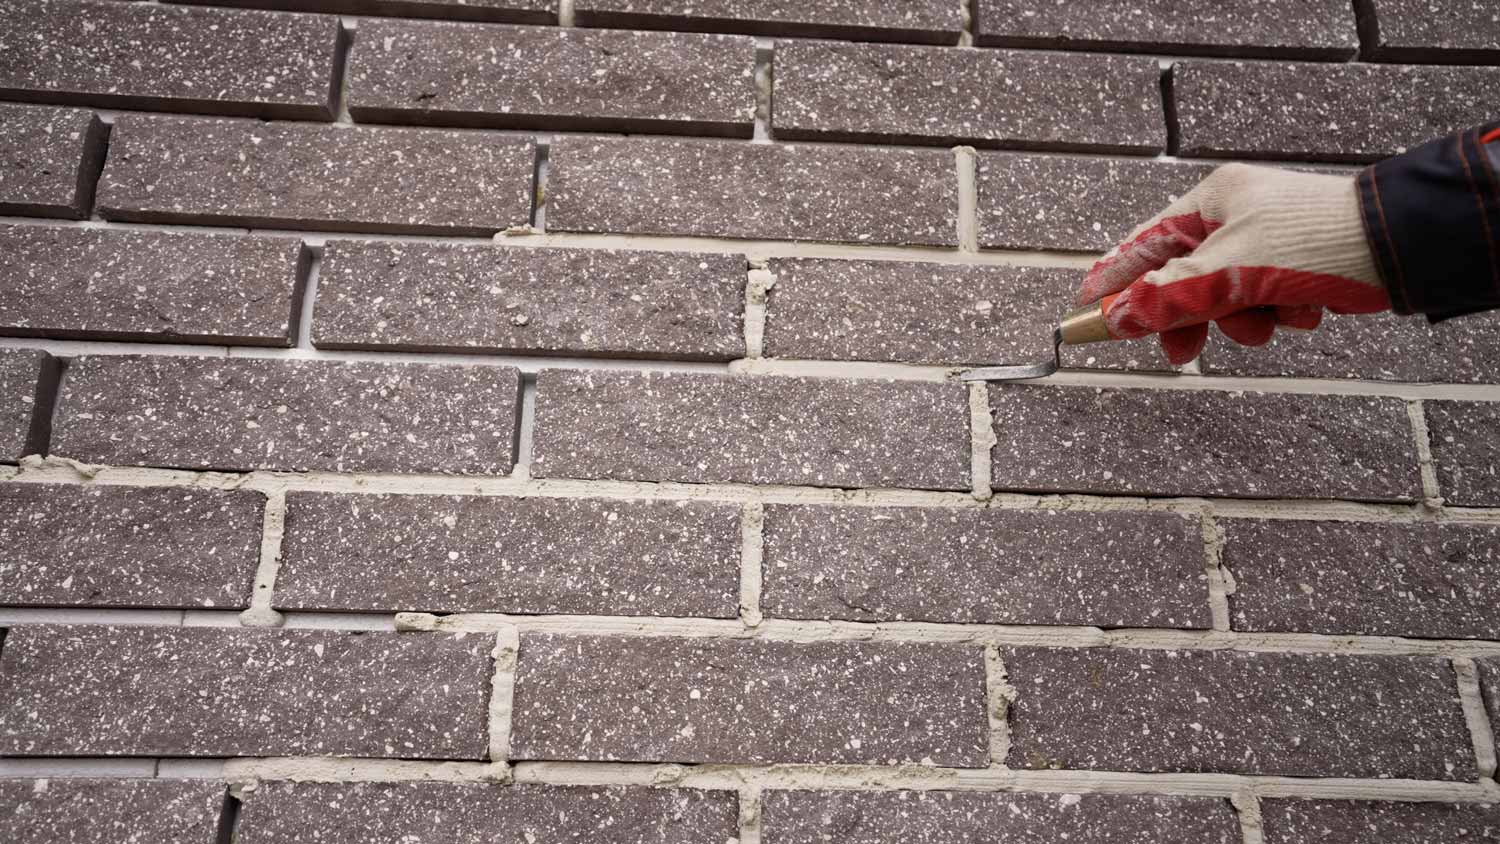
Fixing brick mortar is easier than most homeowners think. Use this guide to walk you through getting the job done with a few dollars and a few hours.