
Concrete may be strong, but it's surprisingly sensitive to extreme temperatures. Here's what to know about pouring concrete in cold weather.
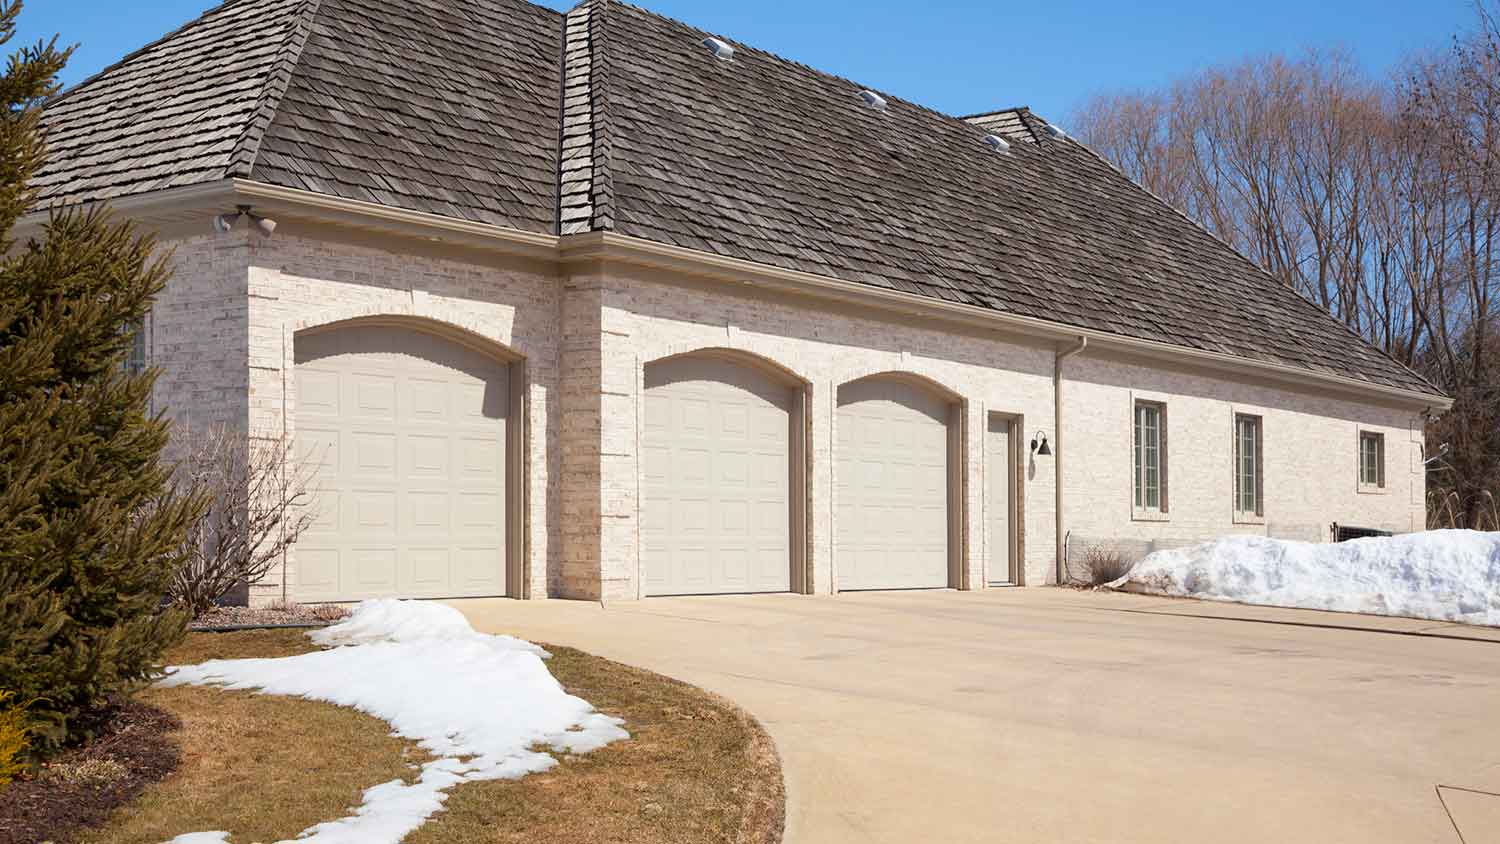
To truly know your house from top to bottom, start with the foundation below


A concrete foundation needs proper depth based on your soil conditions, with 3 feet working for level ground and more required for hillsides or high-moisture areas.
Expect to pay $4 to $25 per square foot for building permits and $3,250 or more for the concrete foundation project, depending on your home's size and site conditions.
Your concrete slab requires 4 to 6 inches of compacted base material under it, plus proper rebar placement and a waterproof elastomer coating after curing.
Hiring a local general contractor removes the guesswork from excavation, soil evaluation, and concrete pouring, ensuring your foundation supports your home correctly for years.
Every great house starts with a strong foundation, and there are several essential steps to correctly pouring a concrete slab or foundation. It's crucial that you choose the right concrete, waterproof the foundation, and obtain the proper permits. Whether you build the foundation yourself or hire a contractor, it's wise to learn the ins and outs of the job so you can trust in your home's stability.
Before learning how to pour a concrete foundation or slab, here are some tips to prevent mishaps.
Before you dig a foundation, you'll have a piece of land and a vision of how you'd like your home to look. But before pulling up earth, determine how deep a foundation is required. On level ground with good soil conditions, 3 feet is a good estimate. For high-moisture soil or homes built on hillsides, you'll need more. Consult a local contractor or structural engineer to determine exactly how much.
You or your contractor must obtain the proper local building permits, which will outline how close to the lot lines you’re allowed to build. Otherwise, your municipality could give you the bad news—long after pouring the foundation—that you need to make major changes to your house. Always obtain the proper paperwork. The cost of your permits should be factored in when determining the total cost to build your foundation (typically $4 to $25 per square foot).
You and your contractor must do some homework before selecting the right concrete mix and determining the volume of concrete needed. Not enough water or too much in the mix can cause it to dry too quickly or not quickly enough, which could cause the foundation to settle and crack. Keep in mind that local humidity also affects the drying time.
High-strength concrete mix is the most popular choice for foundations, as it has exceptional durability. Your concrete company can recommend the best mix for your needs.
Wet concrete can irritate or even permanently damage your skin, so anyone working on this project should wear full-eye protection, long sleeves and pants, and rubber gloves. Consider tall rubber boots if you have to wade into wet concrete. If your clothes get saturated with cement, remove them immediately, thoroughly rinse your skin, and change into clean clothes.
As noted, your foundation is a critical component of your home’s construction. It may take two to six weeks to build and will likely be the most time-consuming part of your home build, but Rome wasn’t built in a day, right? Remember, your slab will still be soft for a day or two after curing is complete, so be patient and don’t build on top of it right away.
Now let’s get into the steps for pouring the concrete in more detail.
Start by clearing the site of any trees, shrubs, underbrush, stumps, large rocks, or pieces from any former construction. Position the slab site parallel to the lot line, then drive four stakes into the ground to roughly indicate the site’s corners.
"Be extra careful to remove all the stumps and large roots. Over time, they will decompose and cause sinkholes if not carefully removed and properly filled in with new compacted material," says Matt DiBara, Angi Expert Review Board member and owner of DiBara Masonry.
Next, you’ll create forms for the foundation's footings, which are wooden frames used to hold the concrete in a particular shape when poured. Anywhere from 16- to 20-inch-wide footings are enough to handle the weight of a typical home. You may need larger footings and forms if you live on volatile ground or your home is expansive.
Cut boards of forming lumber to the length of each side of the site and nail them to your wooden stakes. Brace the forms with additional vertical wooden stakes and kickers angled into the ground every 2 feet around the outside. Measure carefully to ensure that you set each board at 90 degrees from the ones it’s nailed to. Save the straightest boards for the top form so the edge is nice and straight.
Using a line level and string or a builder’s level, measure down in multiple spots to see whether the site is sloped. Hire a professional excavator or use a skid loader to add or remove soil, build up low sides, or dig out high sides. Add a solid layer of gravel fill on top of your soil for the slab to sit on.
Pack the fill down solidly using your plate compactor, sloping it down in a 12-inch deep by 12-inch wide trench along the perimeter so the edges of your slab will be thicker. Cover the fill with the plastic sheeting.
Depending on the slab’s thickness, you may need rebar to reinforce the concrete. With your fill in place, set metal stakes around the perimeter of your wooden forms, about 4 inches in. This will form a second perimeter for two rebar bands, strengthening your slab.
Cut the rebar using a metal-cutting blade, bend it, and splice lengths together using tie wire until you’ve created two rebar perimeters set on top of each other. Next, lay a grid of rebar to partition the slab. Space the rebar 4 feet apart over the plastic sheeting, running the length and width of your site. Connect the intersections with tie wire.

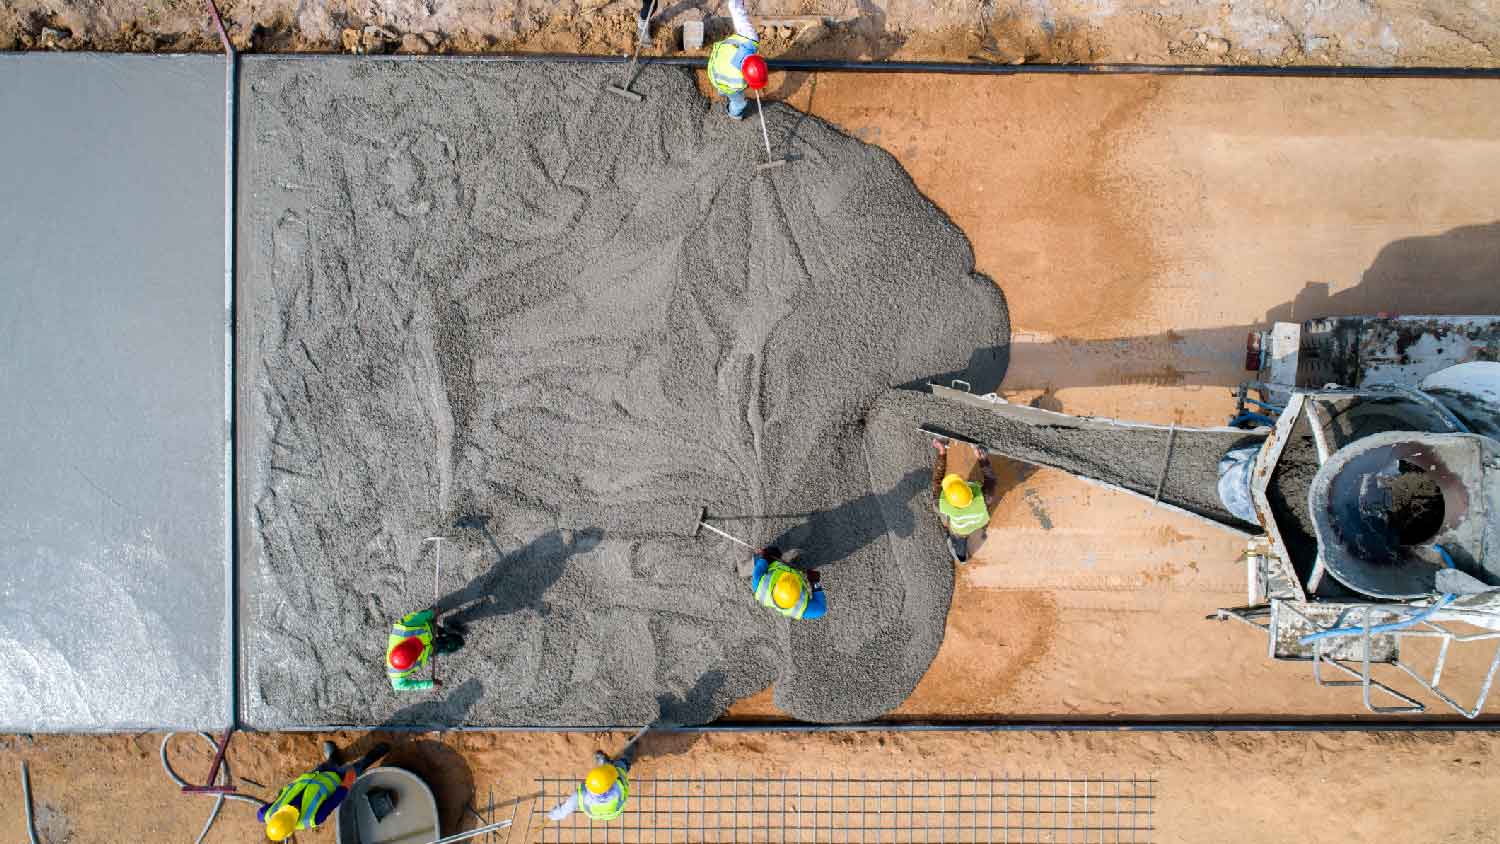
Arrange to have concrete delivered on a day with a mild forecast. Avoid hot days, high winds, and rain. Check again to ensure that your forms are square, level, and well-braced, and have a few strong friends or contractors on-site to help with the pour. Concrete will be poured directly into your forms, which should keep it contained.
Drag a long, straight 2-by-4 screed board across the top of your forms to level the concrete, also known as screeding. It’s best to check your screed board using a string line to ensure it’s completely straight. Simply hold the spring line from end to end to verify. Make multiple passes until the concrete is flat.
Have one of your friends or contractors add or remove concrete in front of the screed board as needed as you pull it. Next, push a bull float across the screeded concrete to flatten it, keeping the leading edge slightly elevated.
Pull the float back across when you reach the far side of the form. Do this up to three or four times across the entire surface. Water may bleed out onto the surface, so wait for it to disappear and for the slab to harden slightly before rounding off the slab edges with an edging tool. Work the tool between the slab and the forms until all edges are smooth.
Wait until the concrete can support your weight to finish the surface. Kneeling on squares of foam insulation, use a magnesium float to smooth out bumps, dips, and pebbles left by edging and leveling. You may need to put some pressure on the float if your concrete starts to harden.
To achieve a smooth finish, follow up hand floating by troweling with a steel trowel. For a rougher, nonslip finish, skip troweling and drag a push broom over the surface for a broom finish.
Your concrete slab should take between three and 10 days to cure, during which time you’ll want to keep it moist. This will allow it to cure slowly and develop maximum strength. Spray your finished slab with a curing compound in a regular garden sprayer, following your product’s instructions on the label. Once the curing process is complete, you can carefully strip off the forms.
Finally, you can waterproof the slab by adding a sticky rubber substance called an elastomer.
This substance retracts water so it can't seep into your walls or foundation and cause damage. Apply the elastomer with a roller or brush.
Most homeowners should not pour a concrete foundation as a DIY project. The integrity of the entire home rests on the foundation, and improper installation can lead to serious problems with every part of the house. Even if you have the required specialized tools and experience, you will still need to spend thousands on the cost of having concrete delivered by a pro.
You may save on the cost of a small concrete slab for a patio with a DIY project, but those savings aren’t worth it for a home foundation. You’ll find trained foundation contractors near you with the right knowledge and equipment to properly excavate your property, evaluate your soil, pour your concrete, and leave you with an attractive finish.
Positive experience. As previously stated, the replacement/repair could not be completed (no fault of the plumbing tech) b/c misinformation was rec?d by property management maintenance. Thanks to the plumbing tech for your efforts. Appreciate you!
 The Waterworks
Carpet repair done well. Scheduling was easy. Showed up on time.
I would recommend this company to anyone! He showed up on time, was friendly, completed a very difficult repair on our dryer vent cover, was responsive, and pricing was extremely fair and competitive. I would have him back to do any of our repairs or cleanings without hesitation!
Everything from initial contact to completion was absolutely top notch. We contacted the business during off hours to leave a message, and the owner still reached out to feel out the issue within minutes. We were scheduled and repaired within 48 hours. I cannot say enough about the...
 Supreme brick & chimney
Ace Fireplace Services came to the rescue for my chimney repair. They were quick to pinpoint the issue and worked their magic to fix it. My chimney is now in excellent shape, and I'm a satisfied customer.
 Ace Fireplace Services
On Sunday 2/26 I requested quotes via Angi from 4 refrigerator repair businesses. Northwest Appliance responded to me Monday morning (2/27) and my refrigerator was repaired by noon the same day. Great communication, they did everything they said they would. The technician had the parts on...
Great experience all together. Dog friendly, courteous, great results and honest with recommendations. Will certainly be using Cardinal in the future for any carpet repairs
Description says they handle window repair including rotten hardwood - they called me back right away but didnâ t leave a voicemail. I followed up 3 days later and they said they donâ t do that kind of work.
Chaz, the owner, was very responsive and he communicated with us throughout the entire process. The overall cost was in the middle compared to the three estimates we received. The installation crew was very professional. Chaz was considerate enough to send a crew back to our home to repair...
 Unique Hardwood Floor LLC
Great guys. Spend a lot of time repairing and prepping our walls before doing the new paint. Home looks great now.
From average costs to expert advice, get all the answers you need to get your job done.
Concrete may be strong, but it's surprisingly sensitive to extreme temperatures. Here's what to know about pouring concrete in cold weather.

Concrete forming is a key part of pouring concrete and nailing the look and strength you want. Learn what concrete forming is and how to do it.
Looking for the best time to pour concrete? Consider the temperature, the weather and climate in your area, the time of year, and sunlight exposure.
Knowing how to hire a foundation repair contractor can be the difference between a permanent fix and more problems. Learn what to look for in this guide.

Easily estimate how much concrete you need with our free concrete calculator. Convert dimensions to cubic yards or bags to avoid costly (and messy!) mistakes.
Building code foundation requirements are crucial to build safe structures. Read on to learn how adherence to guidelines ensures stability and resilience.