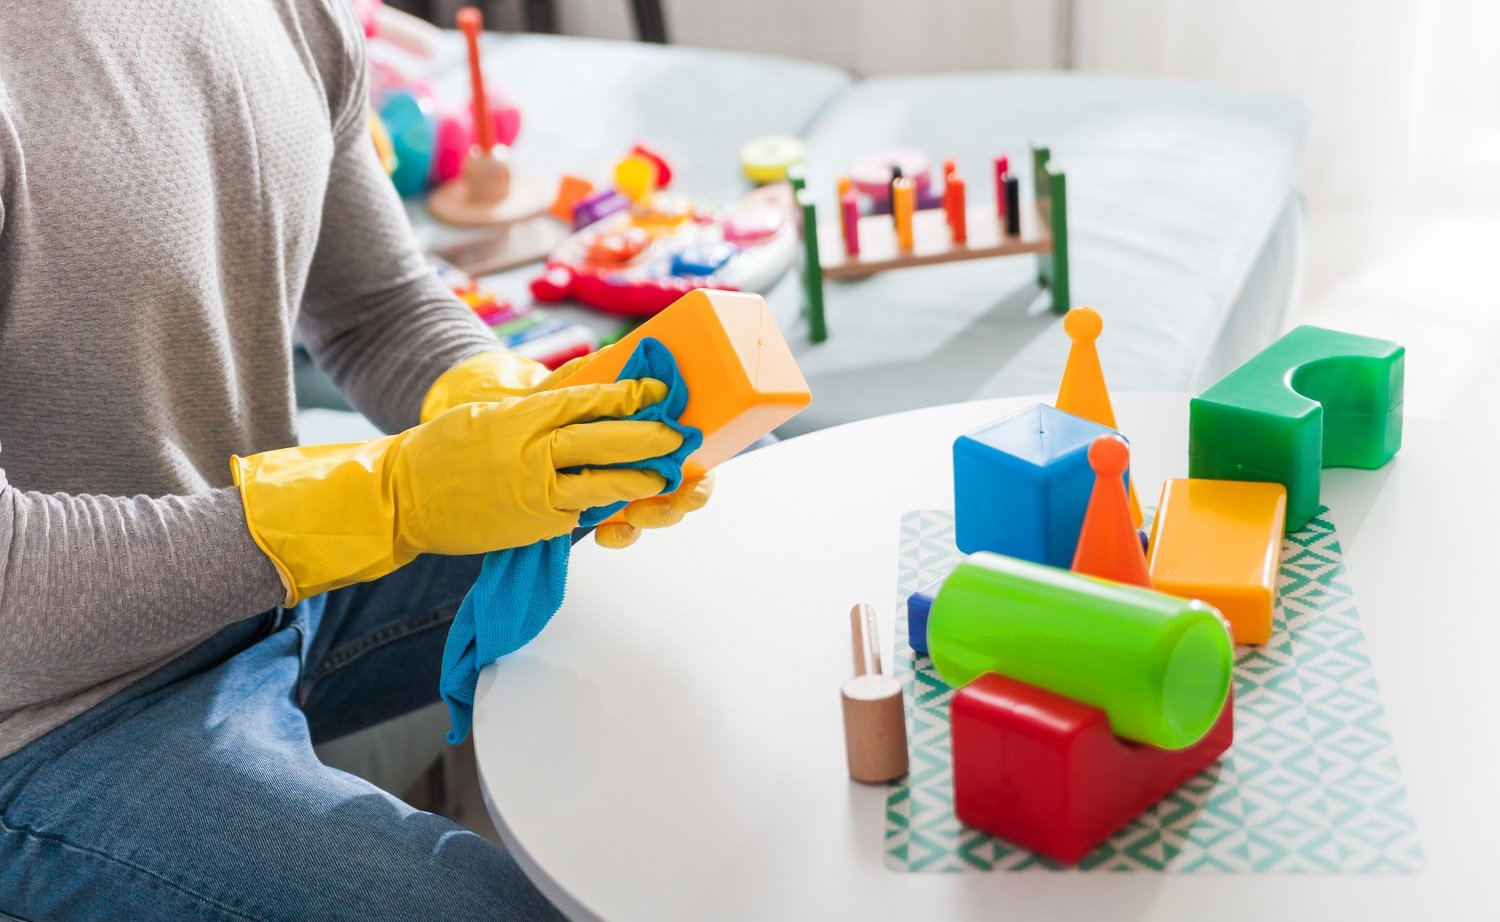
How to Disinfect Your Child’s Toys
Disinfecting your baby’s toys using these methods can limit the spread of germs


As a parent, you want to keep your child safe from germs, but it can be tough to balance it all and your kid’s natural curiosity. While you can’t limit the germs they come in contact with outside, you can reduce the ones found on your children’s toys. This guide will tell you everything you need to know about disinfecting toys by each type.
Difficulty: 1/5
Time: 1 to 3 hours, depends on how many toys you have to disinfect
Materials:
Container
Bleach
Vacuum
Steamer
Water
Microfiber cloth
Soft-bristled brush
Soap
Pillowcase
Baby-safe detergent
Hot glue
Hot glue gun
Mesh bag
Disinfecting wipes
Cleaning vs. Disinfecting
Some people believe cleaning and disinfecting their homes are the same thing, but they’re not. Cleaning is just removing germs, dirt, dust, etc., from surfaces. It doesn’t kill germs; it only decreases their amount, which helps lower the risk of infection.
Disinfecting refers to killing germs on surfaces by using chemicals, but it doesn’t do a good job of cleaning dirt and dust. While they both help lower germ count, only disinfecting has the power to kill viruses and bacterias.
And since disinfecting doesn’t actually clean them, you should always ensure that you’re thoroughly cleaning your toys of any dirt and debris before disinfecting them.
1. Separate Toys
The very first thing you'll want to do before you start disinfecting your baby's toys is to separate them. Toys come in many different materials, so there are various ways to clean them safely.
Take your time when separating them because one misplaced toy can lead to it not working anymore. If you need to, you can always separate in phases.
In phase one, you’ll focus on placing similar toys in a pile based on material type. So all plastic toys would go in one pile and all plush toys in another. Then in phase two, you’ll separate plastic toys with batteries and those without any. And you’ll do this until each toy is accounted for and in a pile.
Now that you placed each toy in its own category, we'll discuss the different disinfecting methods.
2. Wooden Toys
Wooden toys are porous, which means water can get trapped and produce the perfect breeding ground for mold. So, when cleaning and disinfecting them, you want to minimize how wet they get and avoid completely saturating them. To clean your baby’s wooden toys, all you’ll need is a microfiber cloth to remove the dirt and dust.
Create a mixture of one-third cup bleach with 1 gallon of water and place it in a container
Dip a cloth in your mixture and squeeze out excess water
Wipe down the toys thoroughly, making sure to get in between any crevices
Lay them out flat to air dry
Wipe with clean water to remove any remaining bleach
Let air dry
3. Plush
Germs thrive in plush toys, so you’ll want to make sure you’re taking the necessary steps to kill all harmful substances. But since these are some toys that your baby might keep closest to their face, you want to use products that are safe for their skin. To clean their plush toys, always check the toy’s label to see the manufacturer’s recommended cleaning method.
1. Place machine-washable plush toys in a pillowcase to protect their stuffing and tie it to ensure they don’t come out
2. Use baby-safe detergent and place the toys in the washing machine
3. Set your washing machine on a gentle cycle in warm water
4. Take toys out of the pillowcase and let them air dry, or use a low-heat setting on your dryer
4. Plush with Batteries
For plush toys with batteries, you can surface clean them by removing the battery pack and using a vacuum cleaner’s nozzle to remove dust and dirt. Take care to avoid getting the batteries wet.
1. Remove battery pack
2. Use a steamer and lightly pass over the plush toys
3. Lay flat to air dry or place in a pillowcase in the dryer on a low-heat setting
5. Plastic and Silicone
While you can take different approaches to clean plastic toys, such as boiling for a few minutes or placing them in the dishwasher, you have to be very careful with silicone, or you can risk disfiguring them. The safest way to clean your silicone toys is using warm, soapy water to remove any dirt, dust, and grime. But when it comes to disinfecting, you can use the same method.
1. Create a bleach solution by mixing one-third cup of bleach with 1 gallon of water
2. Place toys in bleach solution for five minutes
3. Use a soft-bristled brush to ensure the solution is getting into all the nooks and crannies
4. After the time is up, rinse each toy thoroughly in clean, warm water to remove any bleach residue
5. Set out to air dry
6. Plastic with Batteries
Electronic plastic toys need to be handled with care to ensure you don’t affect how they operate after cleaning them. To clean your electronic plastic toys, remove the batteries or battery pack and use a damp microfiber cloth with warm, soapy to remove visible dirt, dust, and grime.
1. Remove batteries or the battery pack from each toy
2. Use a disinfecting wipe and clean the surface and crevices
3. Let solution air dry
4. Use clean, warm water to remove any leftover residue
5. Lay flat to air dry
7. Bath
Some of the most germ-filled toys are bath toys. And even if you do rinse them off, mold can still grow in squeezable toys.
You can use warm, soapy water to remove visible dirt as an everyday cleaning method. We also offer a method of disinfecting those types of bath toys and preventing water from getting in them again. But, if you don’t feel comfortable allowing your kids to play with them, it’s always best to throw them away.
1. Create a mixture of one-third cup of bleach to 1 gallon of water
2. Place bath toys in the mixture for five minutes
3. Squeeze bleach mixture inside bath toys with holes
4. Use a soft-bristle brush to remove any dirt and debris on the surface and between any crevices
5. Remove bath toys from the mixture and squeeze out all water
6. Rinse with cold water to ensure there’s no leftover bleach
7. Hang them to air dry in a mesh bag
8. Cover holes in bath toys with hot glue to ensure no water gets inside
How Often Should I Disinfect My Child's Toys?
How often you disinfect your child's toys depends on whether your child is currently ill, what time of year it is, and how often they play with them.
If your child plays with their toys daily, then you'll want to disinfect them once a week. But for toys that they don't play with as often, disinfecting at least once a month should keep them in tip-top shape for your little one.
But if they're currently sick, then you'll want to clean their toys enough to limit the spread of germs while they're healing, so disinfect them once a day before bedtime. You'll also need to disinfect your baby’s toys more frequently overall during cold and flu season and if viruses are spreading in your area.


- Stylish Storage: 13 Tips for Hiding Toys and Games in Your Living Room
- 10 Tips to Organize a Playroom: Ideas That Are Fun (And Functional!)
- How To Disinfect Your Home
- 22 Parent-Approved Toy Storage Ideas
- How to Clean Your House During and After an Illness
- 10 Tips for Disinfecting Your Bathroom
- Learn How to Clean Your House (and Maybe Even Have Fun Doing It) With These 27 Tips
- How to Hire Someone to Disinfect Your Home
- These Are the Best Tools for Cleaning Hard-to-Reach Areas
- 26 House Cleaning Tips to Elevate Your Cleaning Game
Get our Angi-powered app


