Xeriscape costs depend on materials, the size of your yard, and if you DIY. This guide will help you determine what your xeriscaping project will cost.
Give your garden a vertical glow-up


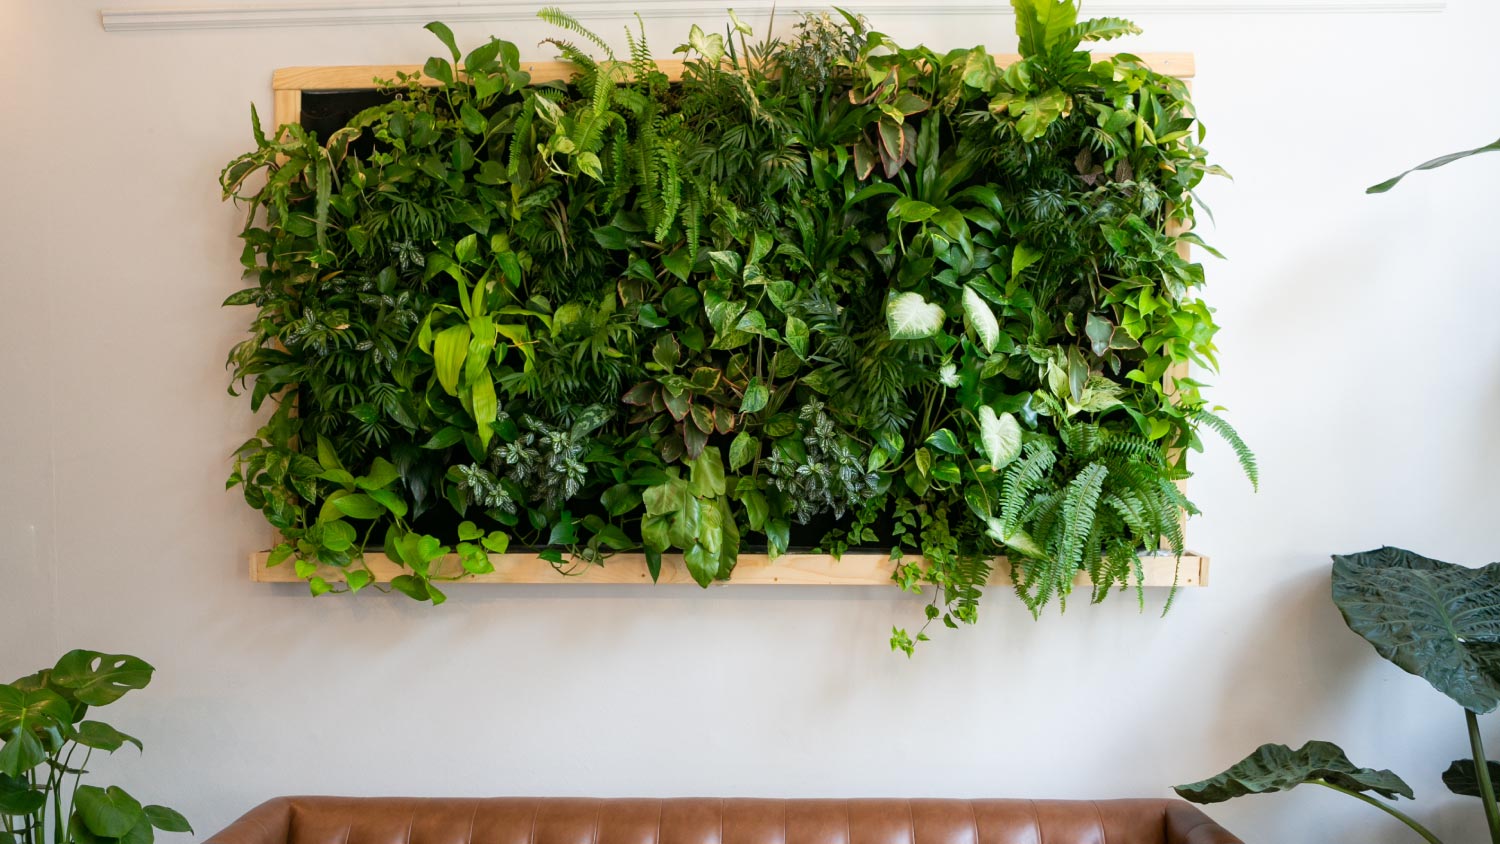
Whether you want a vegetable garden or wall of flowers, a stylish and space-saving vertical garden could be the answer. Not only do they loook cool and expand gardening options in tight spaces, but they can also make gardening without bending over for hours a lot more accessible. Learn how to build a great vertical garden in this seven-step guide.
Here are three things to consider before you start your project.
If you'll be building your vertical garden against a structure, such as a home, garden fence, or interior wall, you'll want to also decide if the wall is in good shape, as well as if you want a mobile or fixed structure.
The step-by-step portion of this guide will explain how to build a boxed frame vertical garden. But there are other ways you can grow plants vertically, and some of these strategies may fit your space or budget better.
For example, is your vertical garden to give you a little privacy outdoors? Building a DIY garden trellis, for example, could be a much easier project that achieves that goal.
You have two options for your build, namely based on the type of garden boxes you want to install: you can build your own and insert them to a backer board, or you can purchase a tiered garden planter that gets drilled into your frame.
Take into consideration what type and how many plants you'd like to grow. Pre-built garden boxes start at around $60, but you could spend $200 to $300 on boxes for a big vertical garden.

Here are the seven steps you need to take to make your green thumb point upwards.
Your three pieces of 2-by-8 inch lumber will form the outer edges and mid-board for support. Cut four equal pieces (each into 4-inch sections) to form the frame, then cut a fifth to be used as the backer board. (The last piece of wood can be used in step 2.)
Cedar, because it's rot-resistant, is a good choice here. Add paint or stain if you'd like before assembling. Let it dry per the instructions on the label.
Screw two screws into the edges of all four corners to form your frame.
If you're installing particularly heavy boxes or plan to plant a lot of items, you’ll want to have gussets added to the bottom corner beams. Use a miter saw to make angular cuts on the remaining piece of lumber, measuring them against your frame and marking with a pencil. Make cuts and then screw them into place.
Attach the mid-board to the back of the frame using screws. If you want multiple rows on your vertical garden or attachment points to the wall, cut one more piece of lumber in half and install them above and below the mid-board.
Adding a backing to your vertical garden is recommended, although the material you choose is up to you. Good choices are felt, chicken wire, and plastic.
Here are some benefits of vertical garden backing layer to help you decide:
Felt helps retain moisture and dulls UV exposure
Plastic helps retain moisture and enhance privacy
Chicken wire enables airflow and helps vines and climbing plants grow
Install your chosen material to the back portion in front of the mid-board backer. Felt and plastic can be installed with nails; chicken wire should be installed with a staple gun.

If you bought premade boxes, install them to your backer boards per the instructions.
If you're building from scratch, here are some tips:
Standard width for the boxes should be 2, 4, 6, or 8 inches
Use 1- or 2-inch thick wood
Stain or paint before assembly
Also, be sure to build the boxes flat and not at an angle; most plants benefit from having a flat bed of soil to grow in.
Vertical garden irrigation systems make life a lot easier, and aren't difficult to install. This is one step even budget-conscious vertical gardeners can outsource pretty easily.
You can purchase a vertical garden irrigation system for $30 to $100 online or at home improvement stores. They generally attach directly to the frame using screws or clips that come in the kit.
Attach your vertical garden to your chosen structure using screws along the back boards and at the top corners. If you'd prefer to keep your vertical garden mobile, you may consider installing it at a very slight tilt, and placing something in front (a DIY garden bench or stones are popular options).
Give your irrigation system a test run, then place dirt, seeds, plants, or whatever you've chosen to grow in your boxes.
If you have leftover plastic from the backing material, use this to line your grow boxes to improve moisture retention. Your vertical garden is ready to go!
A vertical garden is an accessible project for many homeowners. If you don't want to build the frame and boxes from scratch, you can spend a little bit extra cash to get some of it premade to make the DIY build easier.
A local gardener may be able to help get your vertical garden project off the ground.
On the other hand, a handyperson service with gardening experience near you could build the frame or tackle the portions you're uncomfortable with. There are multiple ways to tackle this project. The right way will depend on what you feel like doing and what you don't mind outsourcing!
From average costs to expert advice, get all the answers you need to get your job done.

Xeriscape costs depend on materials, the size of your yard, and if you DIY. This guide will help you determine what your xeriscaping project will cost.

Leveling your yard can help with drainage and prevent damage to your home. Learn the cost to level a yard in Columbus, OH, and what factors can affect the price.

From your flower beds to your walkway, river rocks make a classic addition to your landscape. Learn about the cost to install river rock to set a proper budget.

Looking to install synthetic grass for a putting green or play area? Learn what artificial turf questions you’ll need to discuss with your professional installer before you get started.

Erosion can affect anyone who lives on a hillside, but it’s a particular problem for waterfront property owners. Stop erosion in your yard with these tips.

Opting for a natural turf alternative may have its perks, but the problems with artificial grass can outweigh the good. Get to know these common issues before installing.