

Landscape curbing can really improve the look of a yard, but at what cost? Find out how much it costs and the different ways you can do it
Build a beautiful garden anywhere


A raised garden bed not only looks beautiful, but also gives people who have limited space or poor soil quality an opportunity to grow a fruitful garden. Learn how to build a raised garden bed with this simple DIY guide.
Difficulty: Simple (2/5)
Building a raised garden bed is a relatively easy DIY project. This difficulty rating drops down to 1/5 if you have circular saw and drilling experience.
Total project time: 1 hour
Time will vary depending on the size and quantity of the garden beds.
Cost: Between $100 and $300 for materials
The cost fluctuates depending on the size of the garden beds, how many you build, and the type of lumber you choose. The cost goes up if you don’t already have the required tools on hand and need to purchase or rent them.
Pre-made raised garden beds or raised garden bed kits may be a more cost effective option for you. Prices range from $50 to $360.
2x4 lumber
Drill bit
2 1/2 inch deck screws
3 inch deck screws
Wire mesh
Trellis (optional)
Stakes, flags, or spray paint
Shovel or metal rake
Circular saw
Woodworking clamps
Power drill
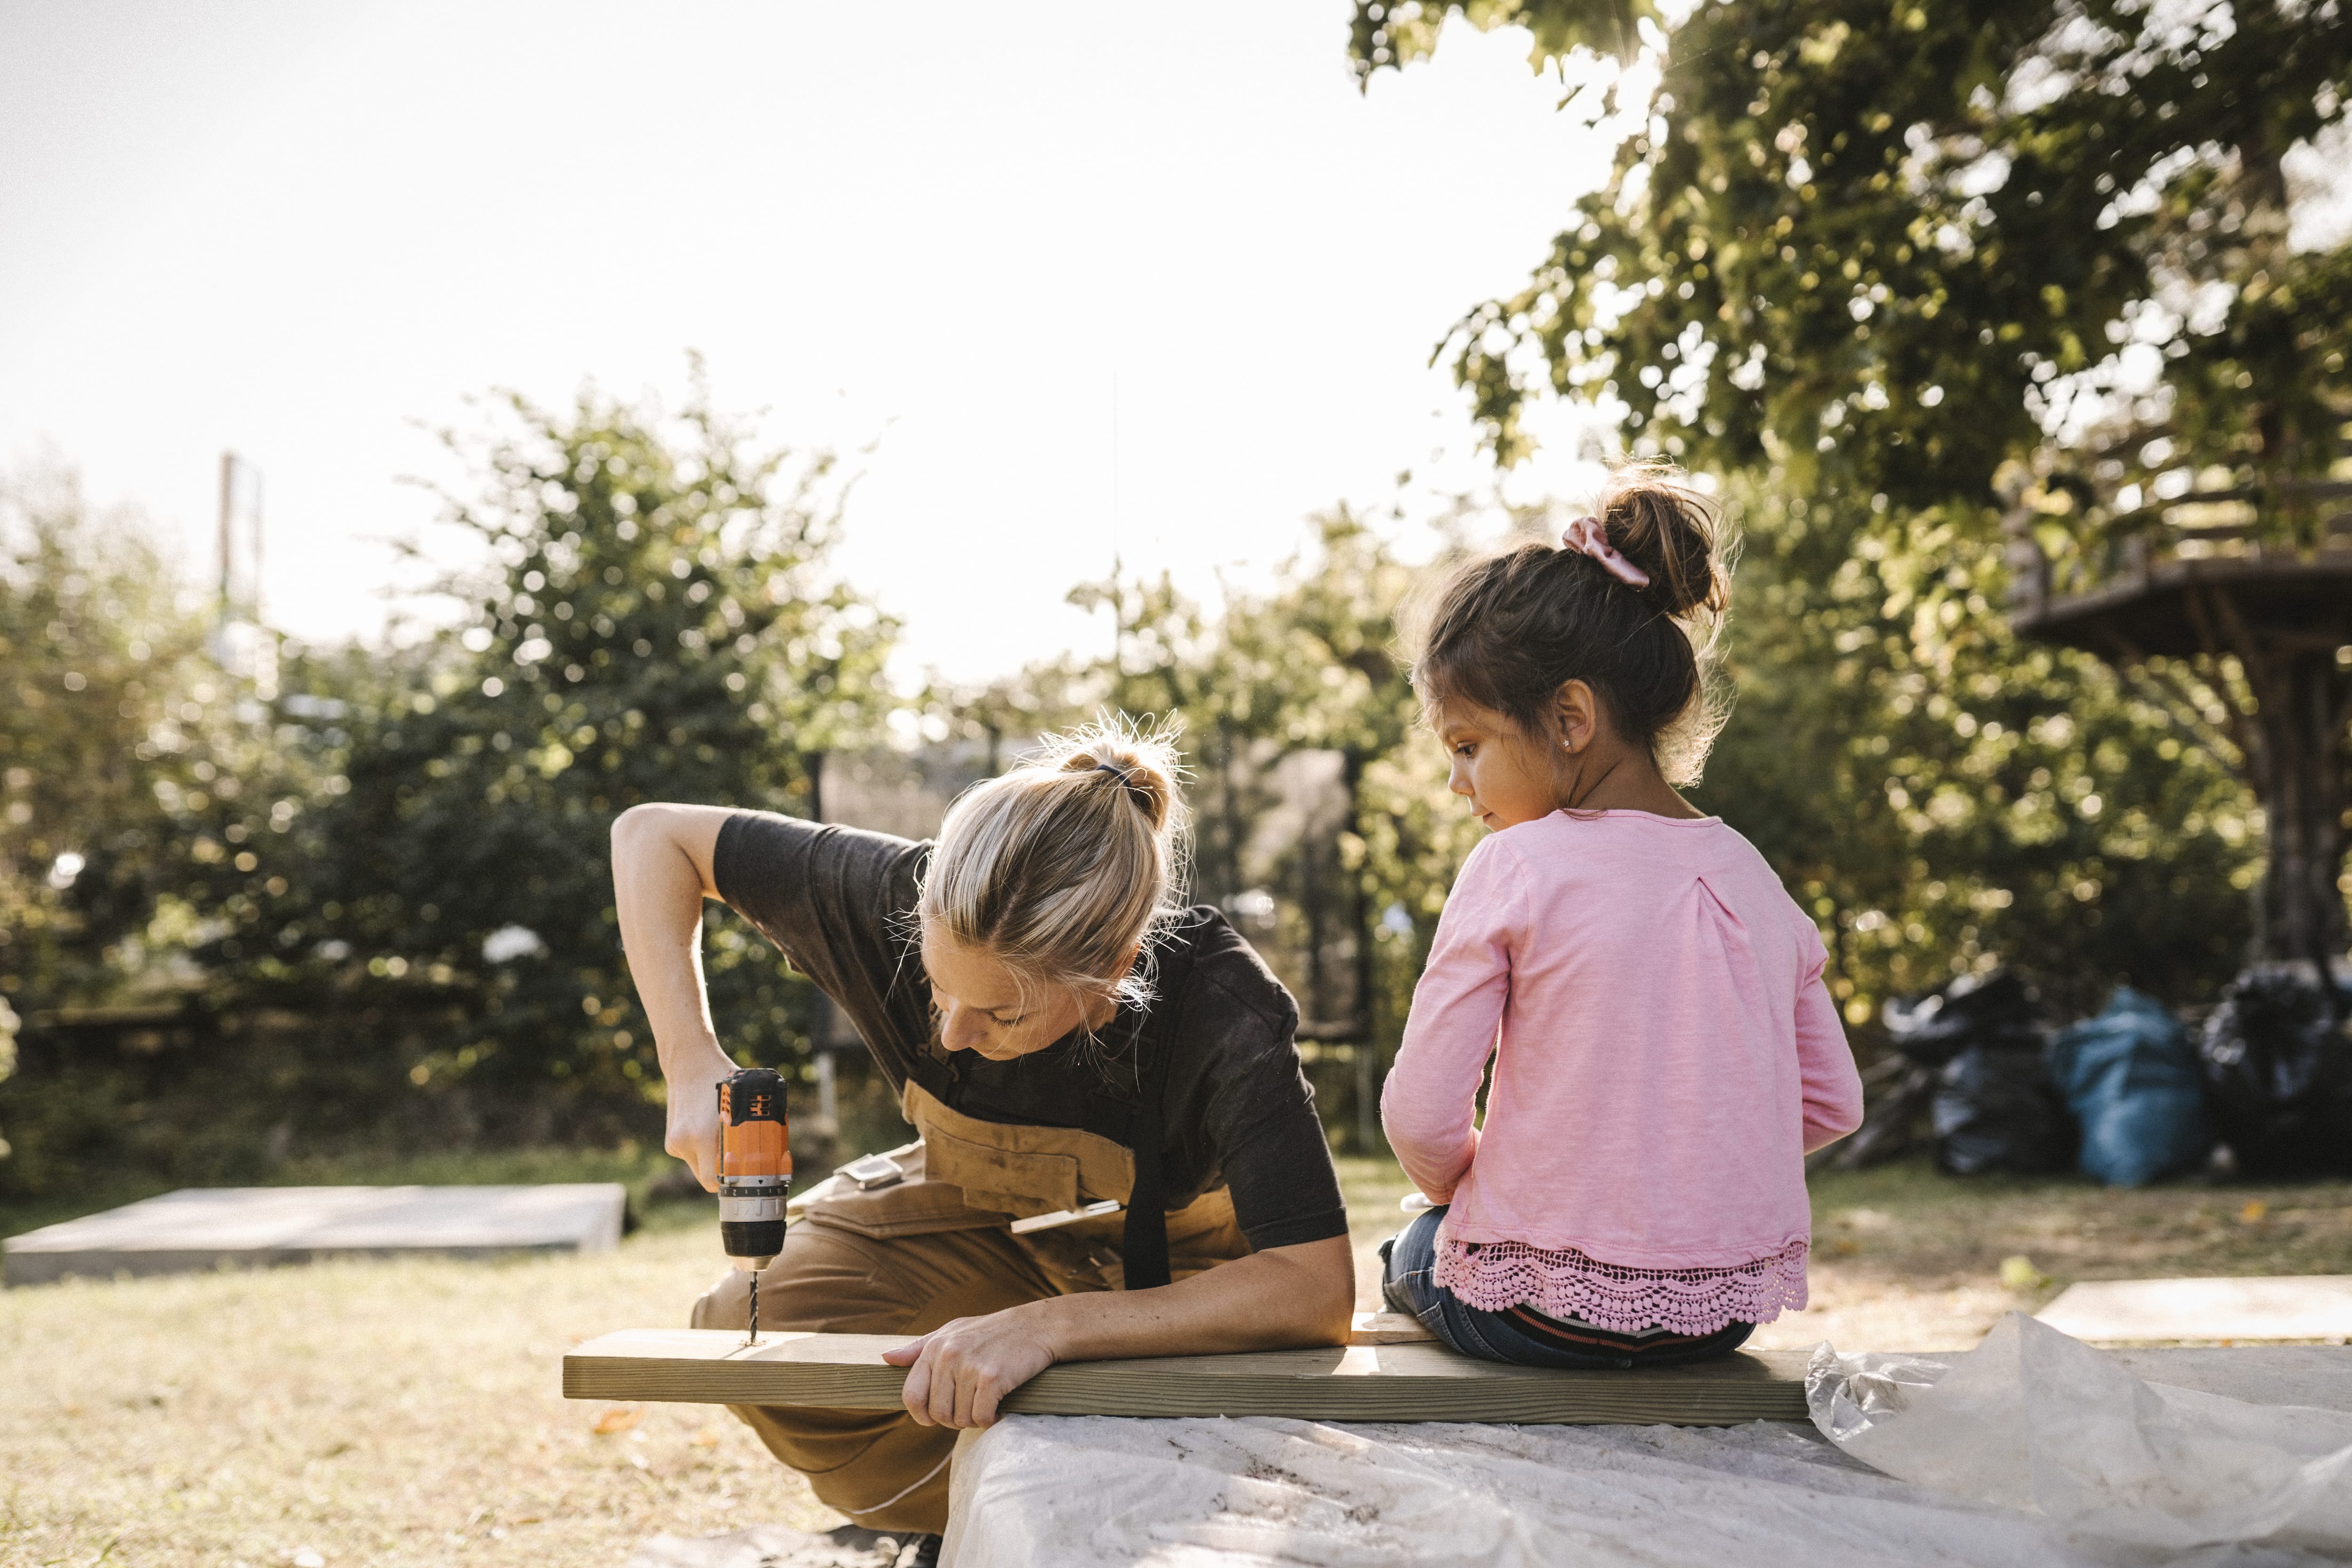
Follow these steps to build your own simple raised garden bed out of 2x4 wood planks.
Every DIY project should start with a blueprint (or at least a basic plan) to prevent unexpected issues. Before you begin drawing out the dimensions of your raised garden bed, do some research on the plants you plan on growing to answer the following questions:
How deep do the garden beds need to be to support the roots of each plant?
Is a trellis needed to support vertically growing vines? (Discover trellis ideas).
Can one garden bed support each plant type?
As for the size—that will all depend on how much space you have to work with. For reference, a standard size garden box is around 6x3 feet. You’ll need at least three planks per side, along with partial planks to use as corner posts.
The great thing about elevated garden beds is they allow you to grow beautiful plants no matter the size or terrain type of your yard. Just keep sunlight and shade in mind when picking the perfect spot.

Once your blueprint is set, mark out the outer edges of your planter with stakes, flags, or spray paint. Lightly till the dirt and grass within the perimeter with a shovel or metal rake to get the location prepped. Be sure to break up any big clumps of dirt and remove large rocks.
Following your blueprint, use a circular saw to cut down the 2x4s to your desired length for each wall.
Don’t forget to trim down the four corner posts that will be used to hold the walls together. Use scrap 2x4 planks for this—they’ll need to be measured and cut so they’re the same height as the walls.
If you don’t have access to a circular saw or don’t feel comfortable using one, you can purchase pre-made raised garden bed kits that come with all of the parts you need or even pre-cut lumber.
Now that all the wood is cut to the lengths you need, it’s time to build each of the four walls one at a time.
Build the longer sides by laying all the posts you will be using flat on the ground, evenly lined on top of each other. Clamp the posts together so they hold in place.
Take two corner pieces, and lay them face-down on each end of the wall. Check to make sure that the corner posts are even to the wall height before drilling the pilot hole. Once even, use a drill to create pilot holes—one for each plank. Drill 2 inch deck screws into the pilot holes to keep the corner pieces in place.
Repeat the steps above to build the two smaller walls. Except this time, install the partial planks more toward the center of the wall instead of at the ends. This makes it easier to attach all four walls together in the next step.
Finally—it’s time to put all four walls together and watch your raised garden bed take shape.
Start with one of the longer walls and its adjacent shorter wall. Hold the short wall up to the end of the long wall, drilling pilot holes where they meet (don’t forget to drill into both the wall and the corner piece for additional strength). Lock them together by drilling 3 inch deck screws in each pilot hole.
Repeat on all four sides until all sides are securely in place.
This step is optional, but it’s a good idea to staple wire mesh to cover the bottom. This is beneficial for a few reasons, including:
Prevents weeds
Keeps garden soil and ground soil slightly separated
Water can still drain
Worms can get in to enrich the soil

It’s finally time to move the finished garden bed to its intended spot (you may need a helping hand here to move it safely). Once it’s in place, install a trellis if your plants require one to grow.
Fill the box up with your choice of soil and start planting!
On the fence about building your own raised garden bed? The answers to your most frequently asked questions might help you make a decision.
There are many benefits to using a raised garden bed, especially when compared to planting a garden directly in the ground. These benefits include:
Enhancing the landscaping and decor in your yard
Having the ability to choose the kind of soil you want to use
Not having to kneel down uncomfortably while gardening
Cedar is considered to be the best type of wood you can use for this project due to its durability and resistance to rotting. However, that high quality can also come with a higher price tag.
Cypress, oak, pine, and redwood are other durable and typically more affordable options, though they will not have the lifespan pine has.
What about treated wood? There’s a lot to consider when it comes to pressure-treated versus untreated wood since it will be in direct contact with your soil and the food that grows from it.
Pressure treated wood lasts longer, but runs the risk of seeping chemical preservatives into the soil. The United States Environmental Protection Agency (EPA) has declared these and other types of wood treatment safe for this type of residential use:
ACQ
Borates
Copper azole
Copper naphthenate
The type of plants you intend to grow are an important factor when planning your raised garden. Different plants require different soil depths for their roots to expand and grow properly. Keep in mind that the deeper the soil requirement, the more you’ll have to spend on lumber.
It’s important to do your own research on each plant type you’re considering. However, this quick list of popular plants that can grow in six inches of soil will give you a basic starting point:
Greens: lettuce and spinach
Vegetables: leeks, onions, radishes, squash, beans, peppers, tomatoes, peas, zucchini
Herbs: Basil, chives, cilantro, dill, mint, oregano, parsley, thyme
Flowers: Marigolds, violets, pansies
From average costs to expert advice, get all the answers you need to get your job done.
Landscape curbing can really improve the look of a yard, but at what cost? Find out how much it costs and the different ways you can do it

How much does hardscaping cost project by project? Check out our breakdown for every price tag you need to know, from outdoor fireplaces to patios.

Growing plants with a hydroponic gardening water system can be a big investment. To know how much it costs to build a hydroponic garden, consider the system, technology, size, and whether you hire a pro. This guide will help calculate costs.
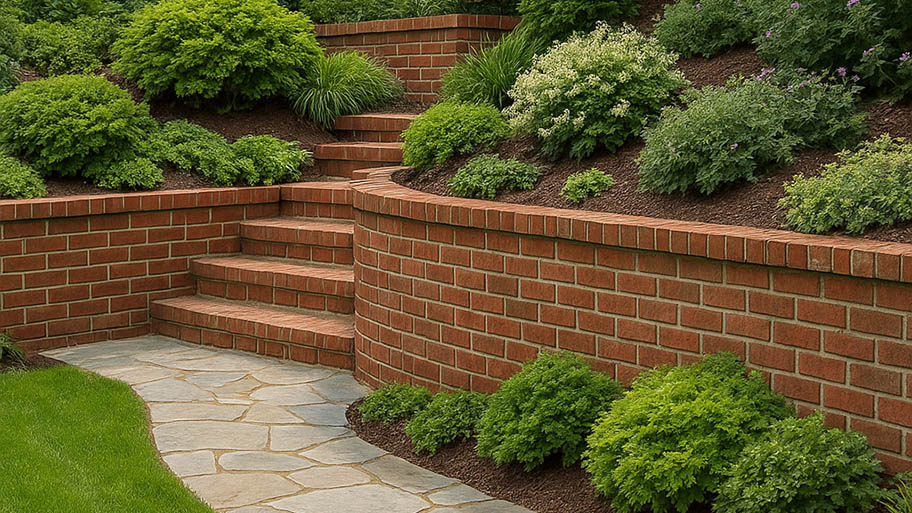
Stone wall garden beds add flair and natural beauty to your outdoor living spaces. Learn how to make a stone wall garden bed with this six-step guide on building a retaining wall.

A perfectly level ground is crucial for a safe and enjoyable pool experience. Learn who to hire to level the ground and prepare your backyard oasis.

Do your hedges need a trim? Learn how to trim hedges correctly, key tips to keep them healthy, and how to stay safe while tackling the task.