How to Hang Christmas Lights on the Ceiling With Ease and Style
Light your room with Christmas cheer any time of year


- Ladder
- Stands of Christmas lights
- Extension cord
- Adhesive hooks
- Pencil
- Microfiber duster
Have the upcoming holidays inspired you to boost the merry vibes in your home? Or do you want to add some extra twinkles to your space? Either way, it’s time to learn how to hang Christmas lights on the ceiling.
This guide to DIY hanging Christmas lights has everything you need to learn to hang lights from the ceiling and enjoy the glow all season or all year long.
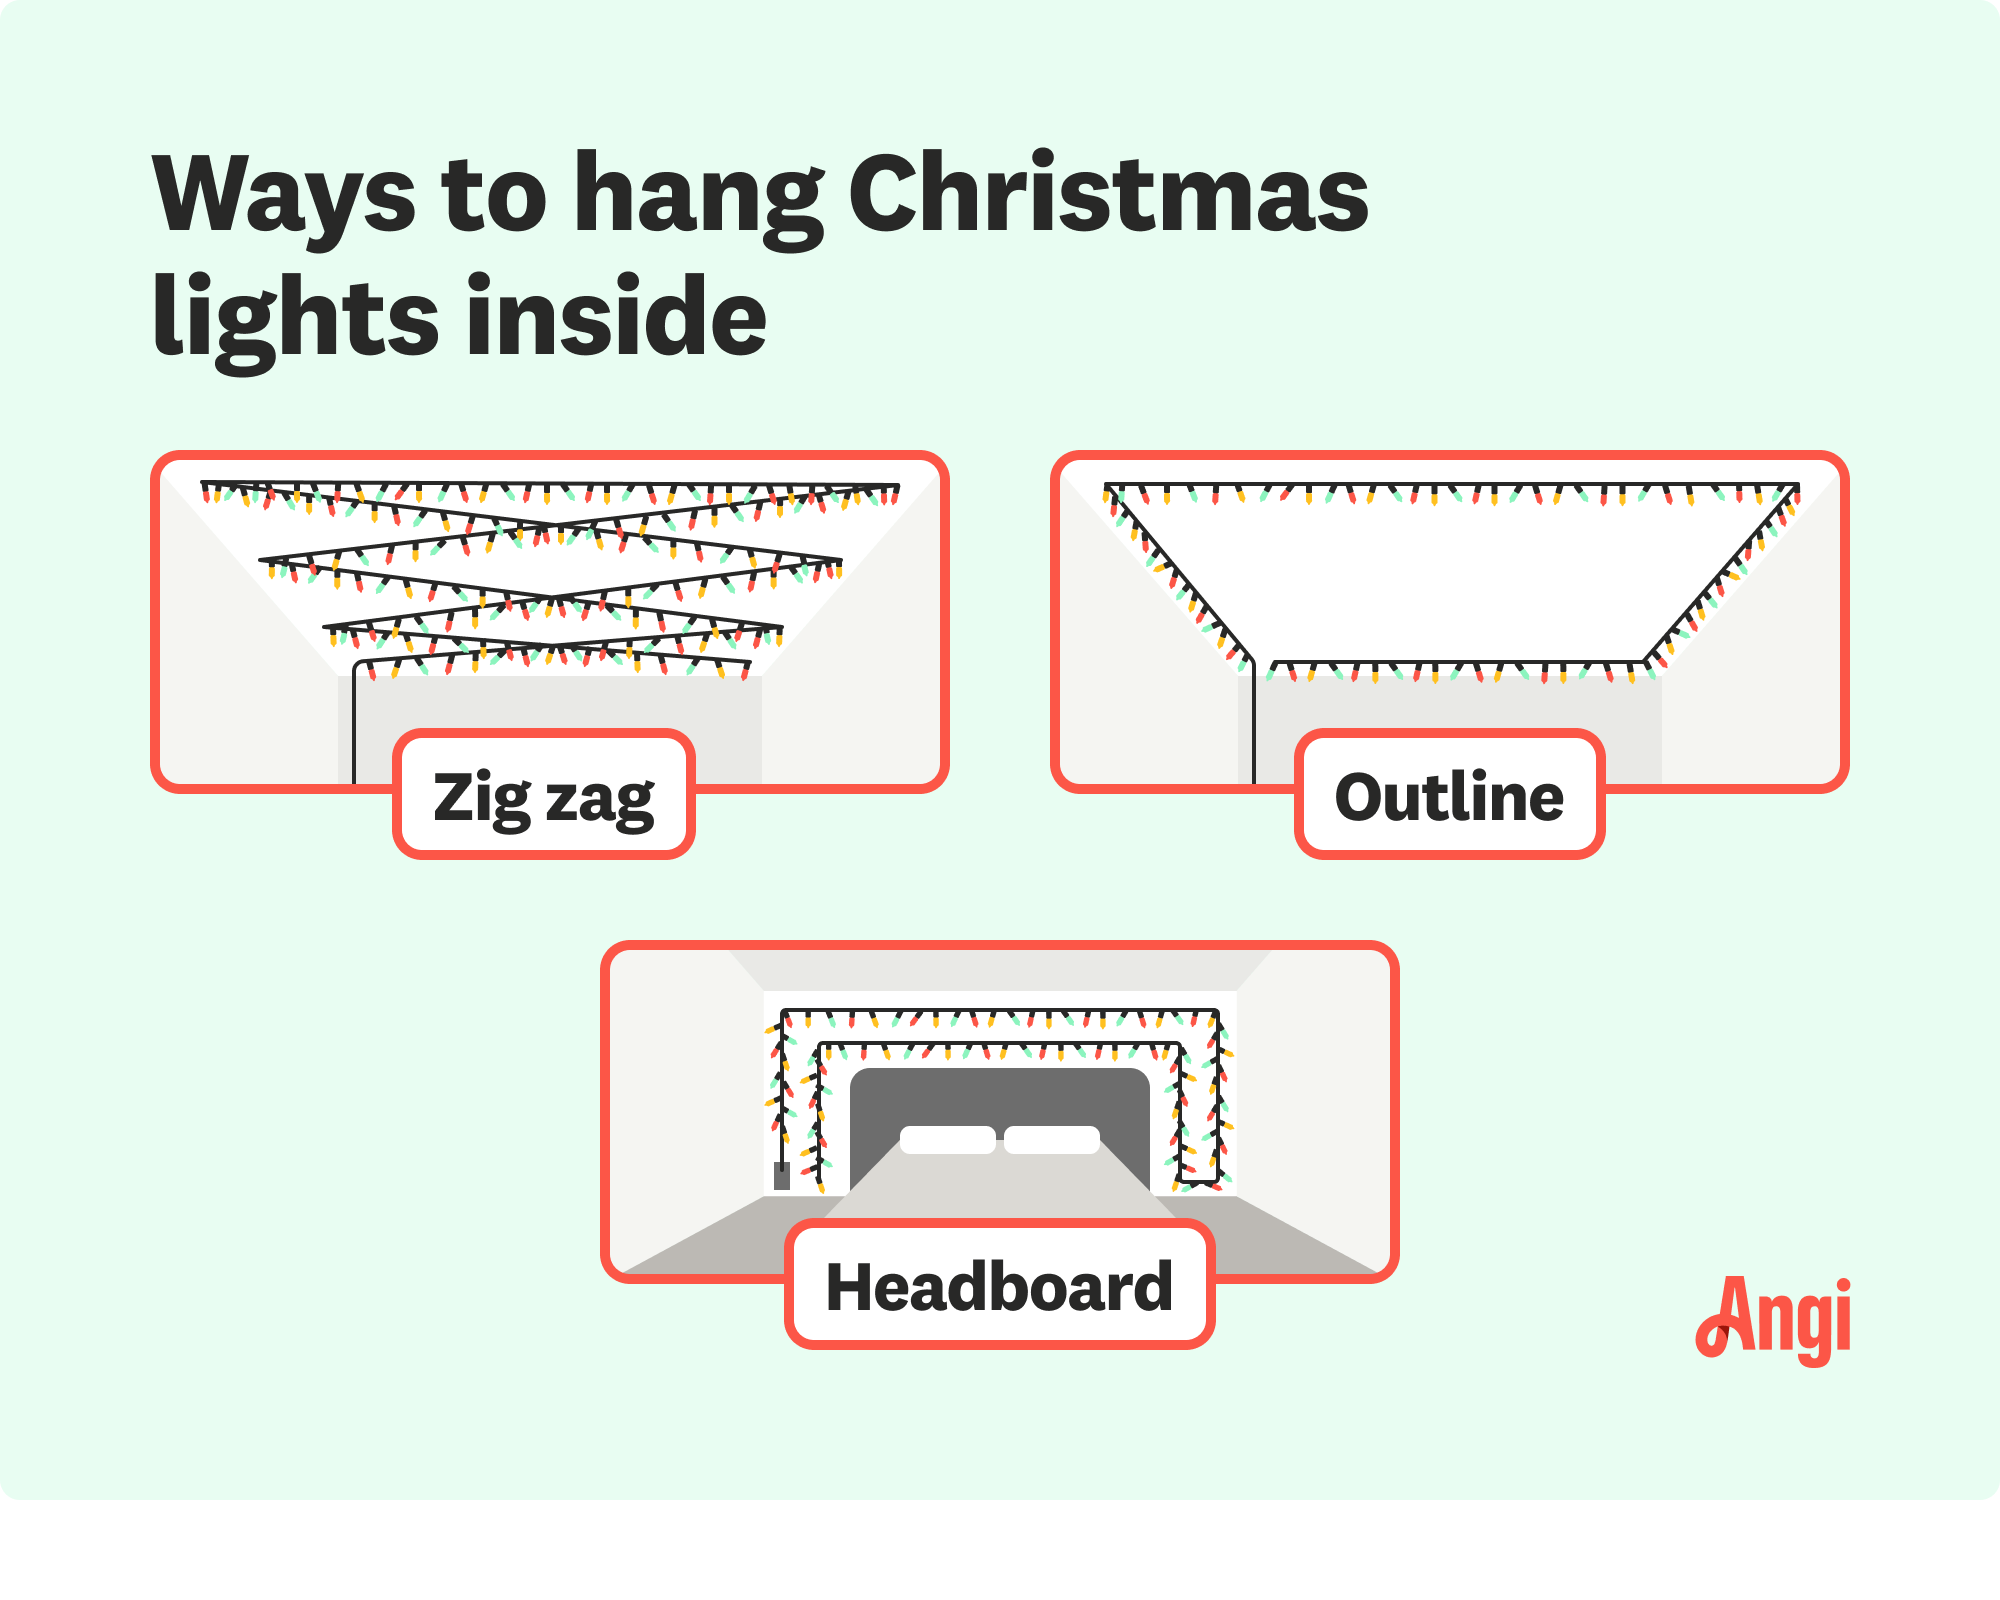

Choose Pattern
The first step of creating a winter wonderland on the ceiling is mapping out a design. Consider one of these popular patterns for your Christmas lights:
Zig zag: Overlap your lights in a zig zag pattern across your ceiling to cover significant square footage.
Outline: Consider outlining the edges of your ceiling with lights for a streamlined look.
Headboard: Instead of hanging lights on the ceiling, opt to string them on and around the headboard of your bed.
Choose String Lights for the Ceiling
Half the fun of decorating your home with string lights on the ceiling is choosing the colors and style to hang. When shopping at a home goods or hardware store, note what types of lights catch your eye. For example, you might like traditional Christmas lights with clear or colored light bulbs or prefer the softer, more delicate glow of fairy lights on the ceiling.
You should also note if the bulbs are LED lights, which are more sustainable but emit different colors compared to non-LED bulbs. Also, note the wire color. Choose white wiring if your ceiling is painted white and you want the strands to blend in.
Select Adhesive Hooks
Removable, adhesive hooks come in various designs and functions and are the perfect tool for this project. But first, ensure the hooks will work on your ceiling surface. Read the instructions and use the tips and tricks the manufacturer provides.
Since you want all of the attention focused on your Christmas lights’ cheery glow, use hooks that are clear and appear invisible when stuck on the ceiling. You’ll need hooks big enough to hold the cord’s diameter, but the string’s weight shouldn't be a problem if you use enough hooks spaced along the room’s perimeter.
Most hooks stick on ceilings without a problem, with one big exception—textured finishes, like a popcorn ceiling. The bumpy finish doesn’t affix to the smooth adhesive film. If you have a textured ceiling and want to revel in festiveness, use a puncture hanging method like thumbtacks (clear tacks disappear in the light) or a staple gun.
Clean the Ceiling
Adhesive hooks work best on a clean surface. To get the best grip for the longest time, clean the ceiling with microfiber cloths to remove cobwebs and dust. Use a telescoping pole or a ladder to maximize your reach.
Measure and Mark the Spacing
 Photo: bigy9950 / Adobe Stock
Before climbing the ladder, plan where you’ll hang the lights. A simple solution is to follow the ceiling’s perimeter, but if your creative side takes over and you decide to plot a design, like a flowing line that curves over the entire ceiling, you’ll need more time to prepare.
Most often, placing hooks about 2 feet apart (depending on how tight you want the strands to appear) should secure the lights. Sometimes it's easier and faster to mark the locations with a pencil if the room is large or you want a specific line definition. Remember to follow the hook’s directions and press them in place for about 30 seconds to stick correctly. Don’t thread the lights until at least an hour later, so the adhesive sets securely.
Plan for the Outlet’s Location
Without a functioning outlet, you won’t have the glimmer you’re craving, so plan to start hanging the lights near an outlet. Avoid having an odd light strand hang down the middle of your wall by using a color-matching extension cord that runs down the corner and meets the outlet. Better yet, start with an outlet installed behind a piece of furniture to hide unused wires.
Hang the Lights
It's finally time to hang the lights! Use a ladder for hard-to-reach spots, then run the strands through the first hook and work through the design or perimeter of the ceiling. You might need to wrap the strand around the hook if it’s extra long or if you're worried about it slipping out of the hook. If you want a runway look, pull the strands tight, but if you prefer a relaxed appearance, let the lights drape or hang between each hook.
DIY vs. Hiring a Pro
This project is a manageable DIY project if you feel comfortable working on a ladder. Add a holiday flow with seasonal music and a fancy coffee or hot chocolate to the project, and you’ll hang the Christmas lights in no time.
If you need assistance hanging Christmas lights on the ceiling, consider hiring a local Christmas light installer for help. Plus, your pro can hang other interior or exterior lights during the service.
Frequently Asked Questions
You now know you can hang Christmas lights with adhesive hooks, but if you need alternatives, consider pushpins, tacks, staples, and adhesive putty (for small projects). If you have a drop ceiling, look for clips and hooks designed for the metal framing.
If you can’t hang Christmas lights with hooks, try one of the above methods, or consider an out-of-the-box idea like stringing the lights over a curtain rod that hangs close to the ceiling. It’s also possible to buy transparent tape created to hold items with weight. Just make sure that it won’t damage the paint during removal.


Get our Angi-powered app


