Want to ensure your home is secure for storm season? We discuss hurricane garage door costs and which factors influence the price tag.
Don’t coil up in despair when your garage door isn’t working


While hiring a professional to replace your garage door and garage door springs costs between $754 and $1,697, a professional can complete this project more quickly and safely.
Garage door springs are under extreme tension and can cause serious injuries if released improperly—especially without the right tools or experience.
Pros have specialized equipment to handle spring adjustments and replacements without damaging the door or surrounding hardware.
Mistakes like over-tightening the spring or misaligning the door can lead to system failure, property damage, or injury.
Calling a garage door pro with specialized knowledge and tools may save you time, headaches, and money down the road.
Your garage is always there for you, be that protecting your car from harsh winter conditions, acting as extra storage, or acting as that home gym that you “use frequently.” Regardless of how you use your garage, keeping your garage door in working condition is paramount to accessing that vital space.
But, if your door keeps sliding down when it’s open, looks a little lopsided, or you heard a loud snap last time you closed it, those may be signs that your garage door spring might need adjusting.
Don’t get stuck on how to fix your spring (or in your garage), because we’ve broken down everything you need to know how to adjust your garage door spring safely.
There are many safely concerns to be aware of when DIYing your garage door spring adjustment.
Your garage door spring is securing the counterweight system in your door, and is under extreme tension equal to the weight of the door (which can be anywhere from 125 pounds for a single door to 225 for double doors). Because you’re dealing with a percarious system under a lot of weight, it’s very easy to cause injury.
Tightening the spring too much so it snaps, getting a finger caught in the mechanism, or a falling door are concerns while you’re doing the adjusting. You can also misalign the weight even more, causing the springs to snap at a later time.
The amount of concerns here can be crushing (literally), so if you’re not experienced, it’s highly recommended you call a professional to adjust your garage door spring.
Replacing garage doors and garage door springs can be dangerous. Garage doors are very heavy and the springs are under a lot of tension. A garage door pro has the tools and experience to do this project safely.

There are several factors to look out for to determine whether or not your garage door spring is in needs a pick me up. The common one is a lopsided door—or known by professionals as an unbalanced door.
The springs themselves can also be a dead giveaway, as they can appear stretched out and not hold tight coils. Another common sign your garage door closes too fast, you have trouble opening it or closing it all the way, or the automatic safety mechanism has trouble activating efficiently.
Lastly, if you’ve changed the weight of your garage door, either through insultating your garage, decorations, or a window insert, you may have thrown off the balance and will need to adjust your door.
These conditions at first aren’t all that dangerous—more so annoying. But, if not dealt with properly or quickly, it can result in your door struggling to open, not open at all, or suddenly shut if the coil fully breaks.
Some of the signs of a garage door spring adjustment can also lead into a broken garage door spring. To determine if your garage door spring needs an adjustment or is broken, you can look out for:
A sudden, loud snap after using your garage door.
Visible rust, corrosion, or a breakage in the coil.
Damaged garage door components.
A lot of resistance when opening and closing the door manually.
If you’re experiencing any of these issues, you may need to replace your garage door spring altogether.
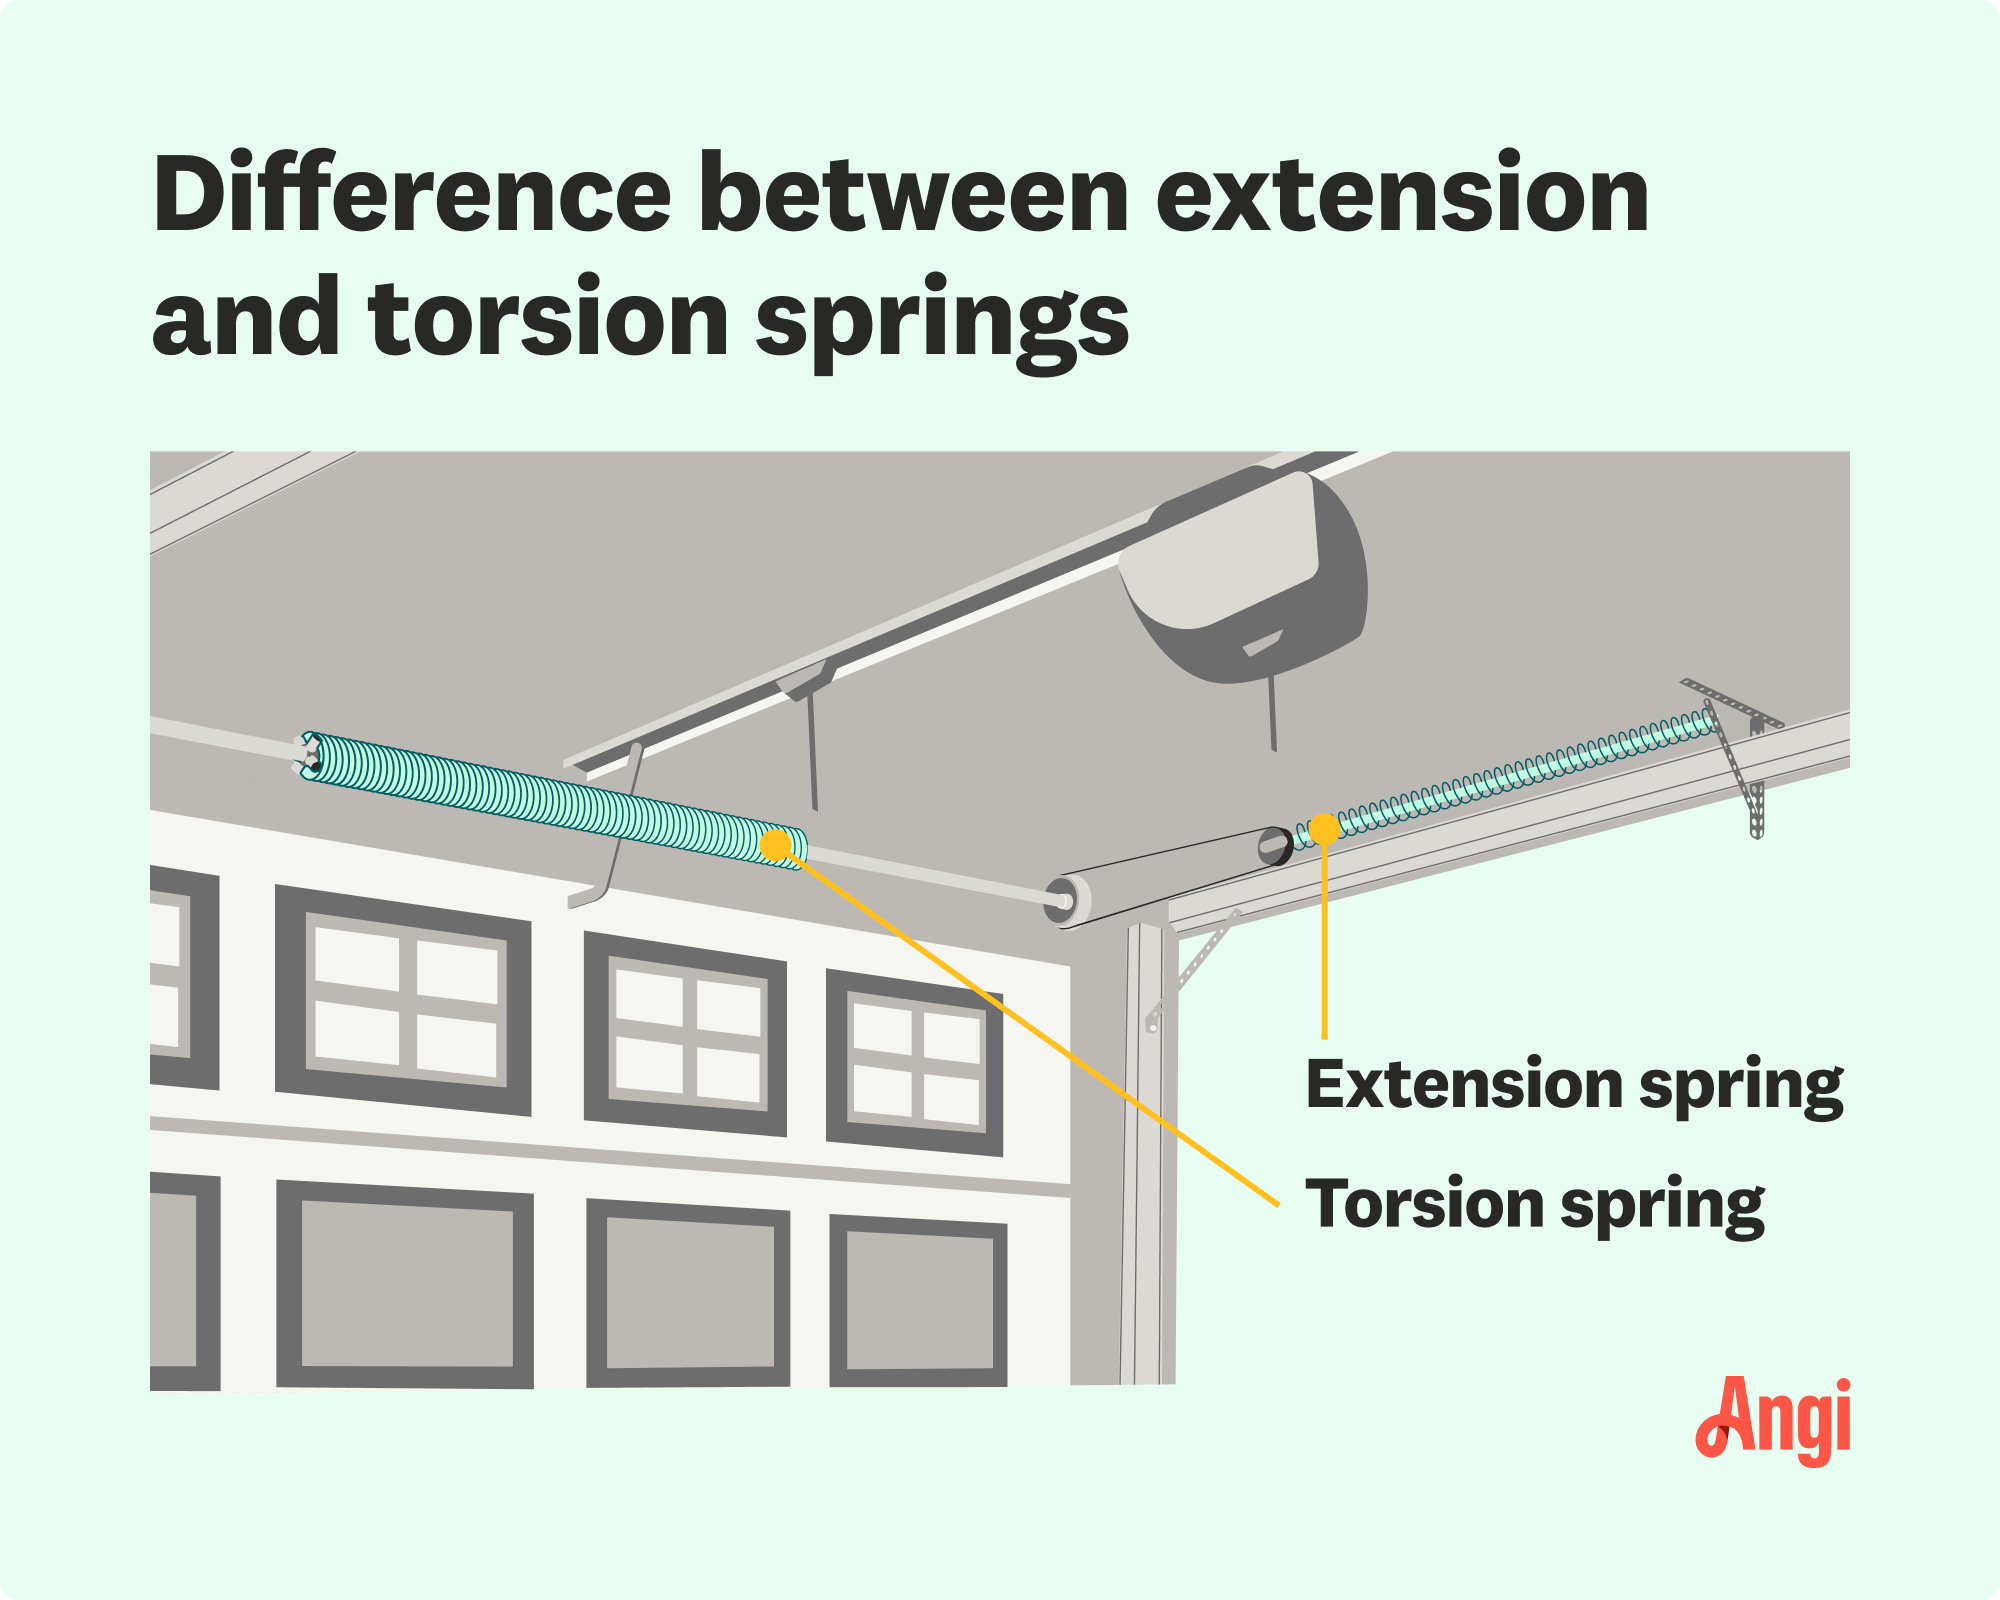
There are two main types of garage door springs: torsion and extension. Depending on which type you have, it could impact the overall cost and difficulty of adjusting your garage door spring.

More commonly found in modern homes or newer garage doors, you can tell if your garage door spring is a torsion spring by its placement over the door on the wall—with a metal rod the length of the door that passes through it.
While most torsion spring doors will have one spring on either side of the door, you may only have one if your door is smaller or lighter. Having two springs means you’ll have double the fun adjusting both springs.
Extension, or side-mount, springs are very visible, with a piece of metal mountated at either side of the door.
An older type of garage door technology, extension springs tend to be less expensive than torsion springs, they aren’t as sturdy or last as long.

Now that the DIY pros are here, we can get to how you can adjust your garage door spring. The process can be a little different depending on the type of spring you have, so we’ll break down how to adjust an extension spring first.
Extension springs need to be adjusted with the door open before you start working, because you’re going to be releasing the tension on the spring. So get it up as high as you can go!
If you have an automatic door, you’re going to need to unplug the opener and disconnect the door. You’ll do this by pulling the emergency release cord down and back until the spring locks.
Then, you’re going to use your grips (i.e., C-clamps or lock pliers) to secure the door open underneath the bottom rollers—one on each side—to prevent it from shutting.
Now that you’ve secured your door open, you can safely remove the hooks along the track hanger. These should be secured with bolts, so pull out your wrench on loosen those up until you can remove the hook.
To make sure you’re getting the right tension, you’re going to move the hooks you just unscrewed lower or higher along the track hanger to decrease or increase the tension of the spring.
If you didn’t notice any lopsidedness on your door, make sure to adjust each springs evenly and one at a time.
Make sure to only make slight adjustments (one or two holes only). Once you’ve made your small adjustments, tighten the hook’s bolt so it stays in place.
After you’ve made your small adjustment, unclamp your door and give it a test it to make sure your problem is being addressed.
Your door might only need to be moved one hole. If not, reclamp your door and slightly adjust the tension even further.
Major tension adjustments in your garage spring door will often fix the problem, but if you’re a Goldilocks looking for an adjustment that’s just right, there’s a couple of things you can do.
First, you can slightly tighten or loosen the eye bolt—typically found on the other end of the spring towards the rear of the garage. Again, if you make slight adjustments here, make sure to test before moving on.
If your initial tests have all been successful, it’s time to do the final tests on your garage door to make sure the spring is adjusted to your liking.
So unclamp, reactivate any automatic elements, and give the garage door a few trips up and down—noting the problems you were having earlier.
Once you’re satisfied, make sure to apply a small amount of lubricant your spring, hinges, bearings, and metal rollers to give all your garage door components a tune up.

While there are a few steps that are similar to the extension spring, adjusting a torsion spring on a garage door has some different steps you want to take note of.
Unlike an extension, you’re going to be clamping your garage door in place while it’s shut. Because of this, you’ll be working while the spring is pulled to tension—which can increase the risk of injury here.
Make sure you have the appropriate light to work with, you have an alternative way out if anything were to go wrong, and all your tools are inside the garage before you start.
To secure your garage door shut, place your grip on the track of the garage door—just above the bottom roller—to prevent it from popping open.
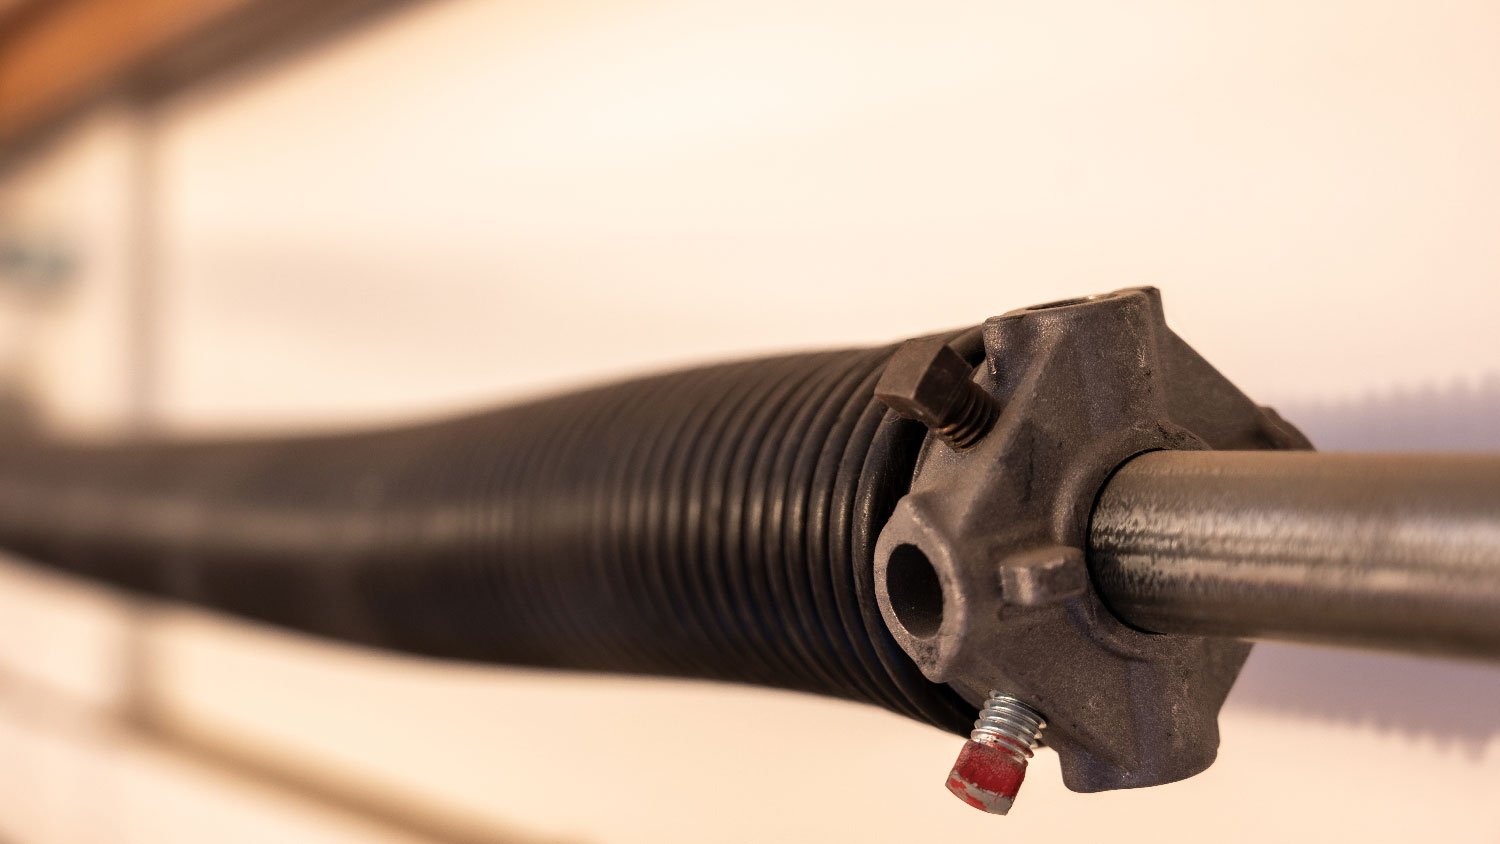
The torsion spring is kept in place by a winding cone, which is located at the outside end of the spring. The cone has four evenly spaced holes, which is where those two winding bars will come into play, and two set screws which secure the spring in place at the centre of the shaft—often having square ends and painted red.
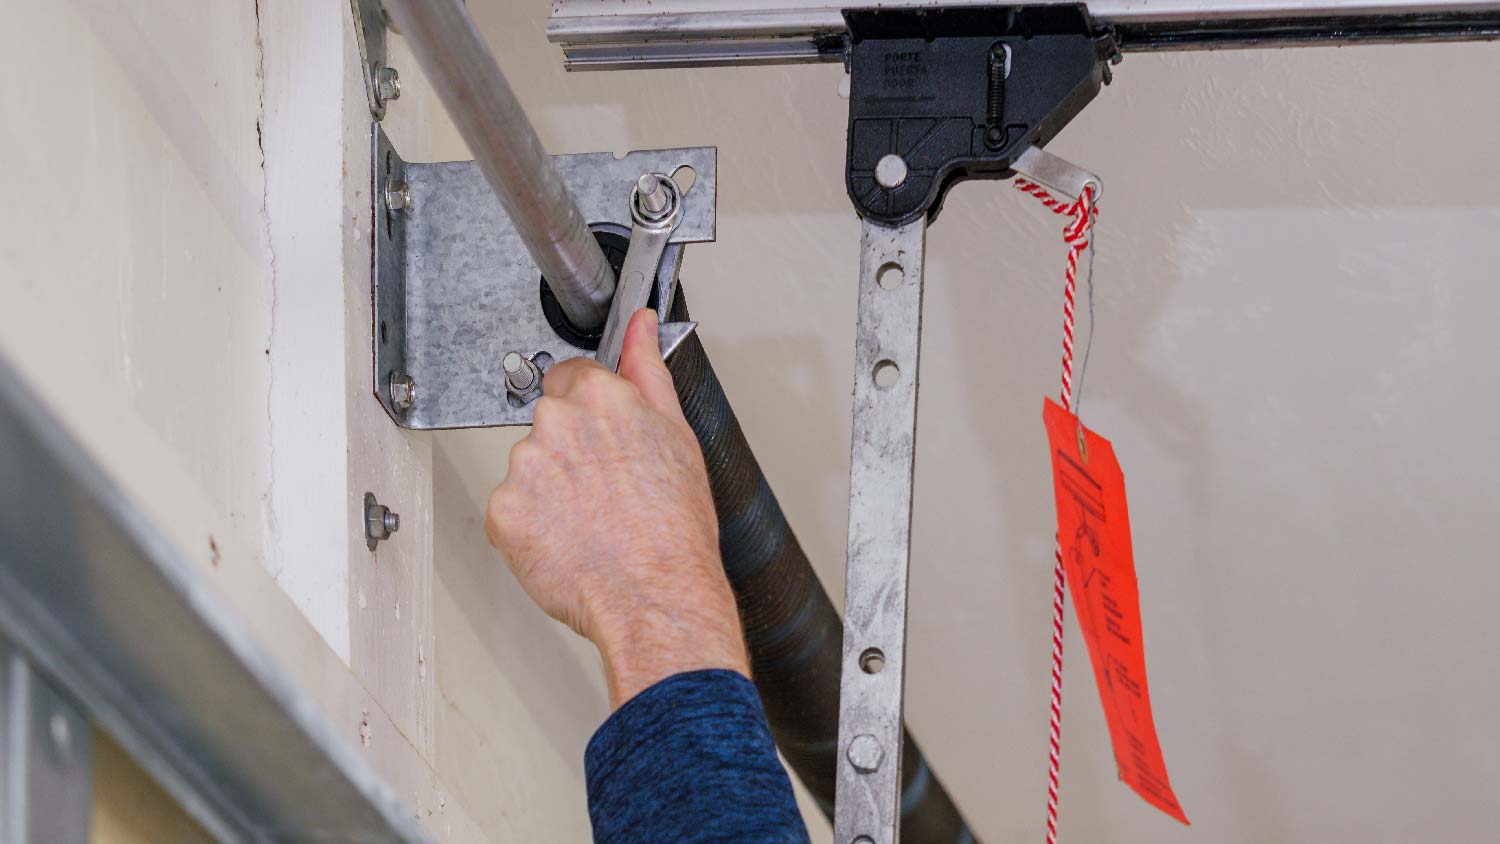
You’re going to loosen the set screw by inserting one of the two winding bars into the bottom how of the winding coil to hold it in place, and use your wrench to turn the screws counter-clockwise.
Now that your set screws are loose, insert your winding bars into perpendicular holes on the winding cone, creating a 90 degree angle. Be sure to position your head and body away from the spring, able to move quickly out of the way.
Once both you and the winding bars are secure, you’re going to give the cone a quarter turn clockwise or counter clockwise, depending on whether you want to increase or decrease the tension of the spring.
After you’ve completed the adjustment on one side of the spring, you’re going to tighten the set screws back into place, and repeat the steps for the otherside—noting how much adjusting you did on the previous side and ensuring you’re making the same adjustments.
With both sides of the spring adjusted equally, and the set screws secured into place, give your garage door a test to make sure all the adjustments are correct.
If you’re still having difficulty, repeat the steps to make slight adjustments until your problem is resolved.
Once you’re happy with the adjustments, give your garage door one final test—making sure to plug in any automatic components.
The final step is to lubricate the spring, hinges, bearings, and metal rollers to make sure your garage door is in tip-top shape.
The question of whether to increase or decrease your garage door spring’s tension can be a—for lack of a better word—tense question. The answer will vary based on the problem you’ve been epxeriencing.
If you’re having difficulting opening your door, or you find it’s closing too quickly, you should be increasing the tension here, stretching the spring.
A decrease in tension is needed if your door isn’t closing fully, having difficulty closing, or opens too quickly.
From average costs to expert advice, get all the answers you need to get your job done.

Want to ensure your home is secure for storm season? We discuss hurricane garage door costs and which factors influence the price tag.

Replacing a garage door sensor is one of the least expensive fixes for a garage door. Learn how you may not need to totally replace it if it only requires an alignment or cleaning.
.jpg?impolicy=leadImage)
This guide shows you what you can expect for garage door roller replacement cost if your rollers are sticking or screeching.

Does your garage door go up but not down? You might have sensor issues, a broken spring or cable, a malfunctioning opener, or issues with the tracks.

Garage door springs are essential for smooth and safe door operation. This guide will help you learn about the different types, their benefits and drawbacks, and the ideal use for each spring type.

Learn how to frame a garage door with our guide that includes instructions for each step, from measuring the rough opening to installing the side jambs.