
The cost to frame a house can vary depending on the size of your home, the structure you’re building, and your materials. Keep reading to learn how much framing your house might cost.
Make sure your retaining wall stands the test of time and the elements


Installing a retaining wall beside or under a driveway can add visual appeal and value to your property. It’s important to make sure a retaining wall like this is built well and will last a long time. Your investments in your driveway, vehicles, and landscaping depend on the integrity of this retaining wall. And more importantly, your safety and that of your family and anyone else who uses your driveway depends on the retaining wall standing strong for many years. Check out these important tips to keep in mind when building your driveway retaining wall. These tips assume that you’re building a retaining wall out of landscape blocks, but also apply to other materials such as concrete, landscape boulders, and railroad ties as well.
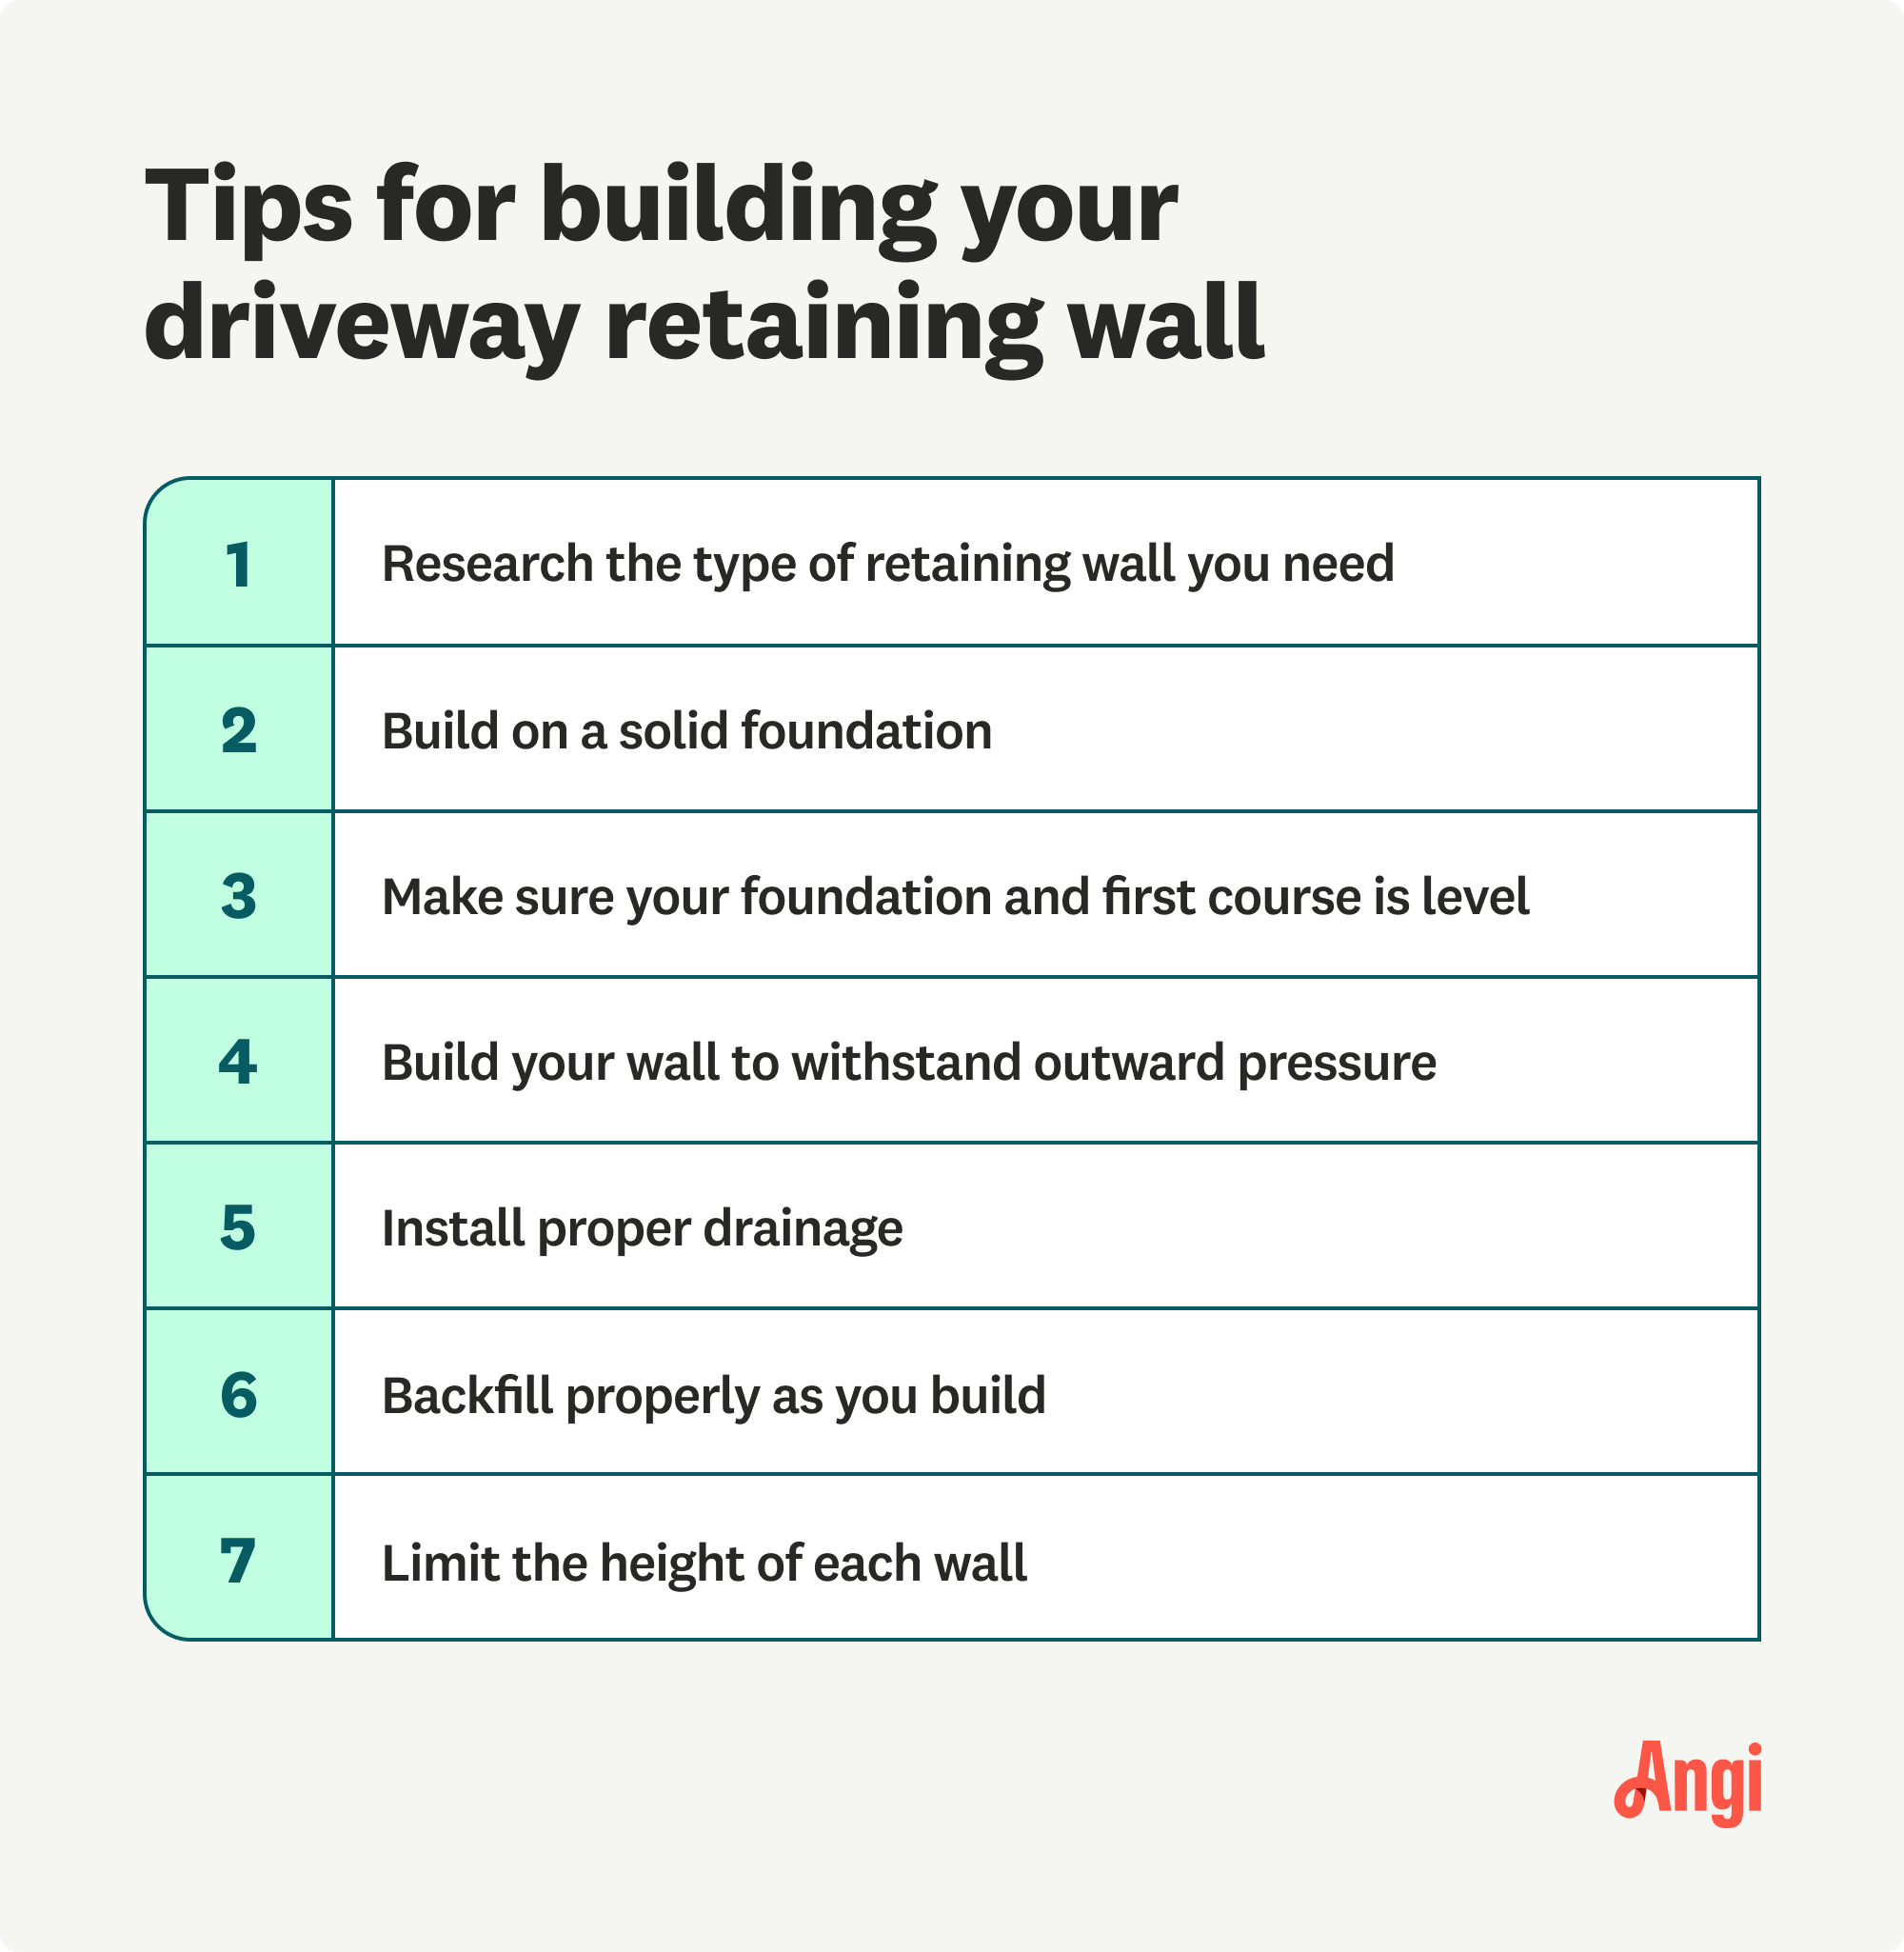
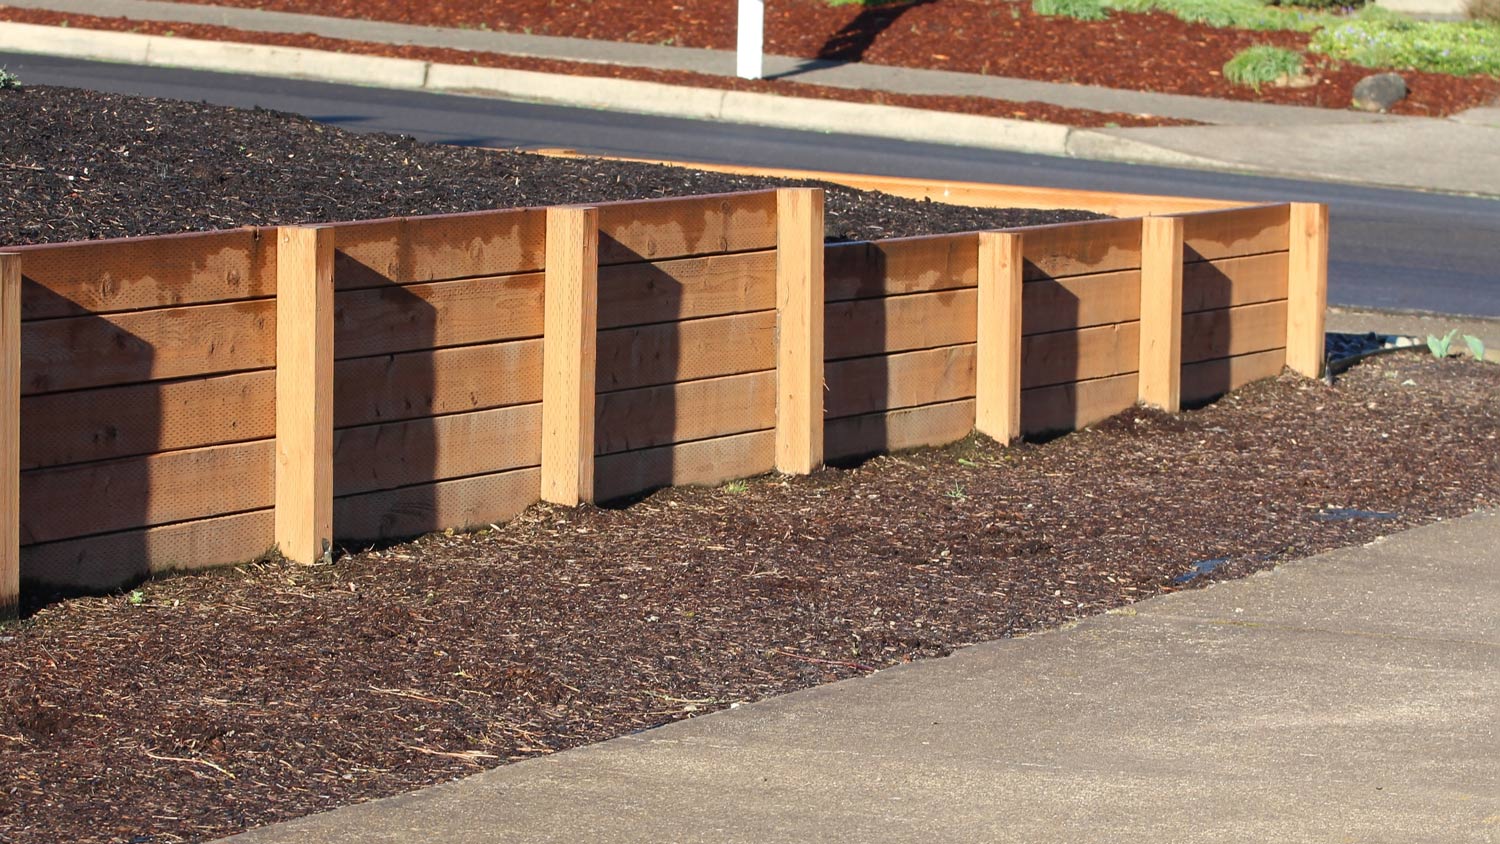
If your wall needs to support the weight of the driveway with vehicles on it, it’s imperative that you choose a wall system that is designed for that kind of application. If you need a retaining wall for landscaping beside the driveway to hold back soil, plants, and trees, that’s a different requirement. Depending on the application, you will find different options available.
As with your home, the structural integrity of what’s built on top of it requires a properly installed foundation. The material and thickness of the foundation depends on what you find out during your research phase, and what driveway retaining wall ideas you’re interested in. Some retaining walls can be built on a compacted crushed limestone foundation, while others may require pouring a concrete foundation and setting the first course of the retaining wall on a mortar bed.
Even though the foundation remains out of sight, it’s worth spending the time and money to make sure it’s going to withstand the load it bears as well as the movement inherent in a freeze-thaw cycle and any water that may end up behind the wall. After you’ve invested in the cost to pave your driveway, it’s worth taking care to protect that investment with a quality retaining wall.
Just like making sure you start with a solid foundation, that foundation and the first course of your retaining wall must be level-set and as flat as possible. Taking the extra time and care here will save you time, money, and major headaches later on. This begins as quickly as a few courses up from the foundation. If your footing or first course of retaining wall is uneven, that will compound quickly as you add more courses or layers of wall blocks.
At some point you’ll have to decide if you’re going to try to live with the unevenness or tear down the work you’ve done and start over. Use the longest level you can as you install the foundation and first course. We recommend at least a 4-foot long carpenter’s level. Shorter levels are often not accurate enough for ensuring that longer stretches of foundation and wall are perfectly level. Also, we recommend stretching a mason’s line the length of the wall to ensure that you’re laying the first row of blocks in a straight, level line. If you’re going to invest in the cost of a driveway retaining wall, it’s worth doing it right the first time.
Soil, water, and added weight from a driveway and vehicles pushes against the back of the wall, and that outward pressure can cause your retaining wall to fall over. Different wall systems use different features to prevent this, from anchors or mesh that reaches back into the soil behind the wall to pins that hold the blocks in place. Many wall systems are designed to lay each course of blocks set back so that the face of the wall slopes backward to counteract that outward pressure.
Much of the outward pressure behind retaining walls comes from precipitation. Allowing that water to drain properly is essential for preventing hydrostatic pressure from pushing your retaining wall over. Retaining walls typically require at least 12 inches of crushed stone encased in mesh behind the wall. The mesh keeps soil from filtering into the stone and preventing proper drainage.
At the bottom of your retaining wall, install perforated drain tile that then runs out beyond the end of your retaining wall or as directed by the wall block manufacturer. Water drains down through the stone into the perforated drainage tile and then runs out, keeping water pressure from building up against the back of your retaining wall.
As you build your retaining wall and install the drainage stone, it’s important to backfill beyond that with sand or pea gravel—both of which drain well—compacting in lifts (running a compactor over the sand or pea gravel with every additional 6 inches of material you add).
Compacting in lifts ensures that the backfill is properly compacted, because a compactor only compresses sand about 6 inches down. Running the compactor after you’re all done will leave the backfill lower down to settle naturally and you’ll end up with major settling over time, which means that the anchors or mesh are not held in place very well, weakening your retaining wall.
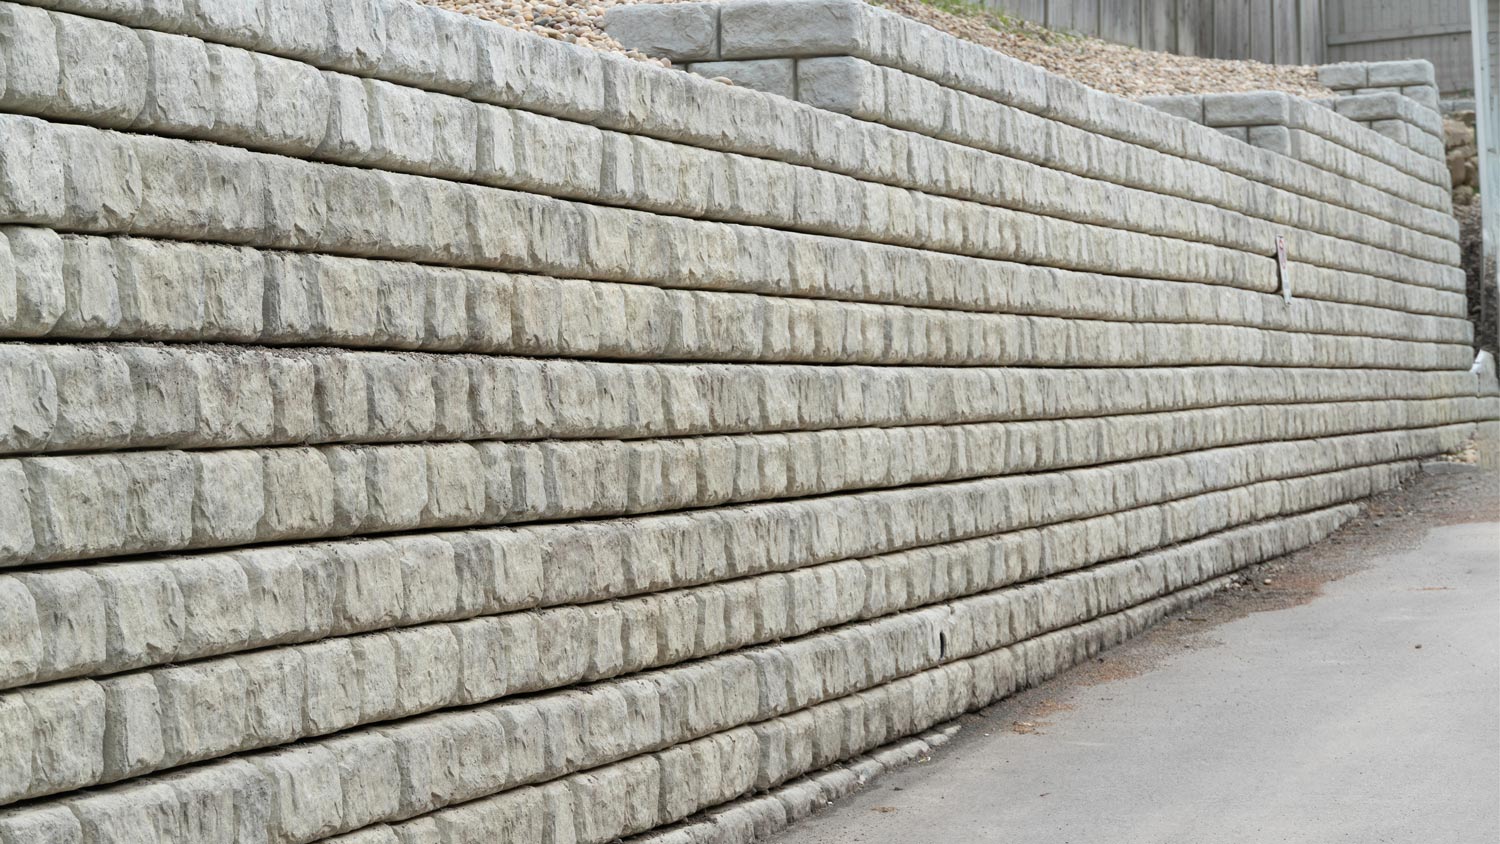
Depending on the wall system you’re using and the height of the retaining wall you’ll need, you may need to build your wall in tiers. Each type of wall will have different height limitations and setback requirements. This means that, for example, you may only be able to build each tier of the wall up to 3 or 4 feet tall before you need to set back the next wall tier 6 feet or more. Building in tiers with setbacks helps reduce the pressure against each wall.
Be sure to understand the design requirements for the wall system you choose. A retaining wall that will be holding up the weight of your driveway and vehicles and/or needs to be built taller than 1 foot should be installed by a professional landscaper or mason.
If the grade beside your driveway slopes up or down dramatically, a retaining wall may be a solid investment to prevent erosion from undermining or burying your driveway, depending on which direction the grade slopes. A retaining wall can be a valuable steep driveway solution, functionally and aesthetically.
Maybe you’ve looked into the cost of a driveway extension but the grade is making it difficult to add that parking slab. A retaining wall is an option for creating the flat space you need for that driveway addition.
However, installing a driveway retaining wall can be a massive undertaking. Heavy equipment is usually required to move and install the materials. The cost to hire an experienced pro is worth knowing that your driveway retaining wall is properly installed. The most valuable tip we have for installing a driveway retaining wall is to be sure to contact a local retaining wall builder for an estimate and advice.
From average costs to expert advice, get all the answers you need to get your job done.
The cost to frame a house can vary depending on the size of your home, the structure you’re building, and your materials. Keep reading to learn how much framing your house might cost.

Looking to turn your yard into a hockey or ice skating paradise this winter? Use this backyard ice rink cost guide to see what the installation will total.

Strong floor joists are the key to a structurally safe home. The cost of floor joist repair will often come down to what is causing the problem.

Removing popcorn ceiling requires skills, patience, and safety measures. Use this guide on how to remove popcorn ceiling to get started on your project.

Making your home wheelchair-accessible requires wider-than-standard doors. Learn what door sizes you need for wheelchair access.
Stair stringers support every step you take. From wood to steel, open to closed—explore the different types, materials, and whether to DIY or hire a pro.