

Leveling your yard can help with drainage and prevent damage to your home. Learn the cost to level a yard in Columbus, OH, and what factors can affect the price.
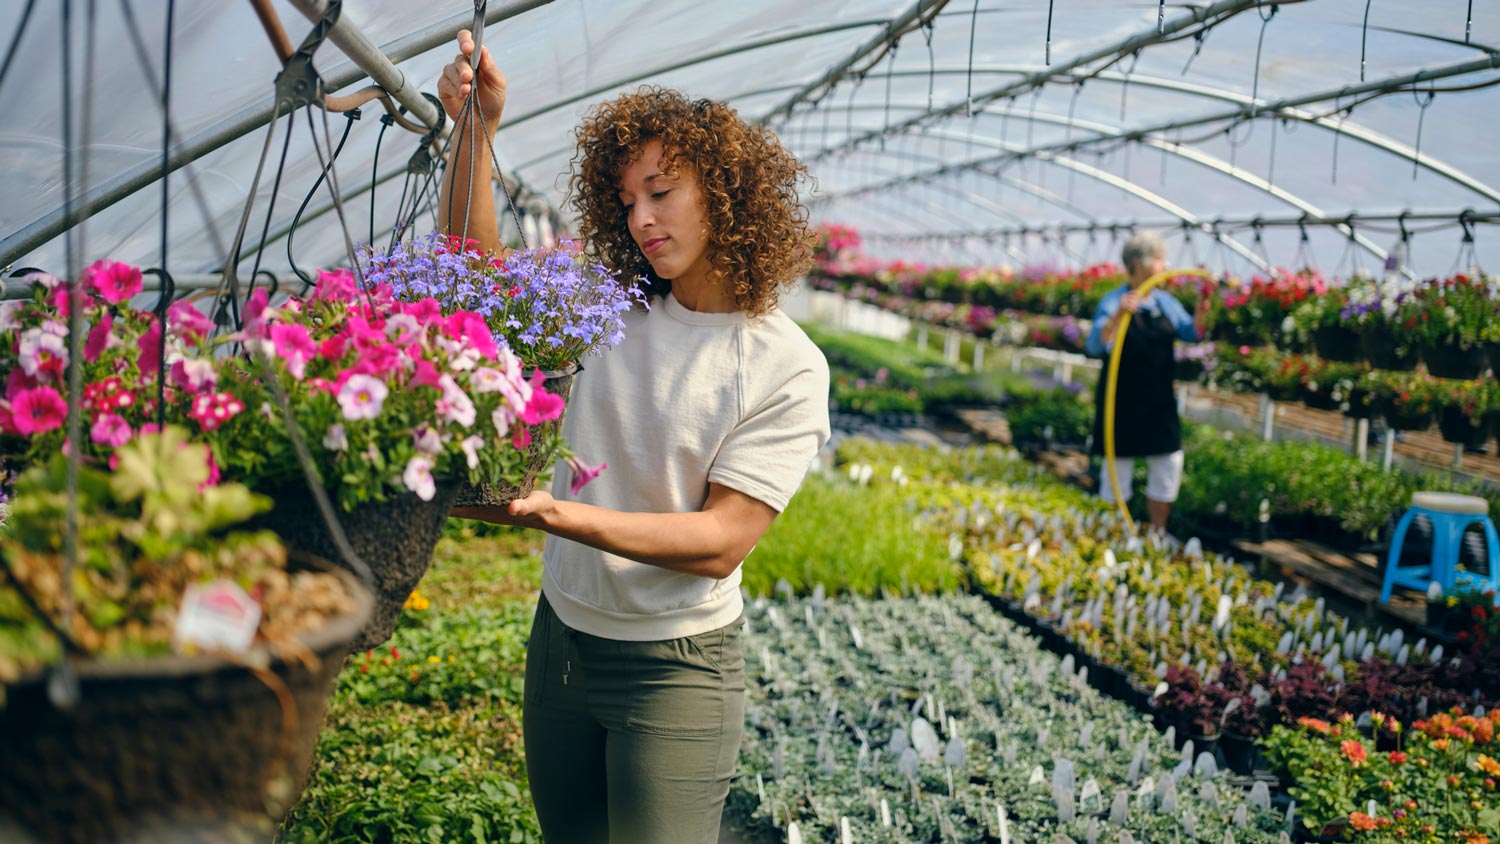
Good gardens really do come in small packages

If you’ve ever put a houseplant inside a pot, you’re already familiar with the idea of container gardening. Container gardening is a common gardening term, but what does it mean exactly? Simply put, it’s when you grow plants in (you guessed it!) containers. This type of home gardening isn’t actually a difficult hobby to start. All it takes is a little know-how and a trip to your local hardware store or garden center. Want to know how to start a container garden? These nine steps will turn you into an instant green thumb.
Before you start a container garden, you’re going to need a few gardening tools. These will help you dig holes, break up roots, move around soil, water your plants, and aerate the soil (since soil in containers tends to get compacted over time). Start with:
A hand-trowel
A hand-held cultivating tool, like a gardening fork or rake
Gardening gloves
A planting mat (to keep things tidy if you’re gardening indoors)
Scissors or pruning shears (use the latter if you’re growing larger bushes)
Container gardening is a delicate balance. Not all plants thrive in pots, and not all plants work in every climate. This latter isn’t a big deal if you’re gardening indoors (it’s the only way to grow tropical Monstera in the dead of winter). Nonetheless, if your plants are going outside, pay attention to your USDA Plant Hardiness Zone.
You’ll also want to pick plants that can survive in pots. Tall or oversized plants—including those that produce large fruit like some types of melon or pumpkin—just aren’t good contenders for a container garden. Instead, reach for flowers, tropical houseplants, succulents, herbs, or small fruit and vegetable plants.
You can start with seeds, bulbs, seedlings, or full-grown plants. All of these options should be available at your local nursery or garden center. For herbs, you can even scope out the grocery store.
For healthy container gardens, drainage is key. Water can’t soak into the ground or runoff like it normally would. If there isn’t proper drainage, plants are easily waterlogged—and nobody wants to deal with root rot or fungus. Instead, plan out a drainage solution in advance. You may want to:
Choose a pot with a drainage hole (preferable in a porous material like terra cotta)
Drill your own drainage hole in a planter
Choose a planter with a mesh bottom
Keep plants in their plastic nursery pot, so you can remove them from the container for watering
If you do choose to drill your own drainage hole, make sure you use the right drill bit. A regular bit works for plastic or wood, but you’ll need a carbide tip for glazed ceramic pots. A masonry drill bit works best for unglazed terra cotta.
You can’t have a container garden without a container. Your local plant nursery or hardware store will have a range of pots, planters, and containers. You can also create a DIY planter by recycling coffee cans or milk jugs.
Remember to match your container to your plant’s size. If you’re growing vegetables like tomatoes, you’ll need a large container that’s deep enough for the roots. Smaller plants with shallow roots like herbs can use a shallower planter. It’s important to keep in mind that the planter you choose will affect how your container plants retain water.
This includes plastic pots, metal containers, glazed ceramic pots, and other planters made from non-porous materials. These containers hold water. They can help you stretch the time between watering, but they also make it easier to overwater your plant accidentally.
This includes terra cotta pots, clay pots, ceramic containers without glaze, and wooden planters. These materials are porous and allow water to evaporate easily. They’re the best for first-time gardeners because they help prevent waterlogged roots, but you will have to water them more often.
These containers have a basin that holds water, so you can water your plants less frequently. They’re more popular with indoor container gardens than outdoor plants.
To grow healthy plants in a container garden, you have to be smart about soil. Regular garden soil compacts too easily. Topsoil can lack nutrients. Instead, purchase a growing medium specifically for containers. There are special mixes for orchids, succulents, seeds, and tropical plants. For an all-purpose solution:
Potting mix is usually best for indoor plants
Potting soil works better for outdoor plants
Look for a potting mix or soil that includes ingredients like peat moss, vermiculite, ground pine bark, and coconut coir. These materials help aerate the soil, allow it to retain moisture, and provide nutrients. The ideal potting soil is fluffy, light, and moist without being waterlogged.
Planting your container garden is pretty straightforward. Don’t crowd your plants. Make sure they have room to grow without quickly becoming rootbound (when the roots start to fold up on themselves inside the pot). Use a pot filler like milk jugs, soda bottles, or a plastic flower pot turned upside down for a large container, so excess oil doesn’t weigh down your container.
Since planters are self-contained, it’s easy for nutrients to run right out of the drainage hole. You’ll need to fertilize your potted plants to get the lushest leaves and largest yield. If your potting mix doesn’t already include fertilizer, start with a slow-release fertilizer (they come in both pellets or sticks). Generally, this type of fertilizer works for 60 to 120 days. Follow up with a liquid fertilizer containing equal parts nitrogen, phosphorus, and potassium.

The fastest way to kill your potted plants is by overwatering. Look at the nursery tag, which should tell you how much sunlight and water your plants need. Herbs tend to like moist soil, but tomatoes are easily waterlogged. Something like a succulent rarely needs water. It’s a toss-up.
As a rule, only water your container plants if the first inch of soil is dry. If the soil is still moist, leave it alone. If all else fails, you can always hire a local outdoor plant watering service.
Pruning helps you shape your container plants, allows you to remove dead or diseased foliage, and promotes growth. Make sure to only use clean pruning shears or scissors when pruning your plants or harvesting your veggies and herbs. Bacteria affects plants the same way it affects you—it can make them sick.
From average costs to expert advice, get all the answers you need to get your job done.
Leveling your yard can help with drainage and prevent damage to your home. Learn the cost to level a yard in Columbus, OH, and what factors can affect the price.

A landscape designer can elevate your outdoor space and bring your vision to life. Use this landscape design cost guide to budget for your next project.

Looking to step up your golf game without leaving your property? This guide details backyard putting green costs to help you decide if this project is worth it.

If you want a great garden year after year, this guide will show you the best perennials for butterfly gardens, xeriscapes, and beyond.
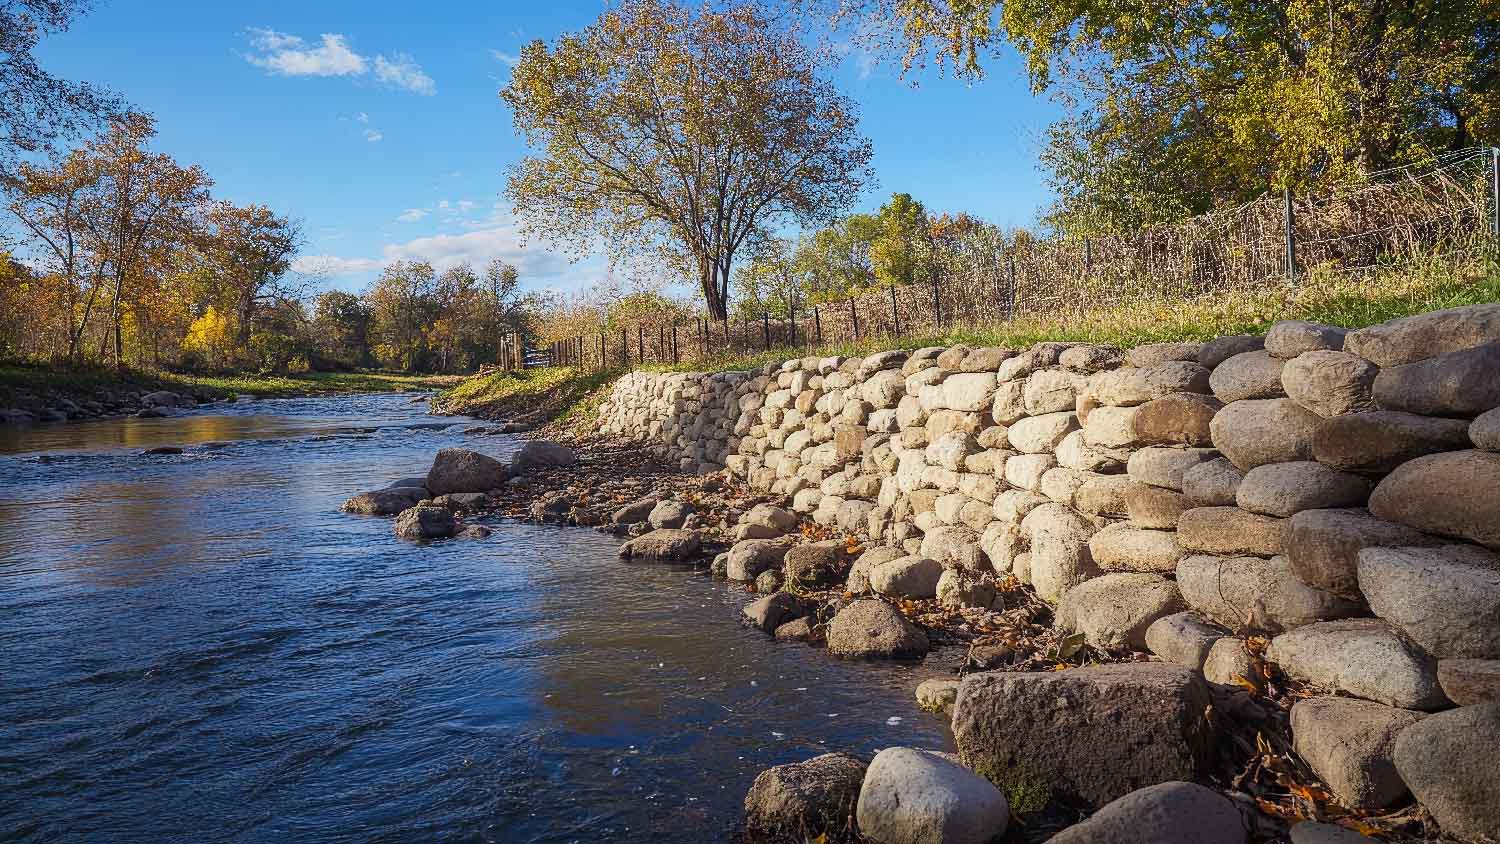
Looking to build flood and erosion resilience on your land? Review this guide for riprap costs that will stabilize your shorefront property.

Preparing your pond for the winter can keep it healthy until springtime. Learn how to winterize a pond with this how-to guide.