Wool insulation offers a higher R-value than fiberglass but is more expensive. Use this guide to estimate wool insulation costs for your home.
The average cost of installing blown-in insulation is $1,655, depending on the square footage and other cost factors.


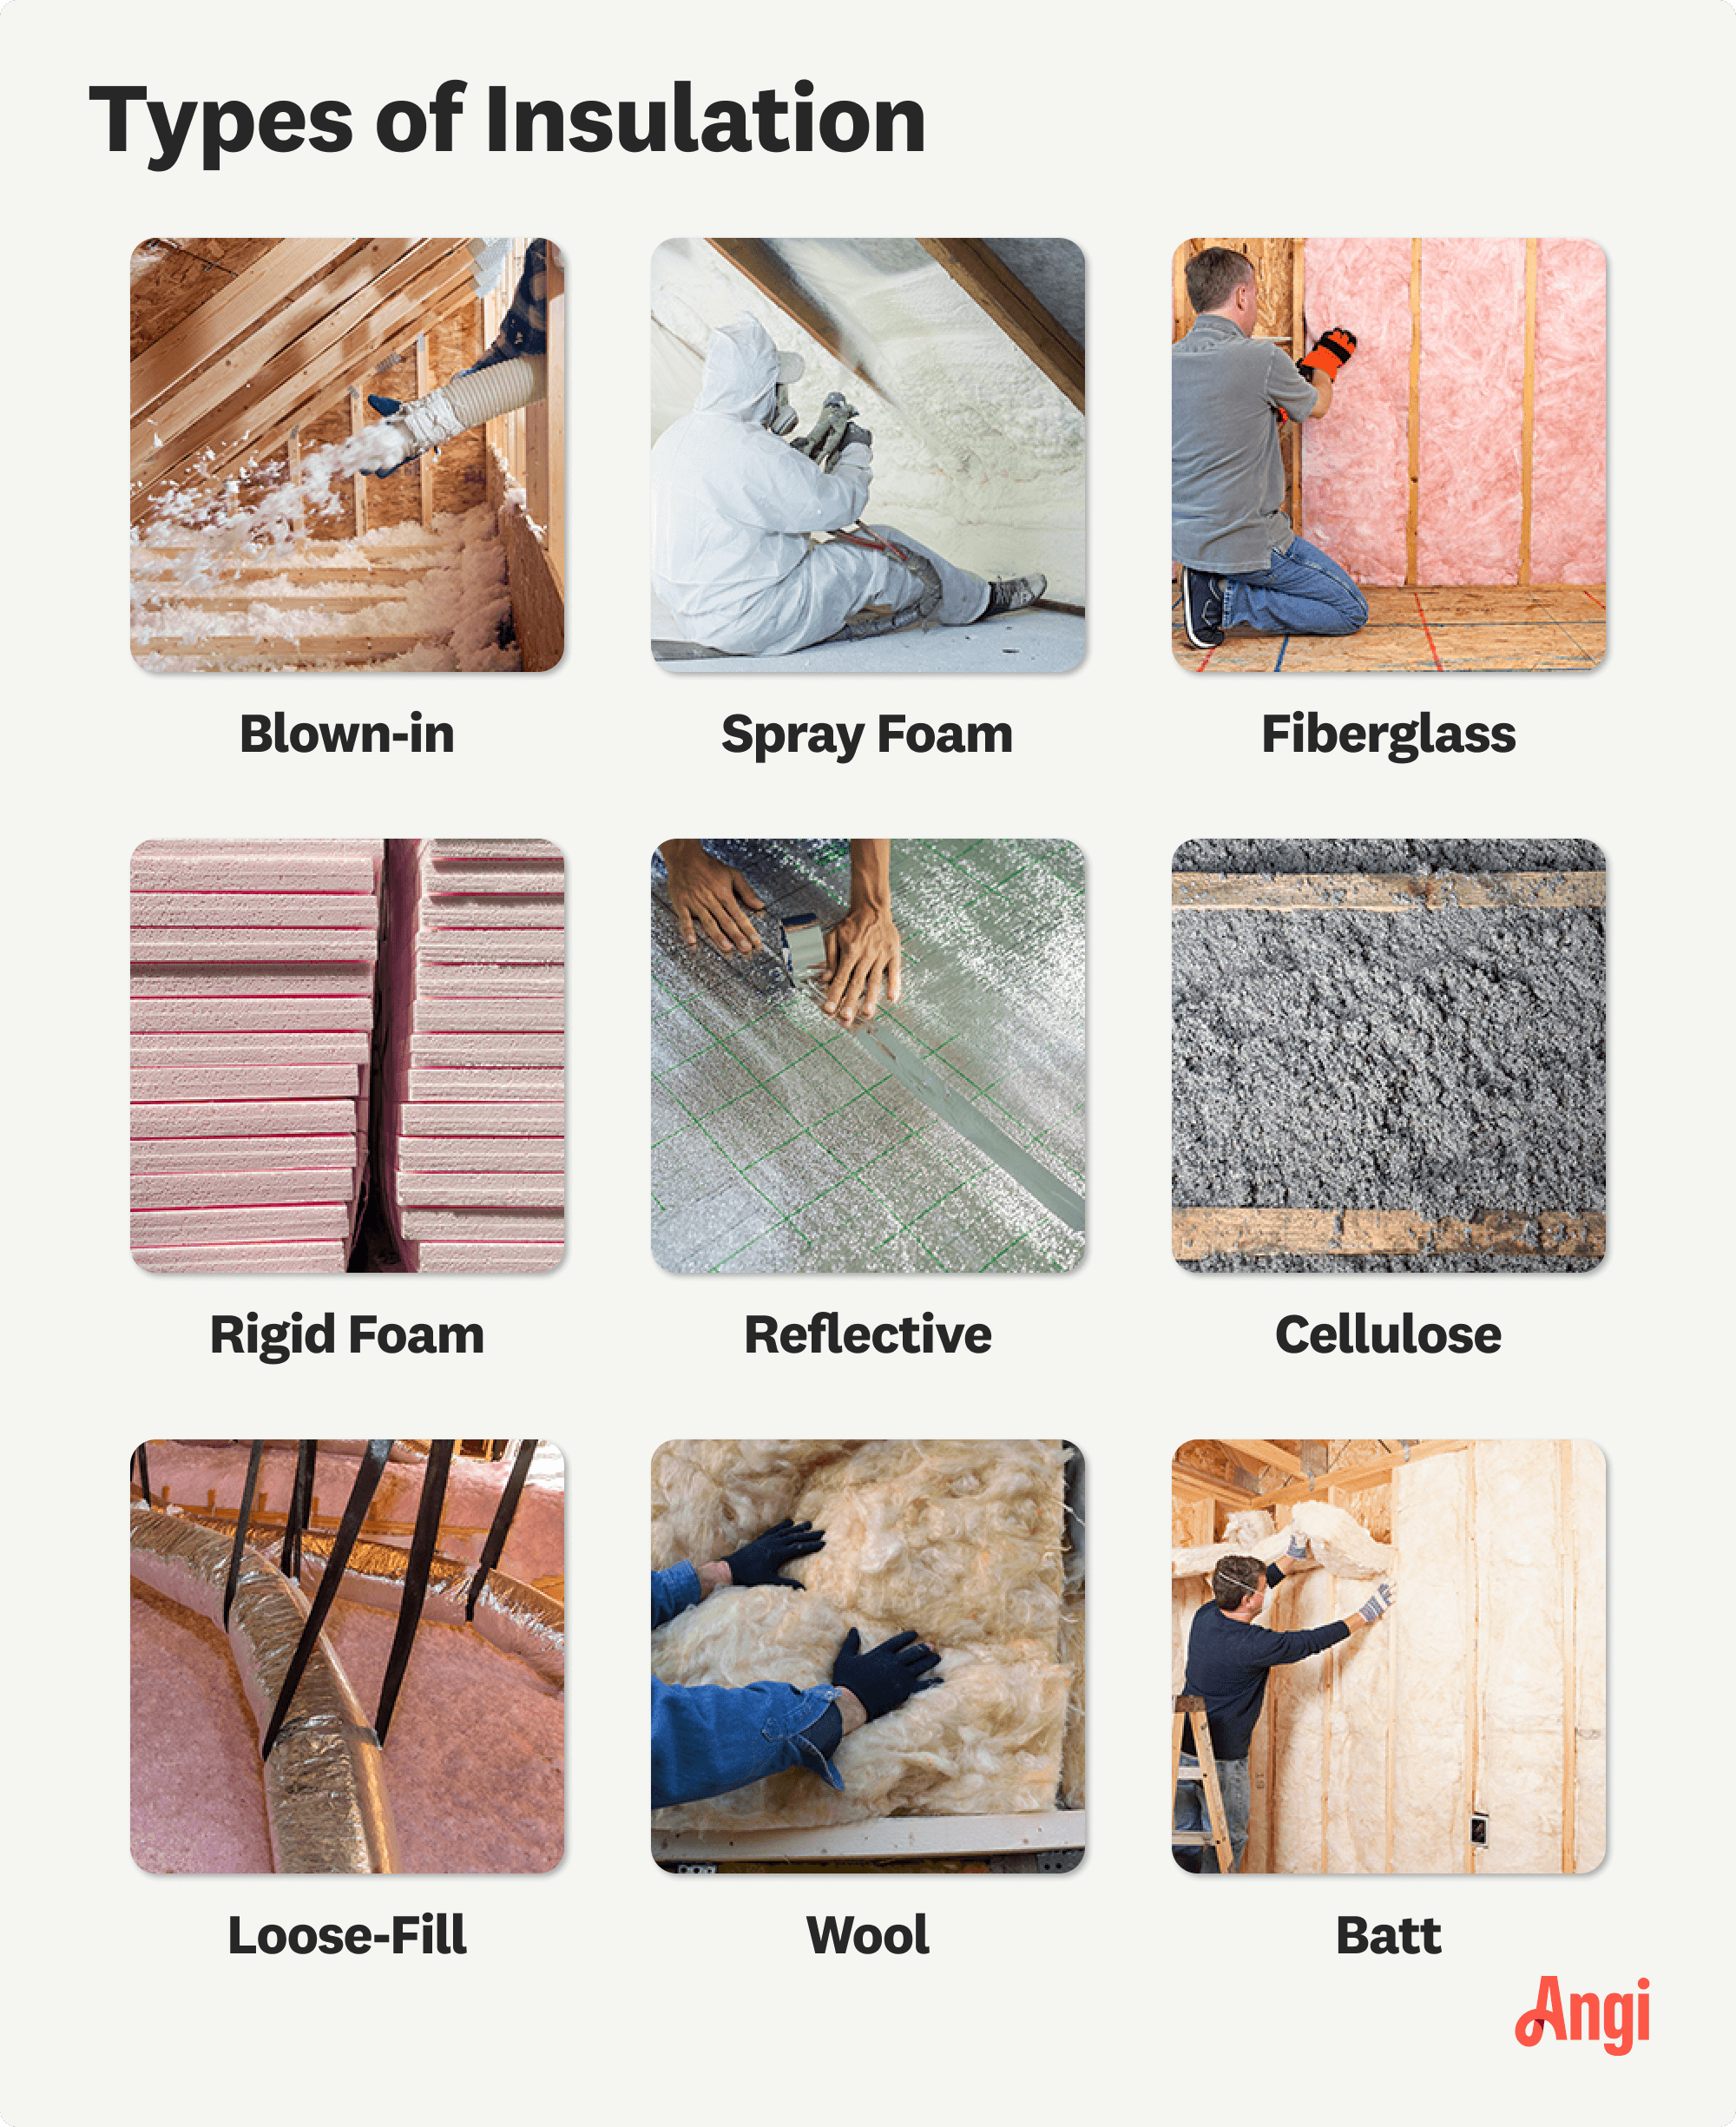
Blown-in insulation—also known as loose-fill insulation—costs between $1.75 and $7.50 per square foot, depending on its variety, installation location, and R-value.
Replacing insulation in the walls will cost less than insulating new homes or previously bare attics.
You'll pay the least per square foot for fiberglass blown-in insulation and the most for cellulose and wool.
Hiring a professional to install blown-in insulation is your best bet, but you can save money by purchasing materials yourself.
Additional costs may include air sealing, mold remediation, or pest control in the insulation area.
The average blown-in insulation cost (also called loose fill) is about $1,655, or between $985 and $2,328. This home improvement project could pay you back with savings on heating and cooling bills in the long run.
You’ve got your cozy fireplace, warm slippers, and hot tea to keep you warm, but for the ultimate comfort, check your insulation. Think of blown-in insulation like a layer of snow that settles into the nooks and crannies between boards or pipes to prevent leaks. Read on to learn the blown-in wall insulation cost, its various price factors, and how to save money on your insulation project.
Plenty of factors impact the overall cost of placing blown-in insulation throughout your home. Let’s take a look at how these factors can help determine your total project cost.
| Area in Square Feet | Blown-in Insulation Cost Range |
|---|---|
| 500 | $875–$3,750 |
| 1,000 | $1,750–$7,500 |
| 1,500 | $2,625–$11,250 |
The biggest cost factor is the size of the area that requires insulation. A larger area requires more insulation and labor, increasing the overall price. This metric is calculated by multiplying your square footage by the cost per square foot of your chosen insulation materials, which are detailed below. However, a general range for blown-in insulation per square foot is $1.75 to $7.50 depending on the type.
Whether you’re installing blown-in insulation in new or existing walls will impact the price. For example, newly-constructed homes reserve blown-in insulation for the attic, with construction pros using batt or spray foam insulation inside the interior walls. However, older homes can have blown-in insulation in both attics and exterior walls. Here is how these insulation costs break down.
Existing walls: Replacing insulation in an older house costs around $1.75 to $3.50 per square foot.
New homes: Insulating attic walls in a newly constructed home with blown-in insulation costs $2 to $4 per square foot.
Attic: Insulating an attic using blown-in insulation costs between $3 to $7.50 per square foot.
When measuring the efficacy of any insulation material, it all boils down to the R-value. Generally speaking, higher is better, though there are two metrics to consider. There’s the overall R-value and the per-inch R-value. For example, if you want a total R-value of 30, you’ll need ten inches of insulation at an R-value of 3.0 per inch. Materials with higher R-values cost more, like sheep’s wool, but you don’t need as much material to complete the installation.
Below is a breakdown of R-values and the corresponding prices:
| R-Value | Number of Bags per 1,000 sq. ft. | Price Range |
|---|---|---|
| R-13–R-21 | 7–10 | $230–$330 |
| R-30–R-49 | 15–20 | $500–$1,600 |
| R-38–R-49 | 20–26 | $1,300–$1,600 |
| R-49–R-60 | 26–32 | $1,600–$2,000 |
Additionally, more is not always better. Maxing out your R-value is great for colder climates but likely unnecessary in more temperate regions. Different regions require different R-values, so talk to your insulation pro about your options.

The cost to install blown-in insulation depends on the type of insulation you choose for the project. Anticipate spending anywhere between $0.50 and $2.30 per square foot for materials, not including installation. Below is a breakdown of each blown-in material type and how much it costs.
| Type of Blown-In Insulation | R-Value per Inch | Average Cost per Square Foot |
|---|---|---|
| Fiberglass | 2.5 to 3.5 | $0.50 to $1.10 |
| Wet-spray cellulose | 3.2 to 3.7 | $0.60 to $1.80 |
| Dense-pack cellulose | 3.2 to 3.7 | $2 to $2.30 |
| Rockwool | 3.0 to 3.7 | $1.40 to $2.10 |
| Natural wool | 3.5 to 3.8 | $1.50 to $3.10 |
Where you live plays a key role in the cost of your insulation. Colder regions require a higher and costlier R-value than homes in warmer climates. For instance, if you live in Florida, you may only spend between $500 and $1,600 on attic insulation costs, whereas a home in Alaska may cost between $1,600 and $2,000 or more.
You can refer to the Department of Energy for zoning information and to help you determine your region’s R-value requirements.
Installing blown-in insulation requires specialized equipment, so DIYing this project might not save you much due to rental and material costs. Hire a local insulation pro who has the equipment and know-how to install blown-in insulation and ensure the job is done right.
Blown-in insulation installation can be a complicated process—here’s why you should hire a pro who installs insulation:
A pro already has all the equipment on hand for installation and plenty of practice using it.
Professional insulation installers can spot and avoid hazards like mold, asbestos, and faulty wiring.
An insulation installation pro can ensure blown-in insulation is installed correctly around wall studs, HVAC ducts, and wiring.
Pros can minimize the mess and dust created during the installation process.
A pro can safely remove old, contaminated insulation for a fresh installation of new material.
If you decide to tackle some of this project on your own, here are some things you can do:
Purchase the material from a local store
Pre-clean the area so it’s easily accessible during installation
Remove insulation that’s been contaminated by pests or mold—be sure to wear proper protective gear
Remove and replace drywall if necessary to access the insulation area
In some cases, your costs extend beyond materials and labor, especially if you need to perform related tasks before adding insulation. Here are some common additional costs to consider.
Air sealing: A pro often recommends air sealing to avoid drafts and minimize your utility bills. This extra task costs $300 to $1,500.
Wiring: Electricians charge $50 to $100 per hour, but the overall wiring cost depends on the size of the area and the status of the current wiring.
Mold remediation: Mold remediation costs $10 to $25 per square foot.
Asbestos removal: Asbestos remediation costs $1,200 to $3,300. You should hire an asbestos abatement company near you to handle this task.
Removing existing insulation: Insulation removal costs range from $1.50 to $3 per square foot.
Pest removal: Pest control costs between $50 and $500 or around $175 on average.

Follow these helpful tips to potentially lower the project cost of installing blown-in insulation.
Opt for less expensive insulation: Fiberglass is the least expensive option, costing nearly half the cost of other materials. The R-value is not as robust as other insulation types, but the difference is negligible for many homeowners. Remember, depending on where you live and any pre-existing insulation, you don’t necessarily need the highest possible R-value.
Don’t remove pre-existing insulation: Most insulation is stackable, meaning you can add on to existing insulation to increase your home’s R-value. Blow the insulation on top of pre-existing materials to save money, but ensure the original insulation is still in decent shape and is not filled with mold, asbestos, or insects.
Get multiple estimates: Contact a few insulation experts and gather estimates. That way, you can guarantee that you’re getting the best value for your service.
Let the pro know what kind of insulation you currently have.
Take rough measurements of the area being insulated—the pro will get the exact dimensions, but it’s good to have an idea of the size.
Discuss your budget and home heating needs to decide what kind of blown-in insulation will be best.
Find out if a permit is required for insulation installation and who’s responsible for pulling it.
Home is the most important place on earth, which is why Angi has helped more than 150 million homeowners transform their houses into homes they adore. To help homeowners with their next project, Angi provides readers with the most accurate cost data and upholds strict editorial standards. We’ve surveyed over 10,000 real Angi customers about their project costs to develop the pricing data you see, so you can make the best decisions for you and your home. We pair this data with research from reputable sources, including the U.S. Bureau of Labor Statistics, academic journals, market studies, and interviews with industry experts—all to ensure our prices reflect real-world projects.
Want to help us improve our cost data? Send us a recent project quote to [email protected]. Quotes and personal information will not be shared publicly.
From average costs to expert advice, get all the answers you need to get your job done.

Wool insulation offers a higher R-value than fiberglass but is more expensive. Use this guide to estimate wool insulation costs for your home.

Crawl space insulation costs vary by size, insulation type, and material. Read this guide to learn how much your crawl space insulation could cost.

How much does a radiant barrier cost? Our guide breaks down prices by type of barrier and size of your attic space.

Learn everything you need to know about mineral wool insulation when selecting the insulation with the best R-value for your home.

EPS versus XPS insulation—if you're going the foam board insulation route, which one is right for you? Learn the difference and how to choose.

Your attic insulation removal cost will vary based on multiple factors, including why you're removing it and how easy it is to complete the task.