How to Fix Cracked Grout in 7 Simple Steps
Improve your shower’s appearance and prevent leaks with this DIY fix


- Dremel
- Grout blade(s)
- Extension cord
- Grout saw
- Safety glasses
- Hearing protection
- Rags
- Grout
- Vinegar
- Water
Cracked grout around your home can not only look bad, but it can also cause problems for both you and your home.
Grout is used to fill the lines between the tiles on your floors and walls. It’s a mixture of cement and sand that bonds your tiles together while creating a waterproof seal that keeps any moisture from getting through to your sub-flooring or walls. Knowing how to clean floor tile grout can lengthen your tile’s life, but no grout (or tile) will last forever.
Over time, your grout can crack or chip away. This can cause your tiles to shift and crack (hello, tripping hazards), and lead to damage to the sub-flooring and drywall located behind your tiles. But the good news: taking care of your damaged grout is easy–even for a novice DIYer.

Remove the Damaged Grout
For grout that’s already loose and easy to remove, you can do it by hand. The more difficult-to-access pieces may require a grout saw. Slowly move the saw back and forth across the grout like you’re cleaning it. Continue doing this until the grout is in pieces, and you can easily remove it by hand.
You should always remove as much of the old grout as possible before adding a new layer. Otherwise, the newly applied grout won't bond correctly to the surrounding surfaces, creating an even bigger headache later on. Keep this in mind as you look at shower tile ideas because you’ll probably need to replace the grout several times while you own it.
Color-Match the New Grout
Unless you’re replacing all of the grout in your space, you’ll need to find a replacement that is as close to the original color as possible. Otherwise, it will be very obvious where you regrouted.
You can get help by taking a piece of your old grout to a home improvement store. An employee might be able to color-match the sample to one of their products.
Vacuum and Clean Up Dust and Debris
Use your shop vac, or if you don’t have one, the hose attachment on your vacuum to clean up all excess grout and any dust or debris. Go slowly up and down each area of the grout with your vacuum to clean the area. Once you clear the dirt and debris, you can determine if you need to go back to step one and remove more grout.
Apply Your New Grout
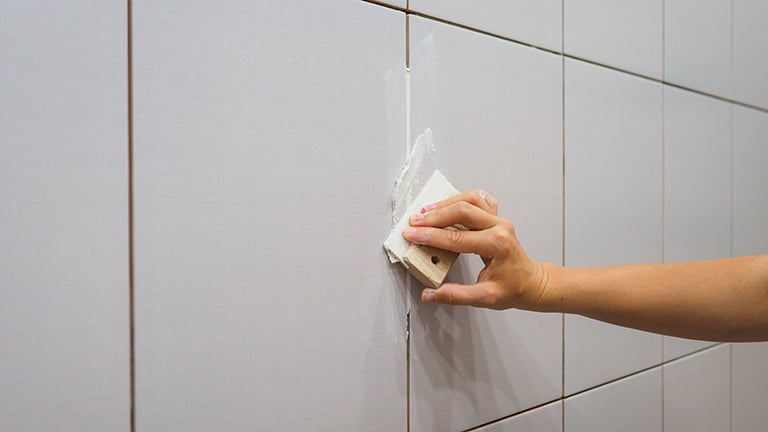 Photo: Alexander Pytskiy/iStock / Getty Images Plus / GettyImages
If you purchased a mixable grout, start by mixing the grout powder with water per the instructions. Read the instructions and product labels carefully to ensure you get the ratio correct.
Pour one fourth to one half of a gallon of grout over the tiles you’re regrouting. Use the rubber grout float, or putty knife if it’s a smaller section, to spread the grout evenly over the edges. Apply the grout in a sweeping circle motion to ensure it evenly covers the tiles and crevices.
Avoid putting too much grout on the tiles at one time. It’s better to start with small layers and add more as you go.
Remove the Excess Grout
After applying the new grout, use the rubber grout float to remove the excess grout. Holding the grout float at a 45-degree angle, slowly drag it across the grout. This will clean up any excess and make the grout smooth. If you’re learning how to regrout floor tile, removing excess grout is an important step, as too much grout can create a tripping hazard.
Let It Dry
Whether you’re fixing the grout on your floor or walls, let it dry completely before walking on the surface or allowing water or other moisture to come into contact with it. Drying times can vary by product, but most grout requires 48 hours to fully cure.
Seal the Surface
An easy way to keep your grout looking its best–and prevent future cracks–is by sealing it. This step is an investment in keeping your grout looking its best for years to come, and reduce the risk of cracks, holes and mold. The cost to seal grout is minimal, and the return on investment is immense.
Once your grout is dry, use one fourth cup of vinegar mixed with eight ounces of water in a spray bottle to wipe down the area. This step removes impurities and helps to disinfect the area. Be sure to wait the appropriate amount of dry time, per the instructions.
Apply a thin coat of the appropriate sealant with a sponge, quickly wiping away any excess before it dries. Apply between two to three coats of sealant, being sure to allow one hour of drying time between each layer.
The type of sealant you use will vary depending on your type of surface. For example, your bathroom will probably see more moisture than your living room floor, so you want to make sure any sealant you use in the bathroom area has a waterproof component. Using sealant will increase you tile installation cost, but it is a necessary step.
DIY vs. Hiring a Pro to Fix Cracked Grout
When hiring a professional, it costs an average of $180 to $420 for grout repair projects. You might save a little money doing it yourself if you already own the tools, like a grout saw, grout blade, and grout float, but it can be messy and frustrating to DIY this project.
It takes the average person four times longer than a professional to remove old grout, so if you are redoing the grout on an entire floor or shower wall, it’s probably best to leave it to the pros. If you have only a few spots to fix, doing it yourself may be less time-consuming.
Frequently Asked Questions
The grout in your shower might be coming out for many reasons, including poor mixing or installation. The grout might not have settled properly if you added too much water. Also, it may not provide the necessary strength if you didn’t correctly pack the grout between the tiles.
You might also have a moisture problem, which can occur if you don’t seal porous grout, allowing water and even mold to grow. Finally, if you didn’t remove all of the old grout before replacing it, the new grout may not have settled deep enough to support the tiles.
Yes, it’s imperative to fix cracked grout in the shower of all places. Water can seep behind the tiles if the grout is in disrepair. This can lead to loose tiles and become a breeding ground for mold and mildew, risking your family’s health.
It’s best to remove old grout before putting in new grout. It is more aesthetically pleasing and allows the new grout enough room to support the tiles, making them last longer.
Consider regrouting your shower every one to two years, depending on how much use it gets. The larger your family or the more use a shower gets, the more frequently you should regrout it.


- Bathroom Remodeling
- Kitchen Remodeling
- Shower Installation
- Stair Installers
- Bathtub Installation
- Shower Door Installers
- Kitchen Design
- Bathroom Design Companies
- Storm Shelter Builders
- Pre-Made Cabinets
- Kitchen Refacing
- Bathtub Replacement
- Ceiling Tile Installation
- Suspended Ceiling Companies
- Residential Designers
- Stair Builders
- Remodel Designers
- Shower Enclosures
- Home Renovations
- Kitchen Renovations
- Garage Remodeling
- Grab Bar Installation
- Walk-In Tub Installers
- Tub to Shower Conversion
- Balcony Contractors
Get our Angi-powered app


