

The cost to paint a house's exterior depends on its size, siding type, and height. The finish and the home's exterior condition also play a role.
Make sure you prepare your home for an exterior paint job that lasts

Painting an exterior house requires good weather between 50 and 80 degrees, so plan your project during dry spring or fall months for proper paint adhesion.
Expect to pay $1,735 to $4,335 for professional exterior painting, while DIY projects cost around $750 for paint and prep materials.
Wash your home's exterior thoroughly before painting to remove dirt and mildew, ensuring the new paint bonds properly and lasts longer on your siding.
Hiring a local exterior painting professional provides peace of mind with proper surface prep, lead paint handling, and scaffolding safety for multi-story homes.
We’d all love a pristine painted house that belongs on the cover of a home design magazine. However, getting that level of curb appeal isn’t as easy as spraying and brushing on the right paint colors and calling it a day. Luckily, there are practical steps you can take to prepare your home for a flawless exterior paint project that will make you proud.
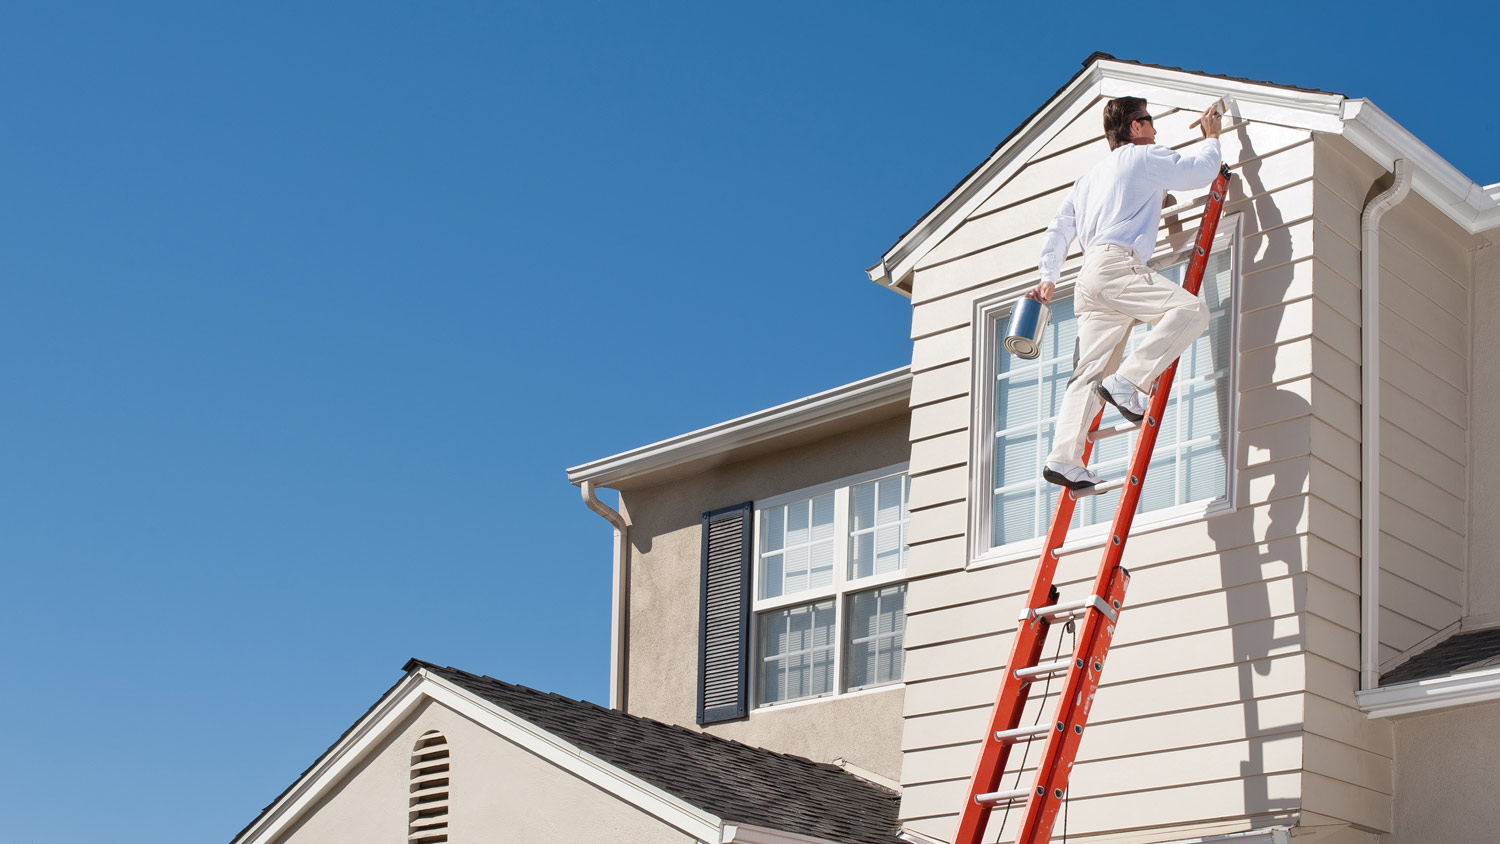
If you plan to tackle your painting project on the weekends, know that getting the best exterior paint job requires three weekends of good weather. Give yourself a buffer if unpredicted rain or humidity sneaks in. To be on the safe side, carve out a month during the dry season for your project when temperatures fall between 50 and 80 degrees Fahrenheit.
If you paint during inclement weather, it can cause your uncured paint coat to blister. You’ll also need a ladder with good support or a scaffold if your home has more than one story.
I usually recommend exterior home painting in spring and fall since temperatures outside can impact how well your paint adheres and how long that exterior paint job lasts. I don’t recommend painting when there’s any risk of below-freezing temperatures or when it’s above 80 degrees or higher. The sweet spot is right around 60 degrees or so for paint that dries thoroughly and has good adhesion.
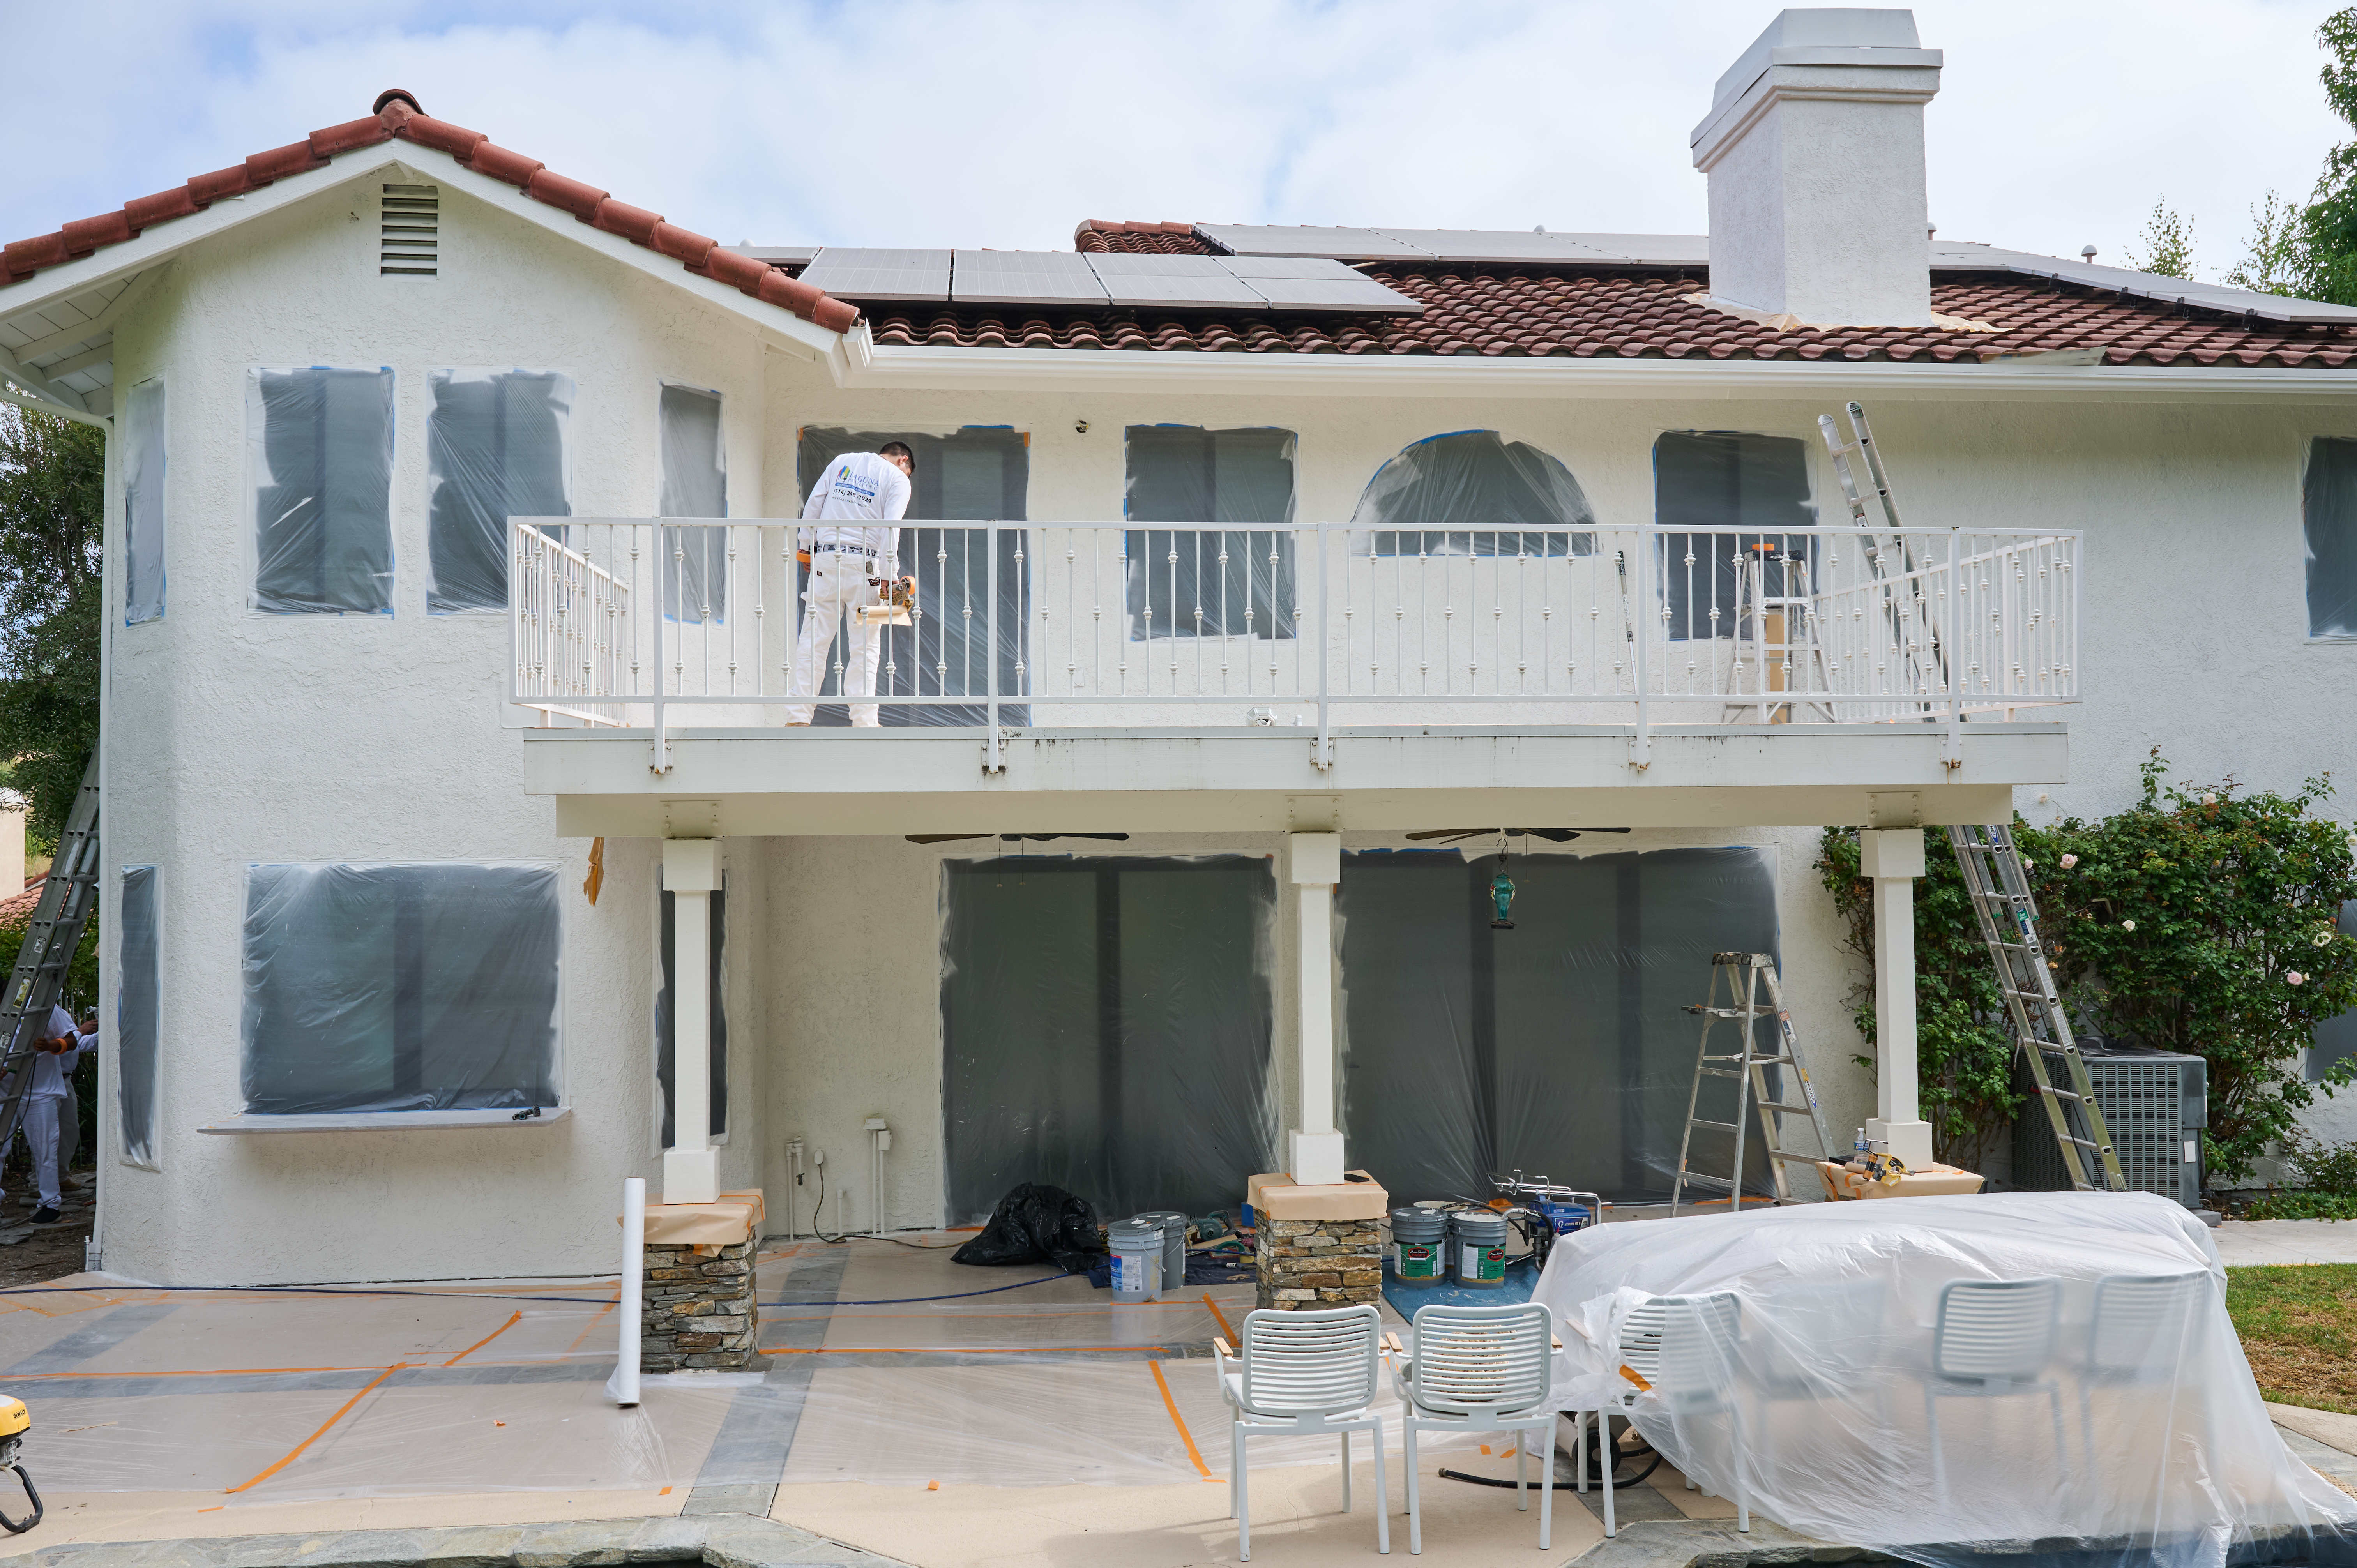
Remove items near the house, such as patio furniture, grills, and trash bins, and place them away from the wall of your home. Tape and cover outlet boxes and fixtures with drop cloths and painter’s tape.
Trim trees and shrubs and cover landscaping with a drop cloth. (You don’t want paint on your blooming geraniums!)
Washing the entire exterior of your home allows the paint to adhere to the surface. Use a pressure washer with a cleaning solution or a hose and scrub brush if you don’t have much peeling and flaking paint.
For homes with mildew, use one part of chlorine bleach to three parts water or a mildewcide. Work in sections and rinse the surface well.
If your home has softwood shingles or siding, handwash it with detergent and water.
The dust in lead-based paint can harm your family, pets, and neighbors. If your home was built before 1978, when the EPA banned lead paint for residences, your paint might contain lead.
You can buy a lead testing kit online for around $25 or take paint chip samples to a testing lab. If your paint tests positive for lead, you’ll need to take these precautions:
Wear an N100 or professional-grade respirator with HEPA cartridges and a microporous protective suit
Use a HEPA vacuum
Lay down plastic drop cloths to gather the scrapings
Dampen the paint with a spray bottle to minimize toxic dust
Remove loose paint with a paint scraper or wire brush
Dispose of hazardous materials in sealed trash bags
If your paint is lead-free, a mask will do. Use a heating gun to soften the paint and save time. To prevent siding damage, scrape in the direction of the wood grain.

Sanding is essential to create a mechanical bond between paint coats. When the paint isn’t lumpy and bumpy, smooth the surface with 80-grit sandpaper.
Speed up the process with a pad or orbit sander. To remove scratches, sand with 100 to 120-grit paper. Use medium-grit sandpaper for weathered wood and fine-grit paper for trim and doors.
When sanding is complete, replace any siding or trim you can’t salvage. Use epoxy to repair rotting wood or replace the wood. Fill gaps around doors, windows, and trim with exterior caulk in a caulk gun. You may want to prime first since primer safeguards wood.
Prime any stains or exposed areas with a stain-blocking primer using a paintbrush. Primer will penetrate and seal the area so the paint bonds to the surface.
If you’re changing the paint color more than a few shades, apply a coat of primer to the home to ensure even coverage. Spray the heads of screws and nails with metal primer to prevent rust from bleeding through the paint.
It’s finally time to make your home shine. Before you paint, cover your mailbox, lighting fixtures, doors, and trim with plastic sheeting using painter’s tape. Pour your preferred color of eggshell latex or flat paint into your sprayer. Working from top to bottom, apply one or two coats as needed to the entire home.
Using a backrolling technique with two painters will cut your time in half. One person sprays the house while another follows with a roller smoothing out the sprayed paint.
Remove the plastic sheeting covering your trim when it’s ready to be painted. Choose an accent trim color in a semi-gloss sheen for a chic look.
There are a few factors to keep in mind when you decide to paint your house and do the prep work yourself. For one, it’s important you understand the power of painting on a clean surface. A pressure washer can work wonders to remove dirt, mold, and mildew from your siding before the painting begins. However, that means you likely have to buy or rent a pressure washer, or hire a pressure washing pro to do it for you. This can add to your DIY cost by a couple of hundred dollars.
Another factor to consider is the importance of repairing any cracks, holes, or similar damage during the preparation process. Repairs will add to your DIY budget as well, especially if you hire a pro to help, but it’s a necessary cost if you want to refresh your siding with a new coat of paint.
DIYers handy with a brush, sprayer, and tools may wish to try their hand at painting the house exterior themselves rather than hiring a pro. The average cost to paint the exterior yourself will total around $750, depending on the paint and supplies you’ll need.
You’ll spend between $20 and $80 for each gallon of paint without a painting contractor discount. Materials (you can find at the top of the post) will cost between $200 to $300.
On the flip side, hiring a contractor for an exterior paint job costs $1,735 to $4,335. Expect to pay $1 more per foot if your home is made of brick and stucco or vinyl.
Hiring a local exterior painting professional is a smart idea for multi-storied homes that require scaffolding and additional safety equipment. Working with a pro also offers peace of mind because they are licensed, bonded, and often guarantee their work.
Great company! Price was competitive, technician showed up on time and completed the job (exterior electric Radon fan replacement) quickly. Would hire them again.
I am highly satisfied with the window replacement service I received; the professionals from Savvy Exteriors were punctual and did an amazing job that exceeded my expectations.
Our homes curb appeal skyrocketed thanks to Custom Paint Jobs LLC s exterior painting.
The Dither painting crew did an awesome job! They were reliable, knowledgeable and professional. We highly recommend Dither Painting!
 DITHER PAINTING
From average costs to expert advice, get all the answers you need to get your job done.
The cost to paint a house's exterior depends on its size, siding type, and height. The finish and the home's exterior condition also play a role.
Discover the cost to paint a commercial building exterior, including average prices, key cost factors, and tips to help you budget your next project.
Painting your home can give it a fresh new look, but how much will it cost? Here’s what you might pay for interior and exterior paint projects.
Are you ready to refinish your siding and revitalize your curb appeal? Before getting started, discuss these exterior painting questions with your pro.
You don’t always need a pro to boost your home’s curb appeal. Use this guide to learn how to paint your home’s exterior in eight simple steps.
The best time to paint a home’s exterior depends on where you live. Read this to learn more about when to paint your house.